Description
The guide below can be used to install the stock Kindle Paperwhite firmware for Kindles that are in Demo mode. Kindles in demo mode were used in retail stores and as newer models come out many are liquidating the old demo units. Unfortunately the demo firmware cannot be turned off by conventional means.
Introduction
I found my Kindle for about $20 on your favorite electronic auction site and was able to after some trial and error eventually flash the correct stock Kindle Paperwhite firmware.
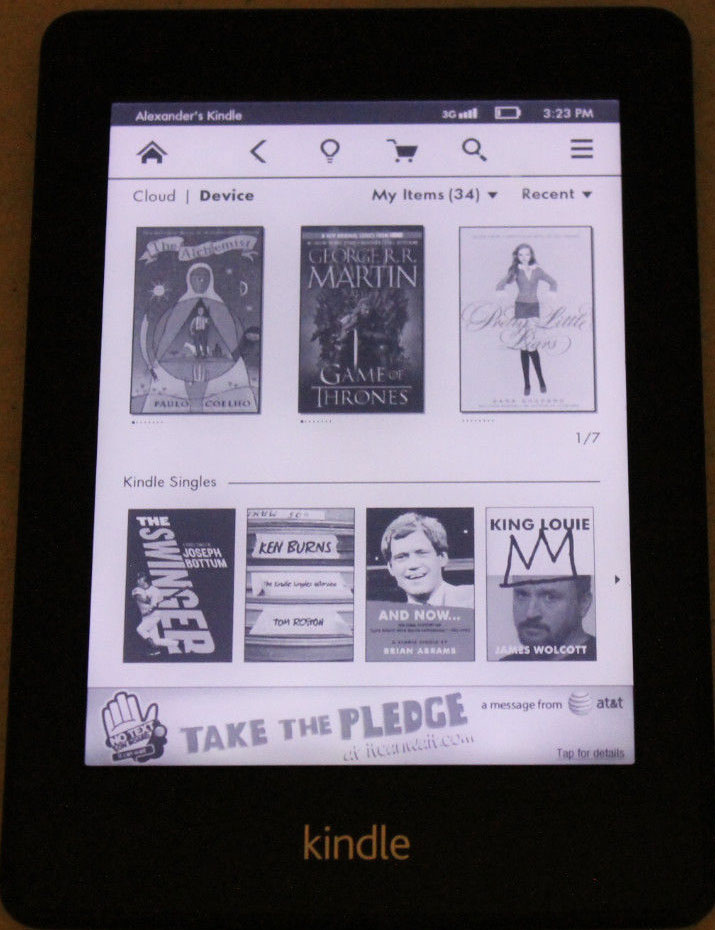
Finished Project
Step 1
Locate the serial port
First the Kindle will have to be disassembled and 3 wires soldered to the serial connection located on the back of the Kindle near the connection for the touchscreen.
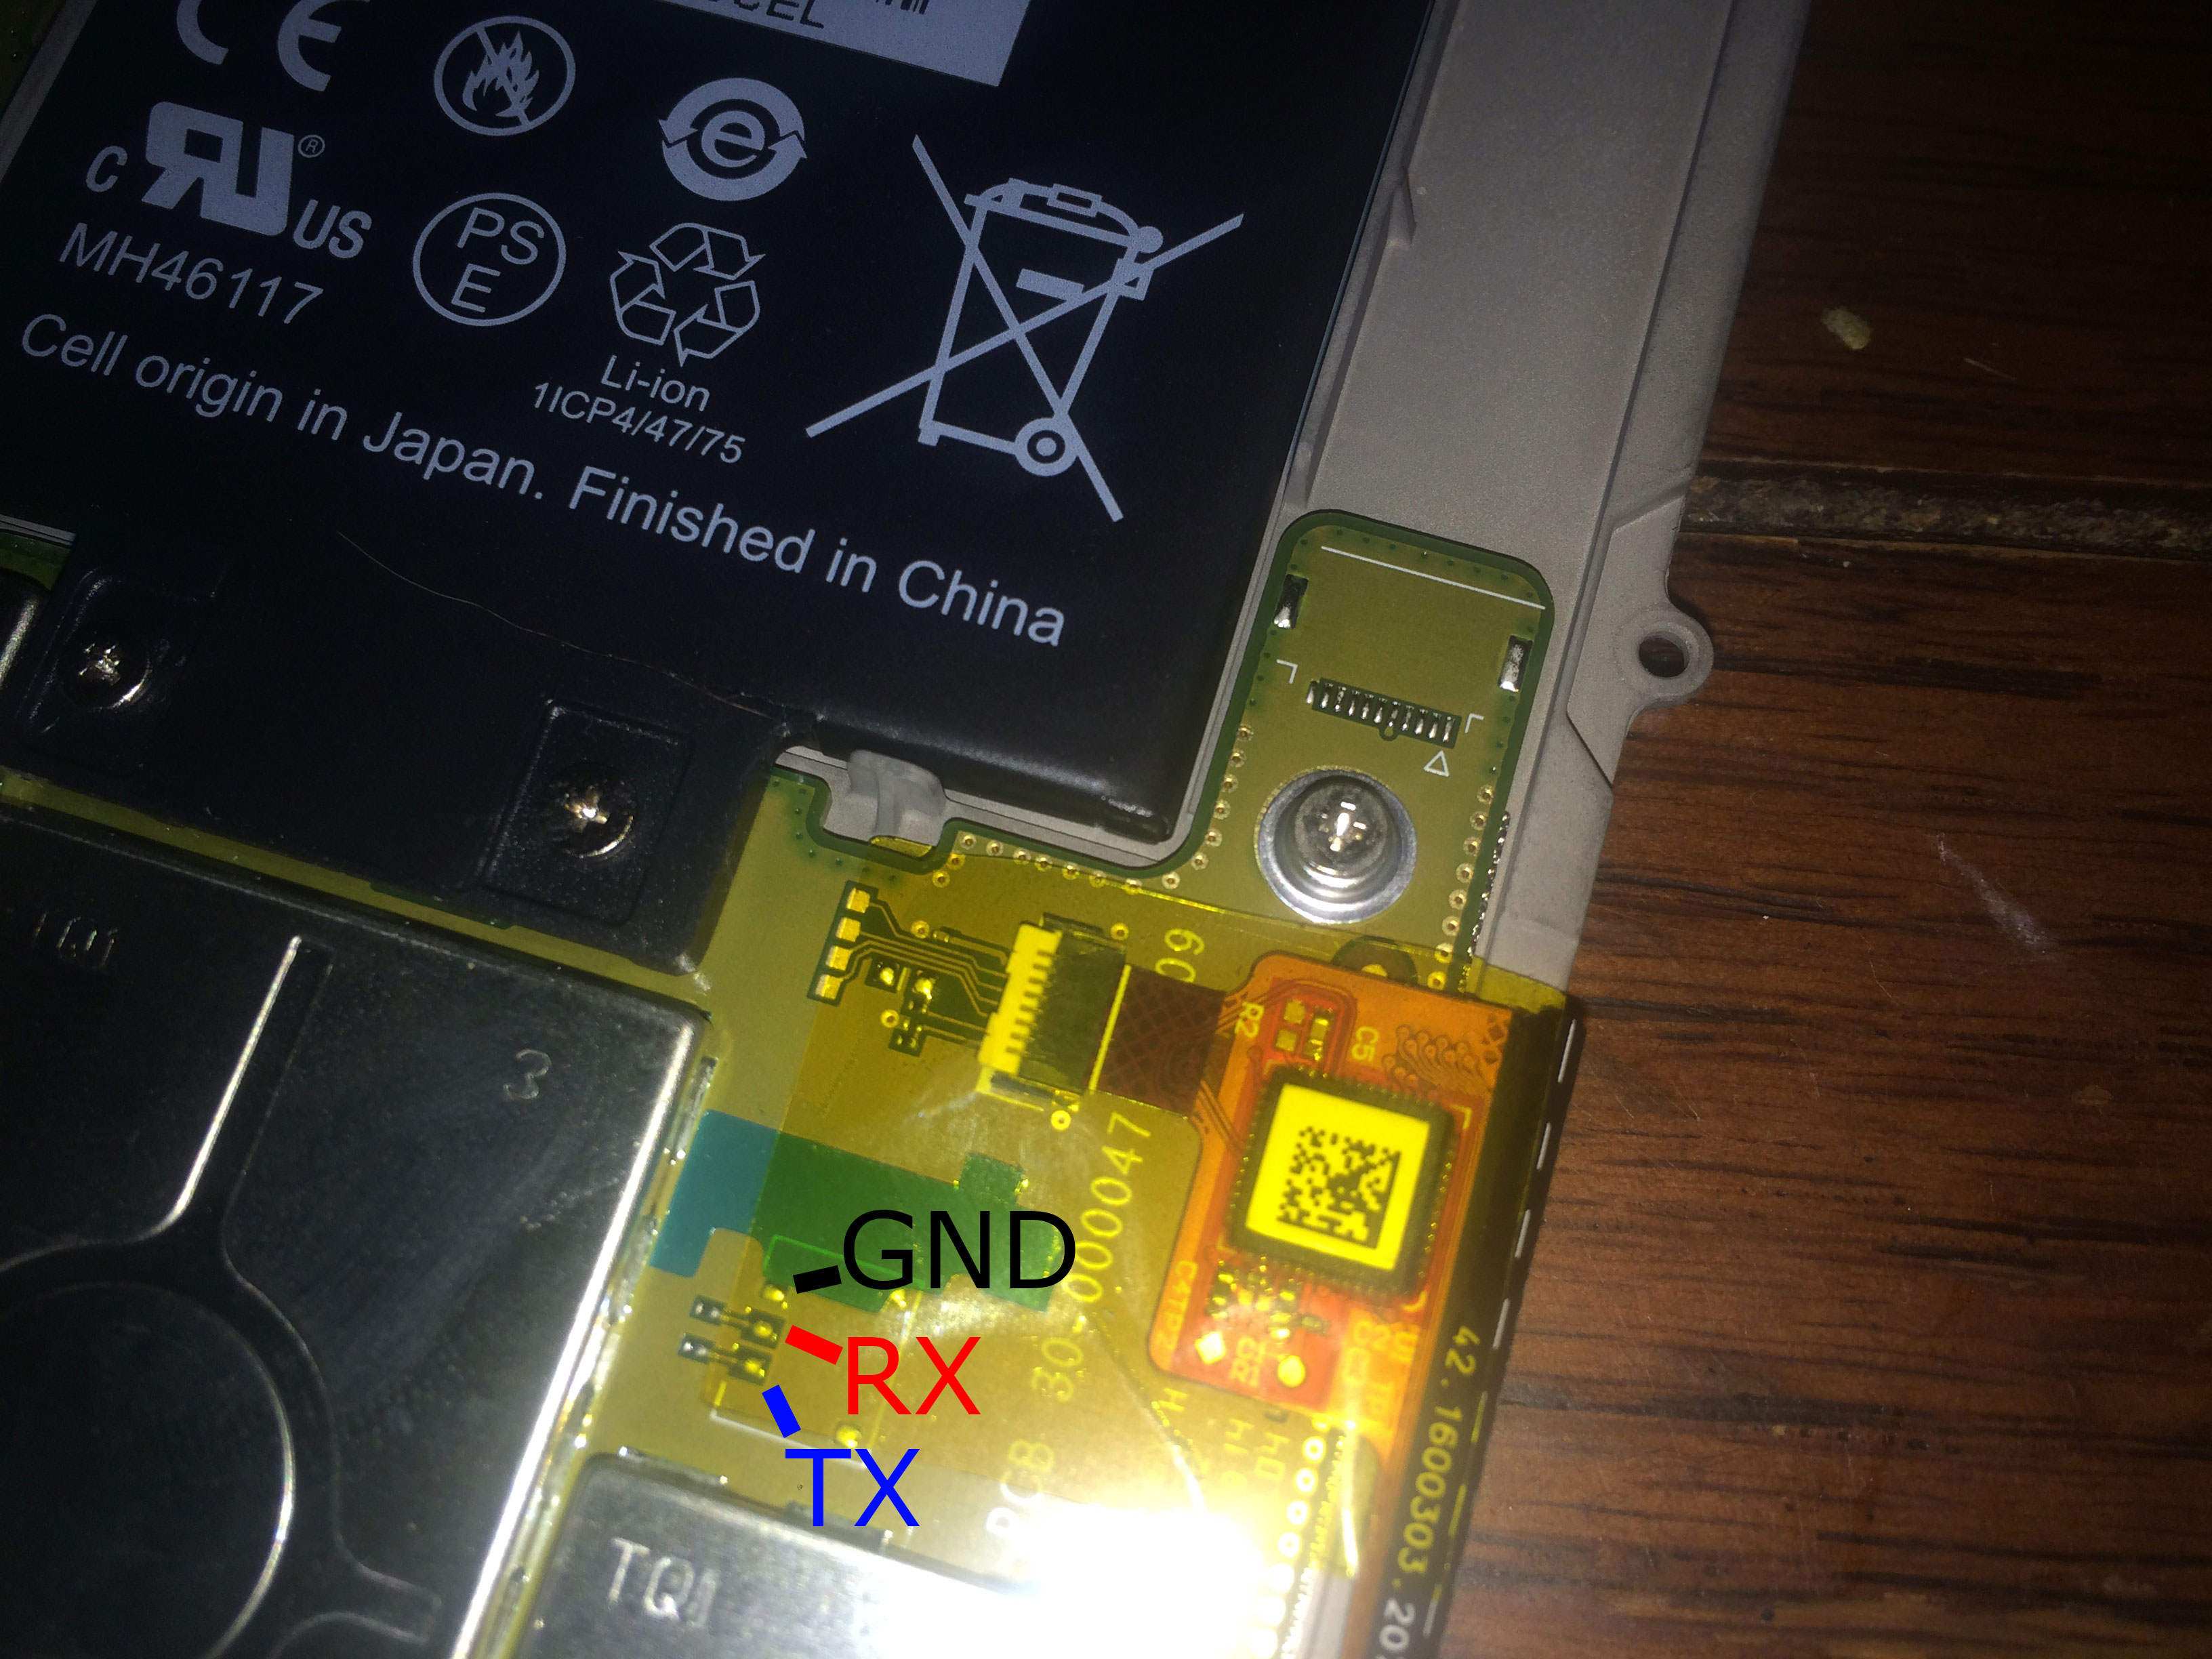

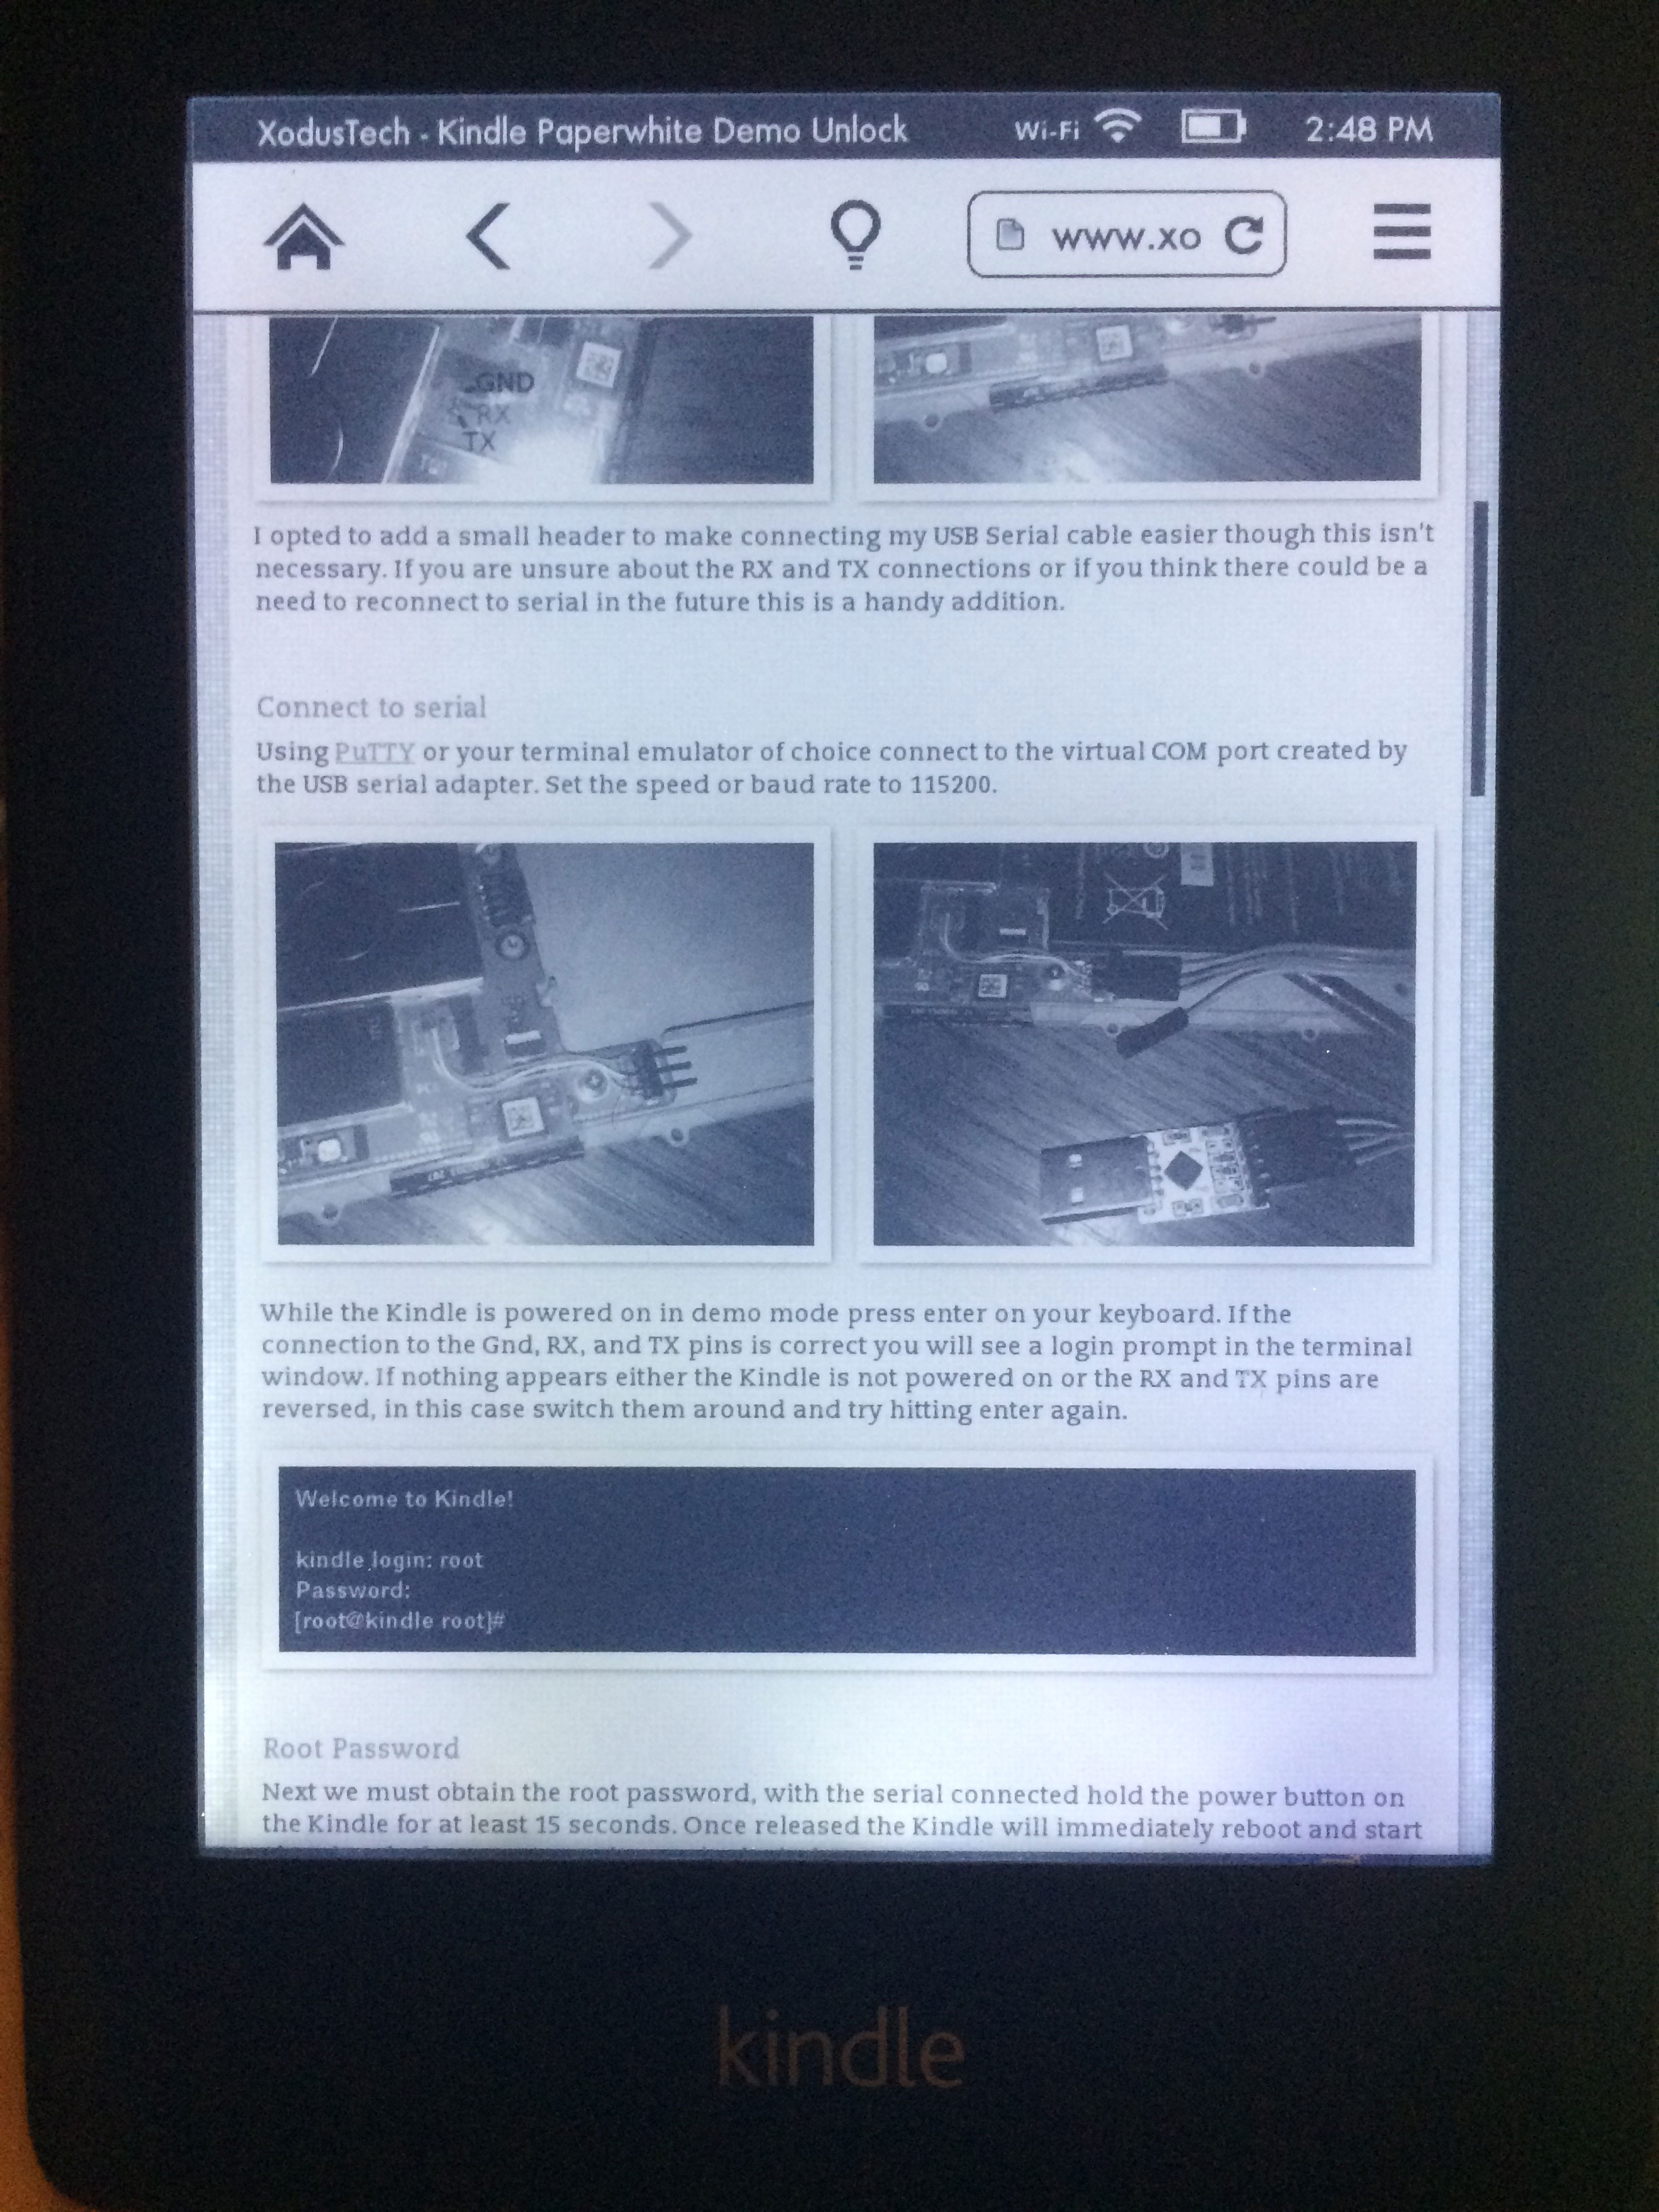
I opted to add a small header to make connecting my USB Serial cable easier though this isn’t necessary. If you are unsure about the RX and TX connections or if you think there could be a need to reconnect to serial in the future this is a handy addition.
Connect to serial
Using PuTTY or your terminal emulator of choice connect to the virtual COM port created by the USB serial adapter. Set the speed or baud rate to 115200.


While the Kindle is powered on in demo mode press enter on your keyboard. If the connection to the Gnd, RX, and TX pins is correct you will see a login prompt in the terminal window. If nothing appears either the Kindle is not powered on or the RX and TX pins are reversed, in this case switch them around and try hitting enter again.
Welcome to Kindle!

kindle login: root
Password:
[root@kindle root]#
Root Password
Next we must obtain the root password, with the serial connected hold the power button on the Kindle for at least 15 seconds. Once released the Kindle will immediately reboot and start showing the boot sequence in terminal window.
Board: Celeste (256 MB)
Boot Reason: [POR]
Boot Device: MMC
Board Id: *REMOVED*
S/N: *REMOVED*
DRAM: 256 MB
Using default environment
Take note of the Serial Number (S/N) shown during boot. You may need to increase the amount of scrollback or history in PuTTY as this is near the top. Enter the Serial Number into the tool below to compute a list of the possible root passwords for your Kindle.
Serial Number:
Step 2
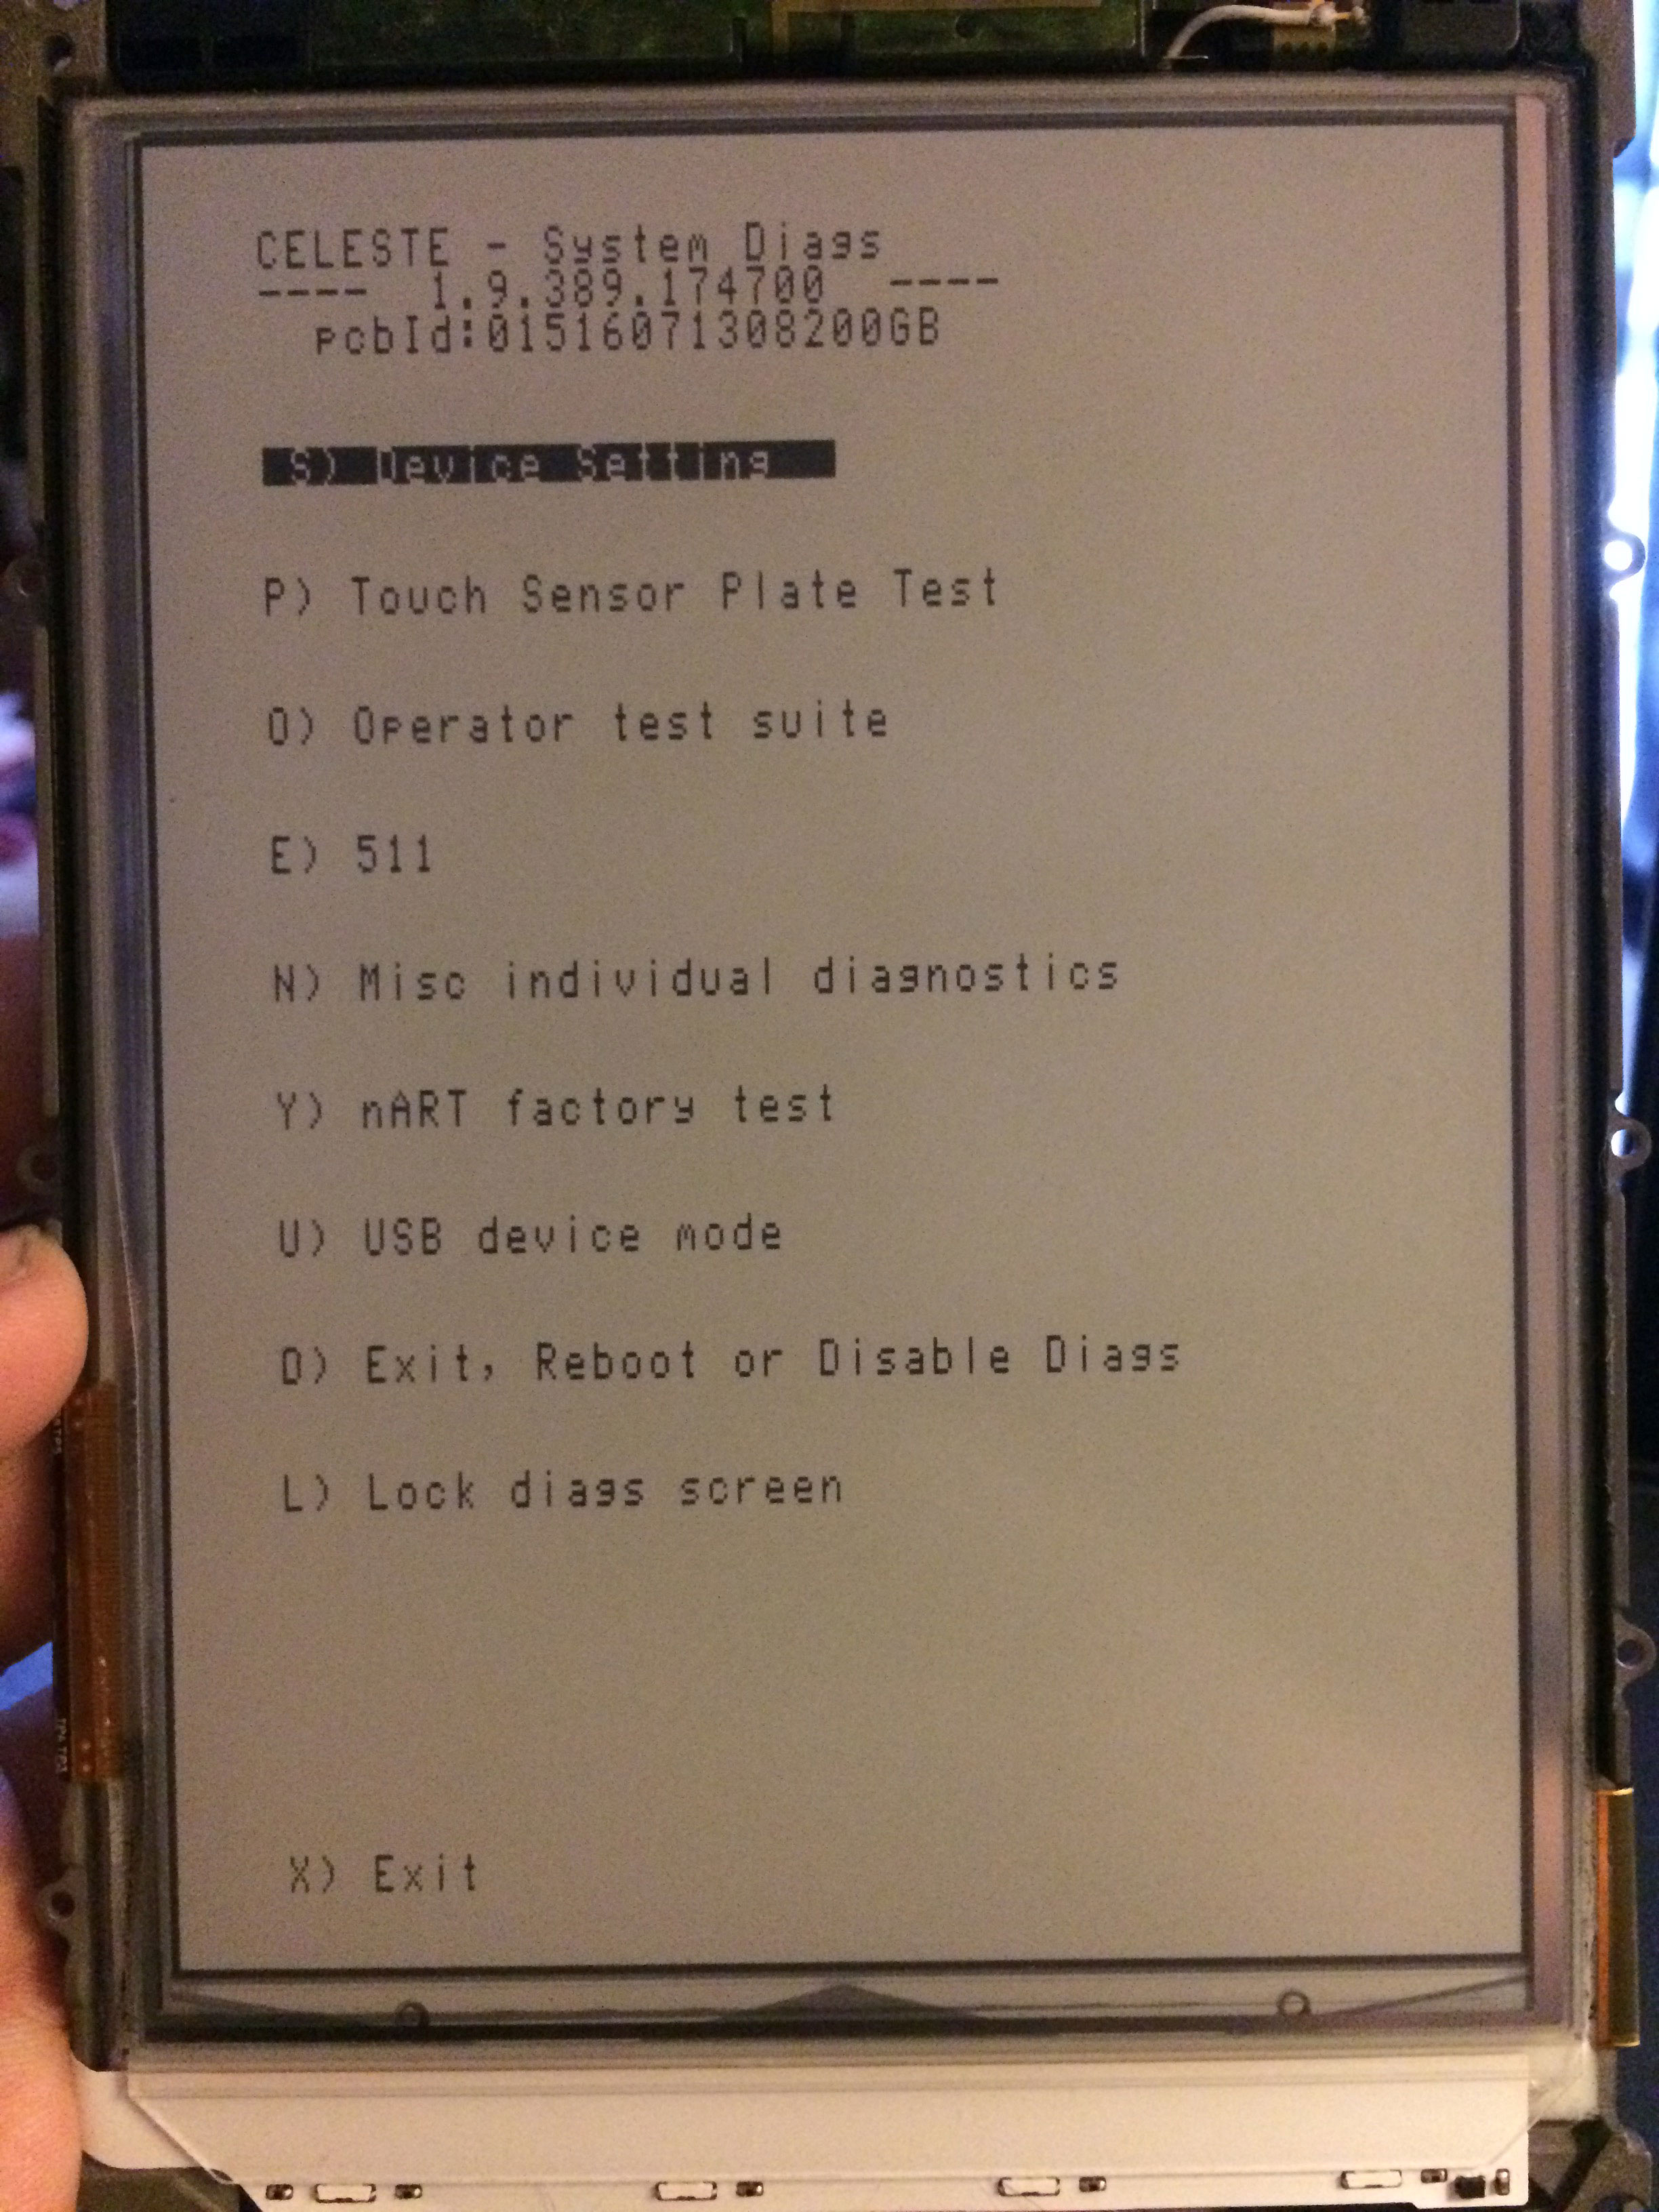
Boot into Diagnostics Mode
The Kindle won’t allow root logins over serial when booted into the system partition so next we must boot into the Diagnostics Menu. With the serial connected hold the power button for at least 15 seconds, release and then start hitting enter in the terminal window until you are able to stop autoboot.
Quick Memory Test 0x70000000, 0xfffe000
POST done in 17 ms
Hit any key to stop autoboot: 0
uboot >
First issue the printenv command to get a list of the current nvram values used to control the boot modes of the Kindle. Make sure to use the command listed for bootcmd_diags, this should be the same but double check since attempting to boot from random parts of memory could be potentially disastrous.
uboot > printenv
...
bootcmd=bootm 0x41000
...
bootcmd_diags=bootm 0xE41000
bootcmd_factory=bist halt
bootcmd_fastboot=bist fastboot
...
Environment size: 243/1020 bytes
Enter bootm 0xE41000 into the uboot terminal and wait about a minute for the Diagnostics Menu to appear on the Kindle screen.
uboot > bootm 0xE41000
## Booting kernel from Legacy Image at 70800000 ...
   Image Name: Linux-2.6.31-rt11-lab126
   Image Type: ARM Linux Kernel Image (uncompressed)
   Data Size: 4608576 Bytes = 4.4 MB
   Load Address: 70008000
   Entry Point: 70008000
   Verifying Checksum ... OK
   Loading Kernel Image ... OK
OK
Starting kernel ...
Step 3
Diagnostics Mode
Now the we are in Diagnostics Mode it is possible to launch the USB Device Mode. Select the option for USB Device Mode and connect the Kindle to your computer using a micro USB cable. Once mounted open the Kindle drive in your file explorer and unzip the file below into the root of the Kindle. You should end up with a file named pw_5.2.0-mmcblk0p1.img in your Kindle’s drive.
Download stock kindle paperwhite system image Here.

Once the above file has been copied, safely dismount the Kindle from your computer and select Exit on the Kindle screen to return back to the main menu.
Boot to Login Prompt
The Kindle still won’t let us login to root however in the Diagnostics Menu we can. First select the option for Exit, Reboot or Disable Diags on the Kindle Screen and next Exit to login prompt. With the serial connected watch the output and wait for the login prompt to appear. Login using one of the root passwords obtained earlier, mine happened to be the second in the list.
Welcome to Kindle!

kindle login: root
Password:
[root@kindle root]#
Confirm the file copied over USB can be found on the file system, using the cd and ls commands below verify you can see the pw_5.2.0-mmcblk0p1.img file. If it is not listed retry the USB Device Mode and ensure the file was copied correctly there.
[root@kindle root]# cd /mnt/us
[root@kindle us]# ls
System Volume Information  documents
cc_factory                 pw_5.2.0-mmcblk0p1.img
diagnostic_logs            system
Step 4
Flash the stock system image
Lastly we will use the dd command to directly copy the data from the stock image file over to the system partition in the Kindle’s NAND storage. This process will take about 15 minutes and should report similar output to below.
[root@kindle us]# dd if=/mnt/us/pw_5.2.0-mmcblk0p1.img of=/dev/mmcblk0p1 bs=4
91750400+0 records in
91750400+0 records out
367001600 bytes (350.0MB) copied, 833.953235 seconds, 429.8KB/s
Now either enter reboot into the terminal or hold the power button until the Kindle resets. It should boot normally into the stock Kindle OS and allow you to register. Hooray! Your demo Kindle is now a real Kindle.
If your Kindle fails to boot reattach the Serial cable and watch the output, there is tons of great information and in the event of a full brick it is possible to recover the Kindle using one of the guides listed in the References section below.