Description
Introduction
I recently acquired an Apple Cinema Display 20” model A1038. Some may know but many may not that these displays used a single permanently attached cable to provide DVI/USB/Power to the monitor. Newer Apple Cinema Displays use a similar cable design that now breaks out into power,usb,dvi.
What I did was chop off the ADC (Apple Display Connector) cable and dremel a hole for a DVI socket on the back of the monitor. The pinouts for the panel were readily available and using that and a basic understanding of DVI I was able to solder up a compatible DVI socket. This allows me to use any DVI cable on hand instead of a mutant pigtail that the Apple ADC to DVI converter would mean. The next step was to provide power to the display. Apple Cinema Displays use 24-28V DC at 4 to 15 amps. This model requires 24-28v at 5.5A. A simple eBay purchase of a 24v power supply was all I needed to have a dedicated solution to powering the monitor.
Extra Resources
I get a lot of requests for more information regarding the pinout on this project, unfortunately this is one of those projects documented in the final stages of construction. This is mainly due to the high-risk nature of building a project that may not actually work out, this happens more than I’d care to admit. I have however in the time since the release of this project come across two sites with great information and pinout tables of the proper connections to make to use this panel with DVI.
Reference

For reference here is an ADC cable (the one I removed was exactly like this) It provides power, usb, and DVI signals.
Project
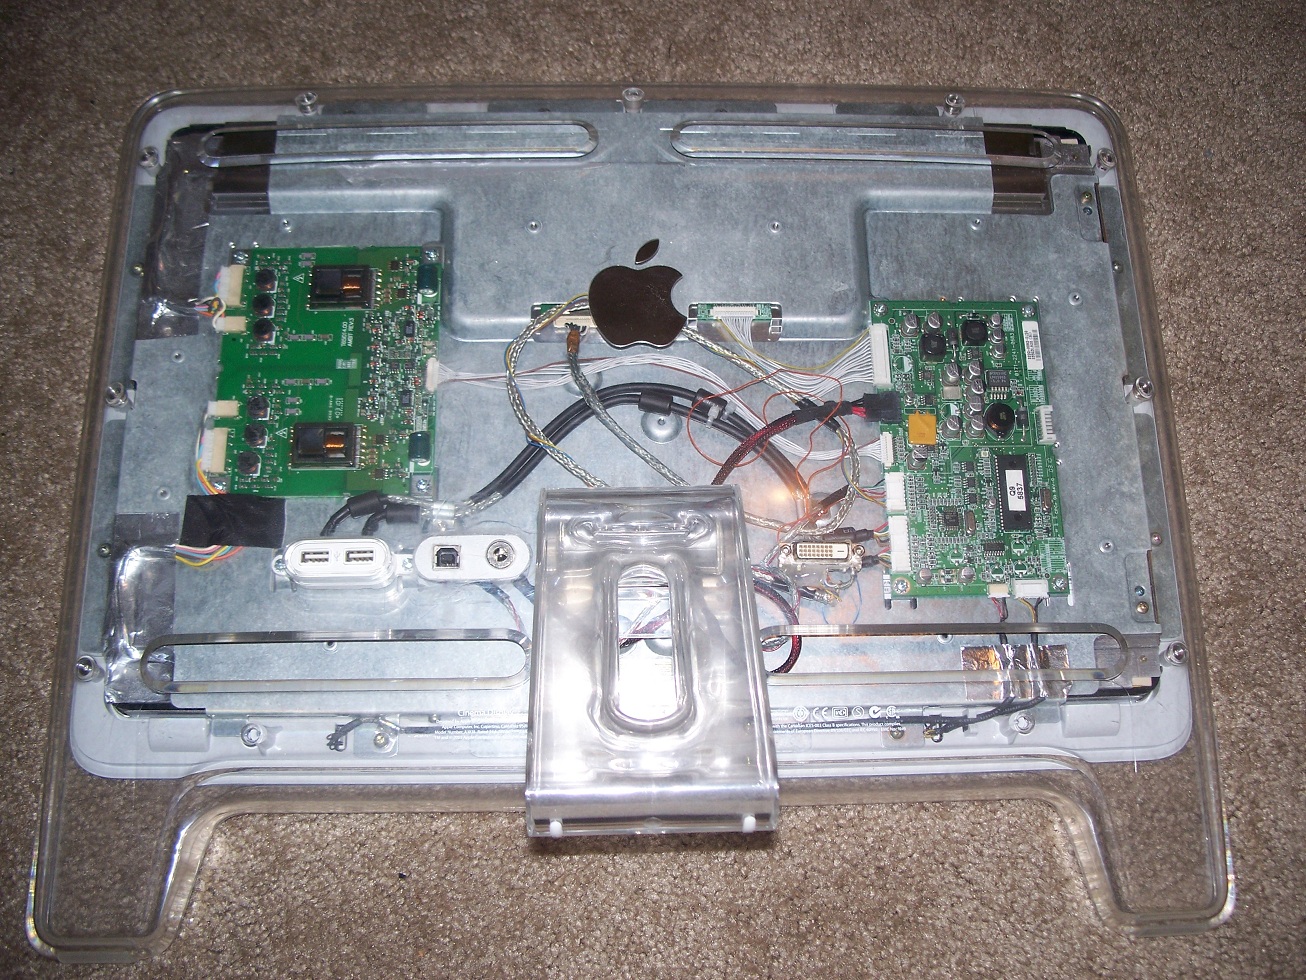

Back of the monitor. No permanent cables anymore! Two usb 1.1 ports, and the added USB input and Power input sockets.
I cut a hole in the back for a DC socket, as well as an input socket for the monitors built in USB hub. I cut a small oval to mimic the look of the embedded usb ports. I need to clean the residue off the plastic I just need the right cleaning solution. The monitor works great and the color is stunning. Both Windows 7 and OSX recognize the panel right away. In the test shots I am using a Mac-Mini to drive the panel using a mini-displayport to DVI converter. Then a DVI cable running to the panel itself.
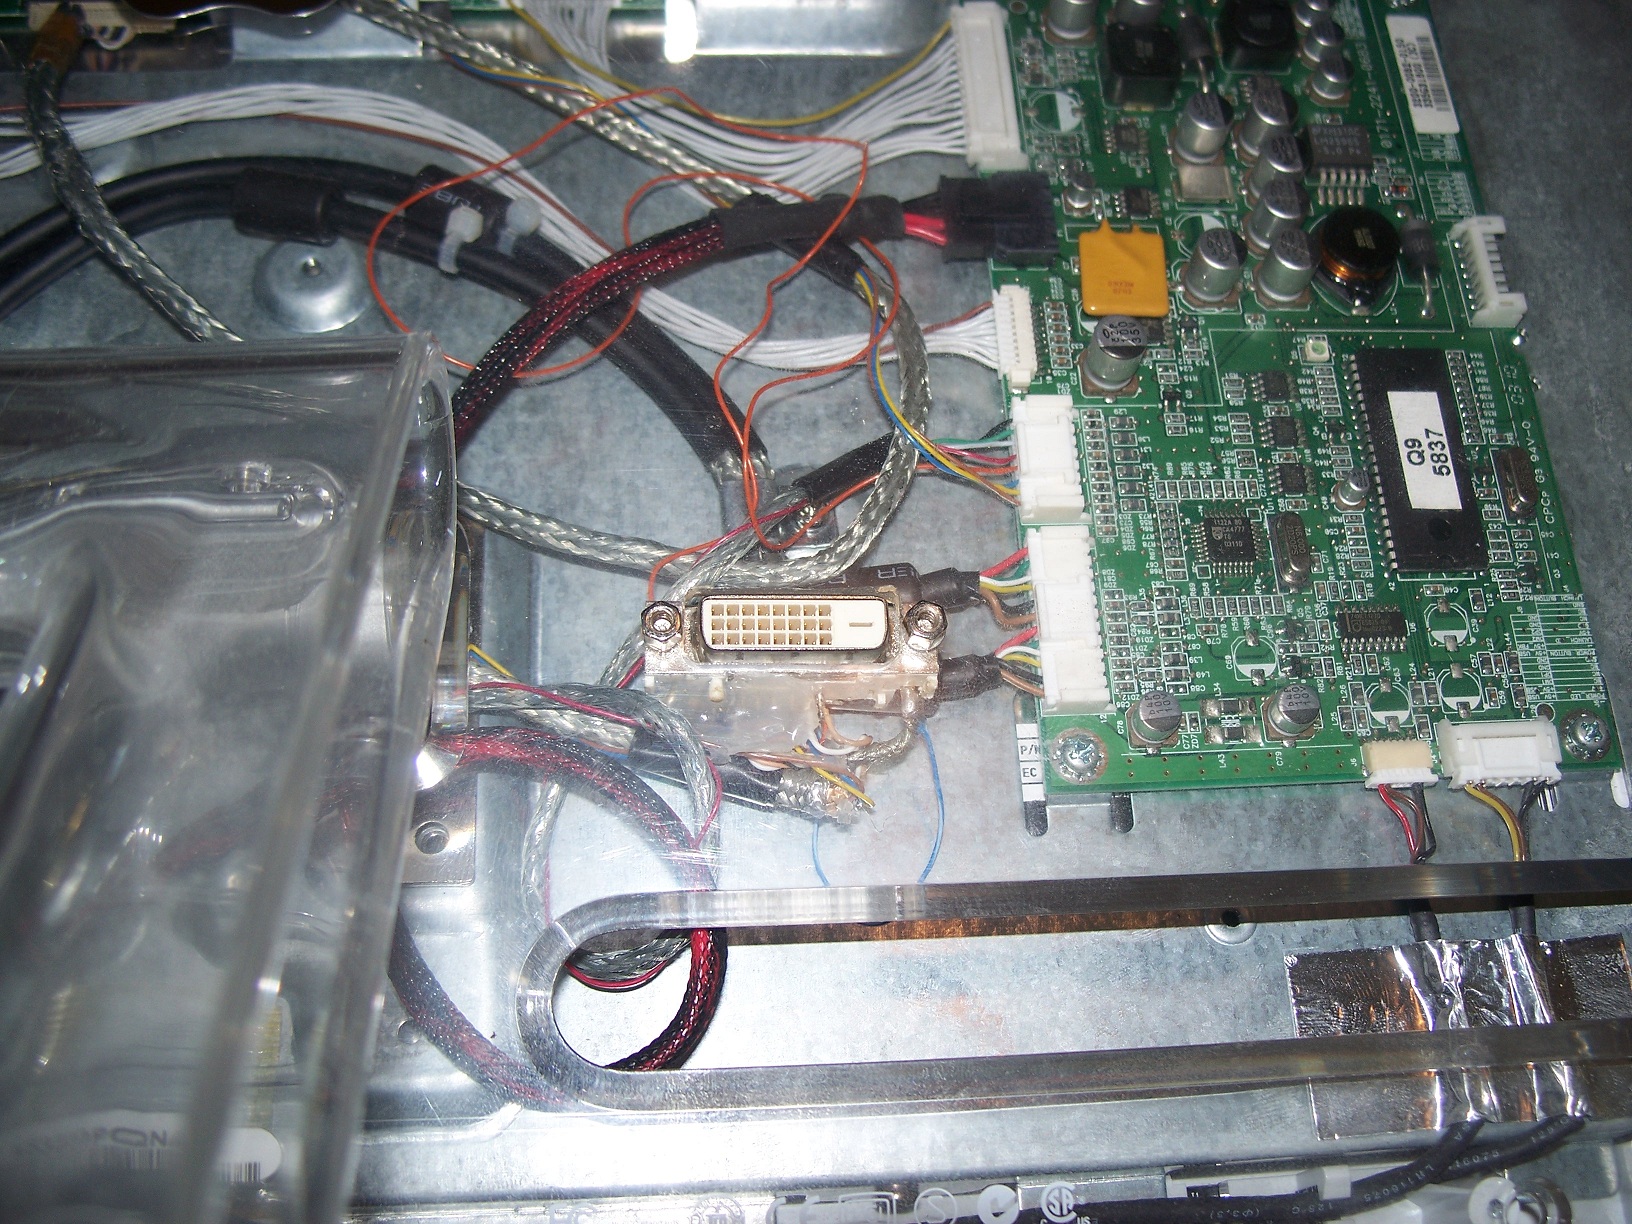
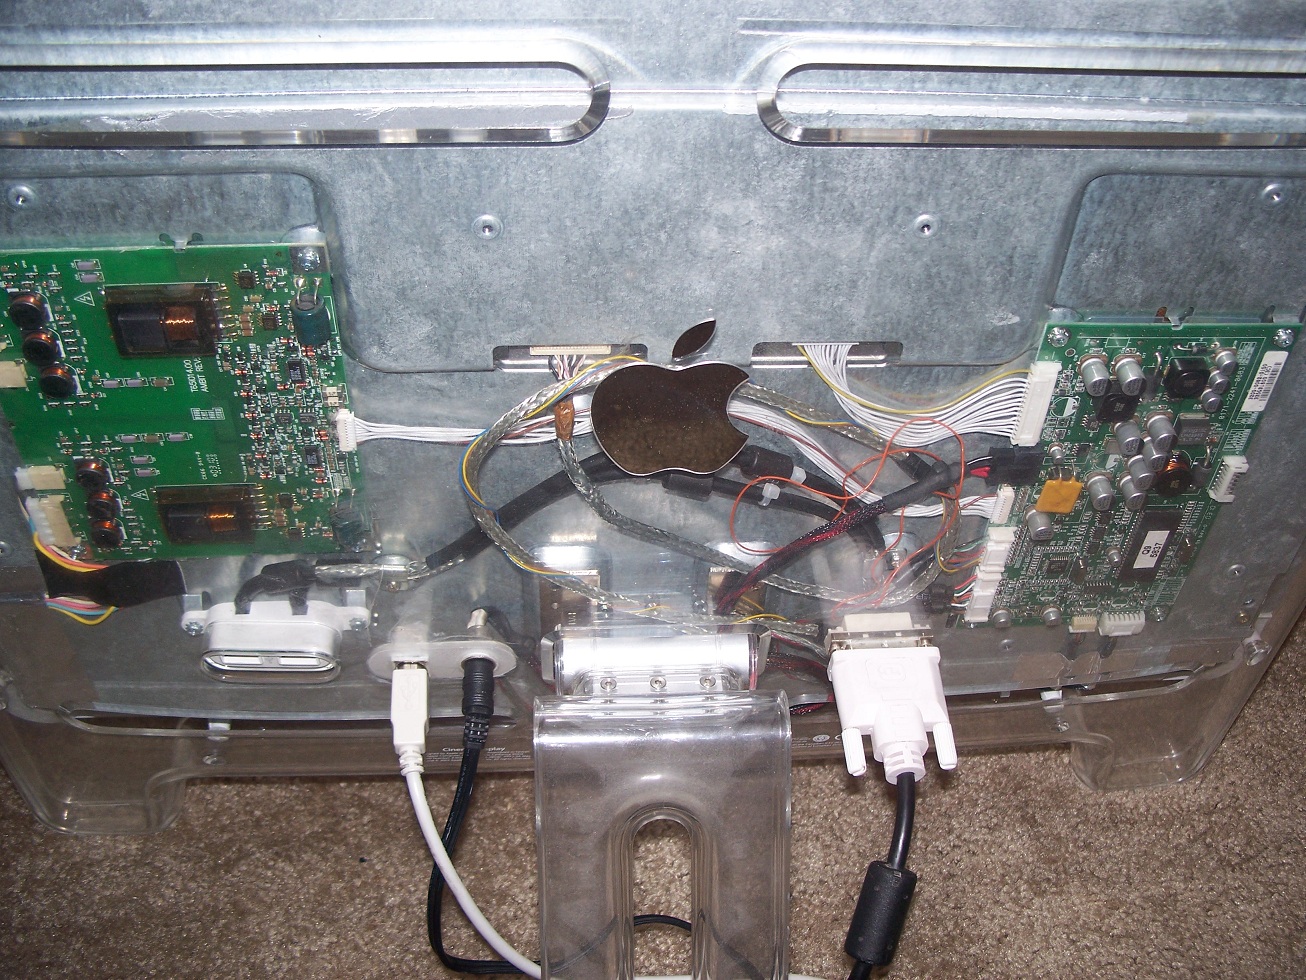
Close up of the DVI port. Now that I have the wiring worked out I am going to bind up the loose wires and hot glue over possible solder break points. USB, Power, and DVI cables connected to the monitor.
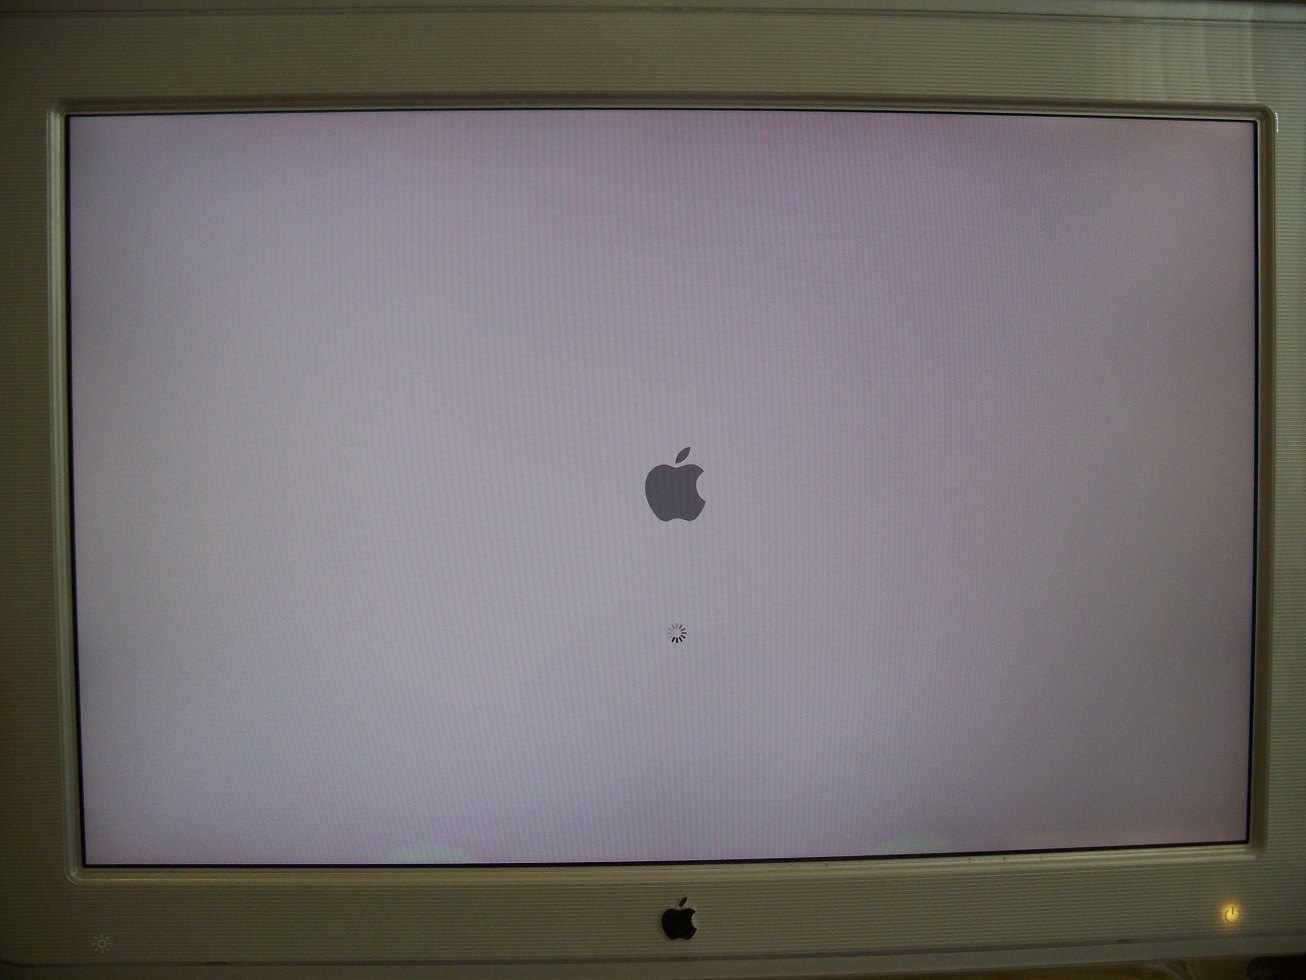

OSX booting up! Also one of my favorite websites HackADay.