Description
Introduction
The Asus Zenbook UX31E is a fantastic machine with one serious fatal flaw, the flimsy power jack. Not only is the barrel very small, think a size smaller than a portable cd player or the original gameboy would have. Unlike those devices if you don’t plug in your laptop after the battery discharges you just simply won’t have a working computer. Typically I will leave the power plugged in even at home or on the couch so I’m not putting unnecessary cycles on a battery that will be difficult to replace.
When moving the laptop power constantly switches between the battery and A/C power and has already been replaced once under warranty. Now that the warranty is up on the computer a bad power jack on this laptop means either a motherboard swap or replacing the jack itself which is proprietary to this machine.
The Solution
One company figured out how to build the perfect laptop power connector years ago.. Apple. They know the design of Magsafe is one of the allures of Macbook ownership and Apple has litigiously defended this design forcing companies like Asus to use technology from the 1980’s. So if you can’t buy a PC laptop with Magsafe why not add it yourself?
The Completed Project
This project remains and will likely remain incomplete since I have not yet figured out how to get an Apple power adapter to output power to anything but an Apple Macbook with working Power Management Controller. See the Full Disclosure section below for more information.
Even having to use 3rd party or homebuilt charger this project came out great and is a vast improvement over the fiddly barrel jack on the other side.
Modifying the Magsafe Connector
I jumped right into this particular mod so I don’t have any good images of the Magsafe connector before I started. The first problem I ran into was the fact that even though the Magsafe connector is small it is still to tall to fit in the profile of my Zenbook.
With two Magsafe connectors in my parts drawer one from a white macbook and another from a newer generation unibody macbook. By combining the small magnets from both connectors I was able to fashion a smaller Magsafe connector that will fit inside the laptop.
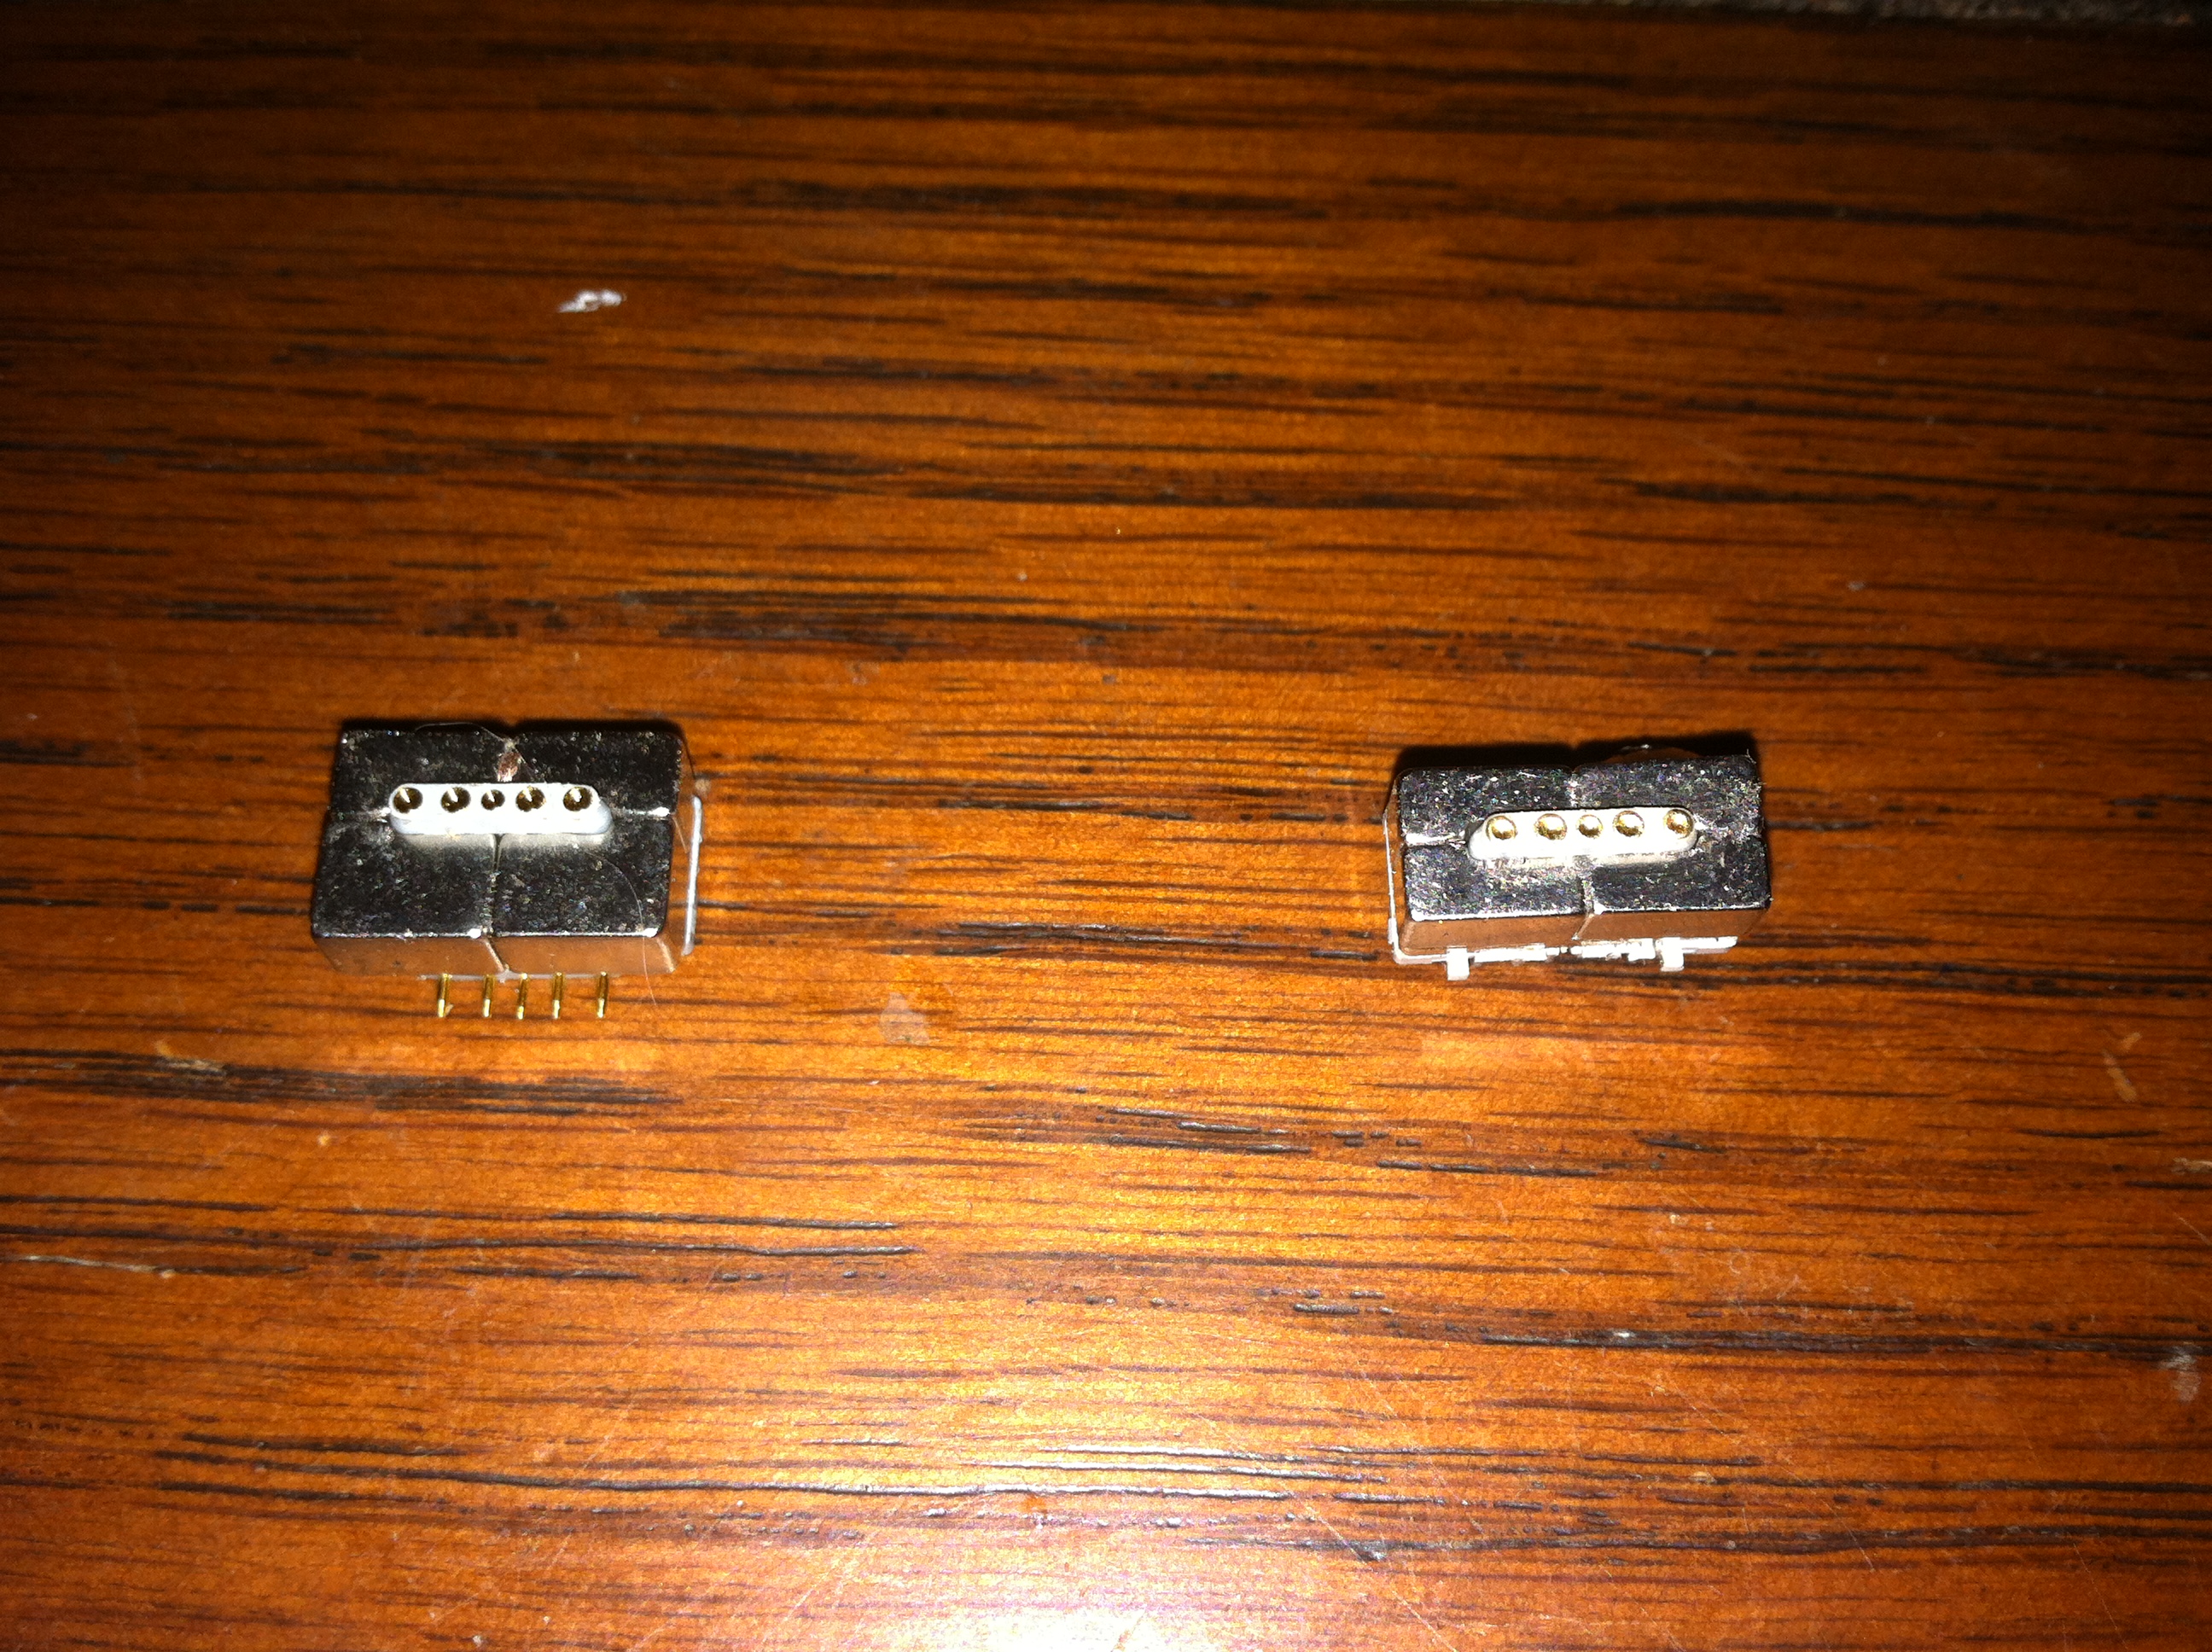
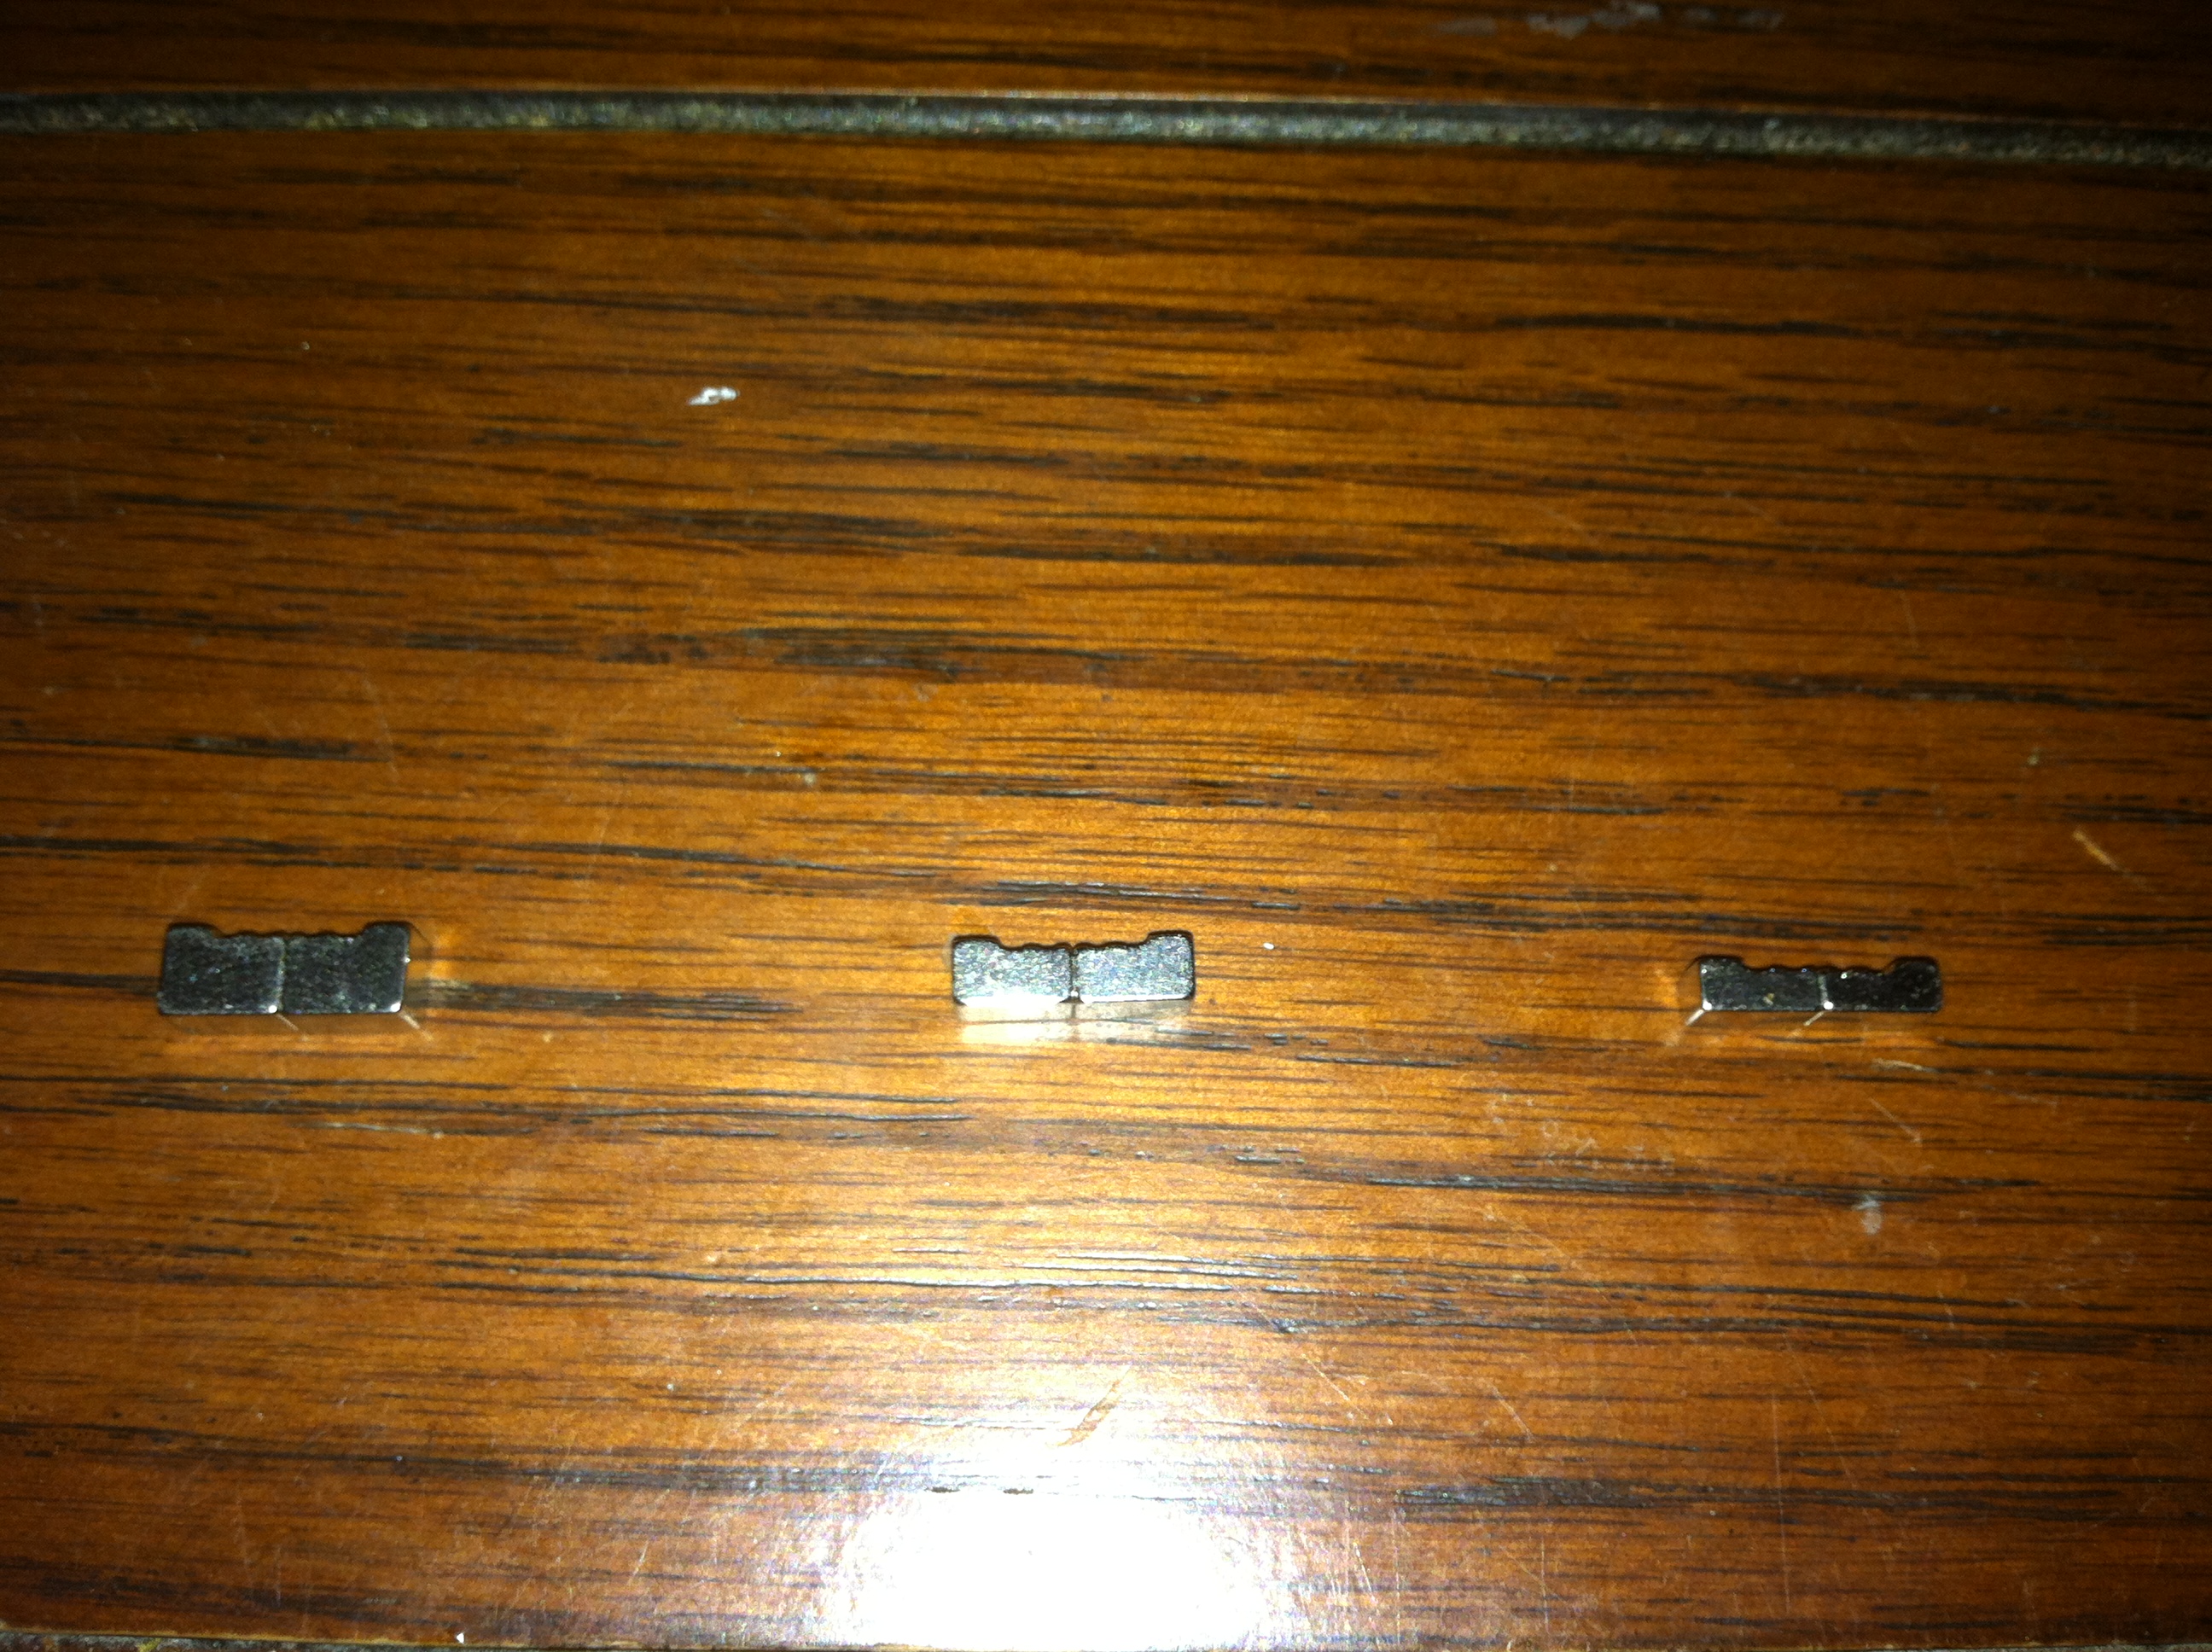
Here you can see the 3 sizes of magnets used in the Magsafe connectors, the older generation had two large magnets and two smaller ones, the first and third pictured in the second picture. The second connector was made up of the medium and smaller sized magnets, the second and third sets pictured in the second picture.
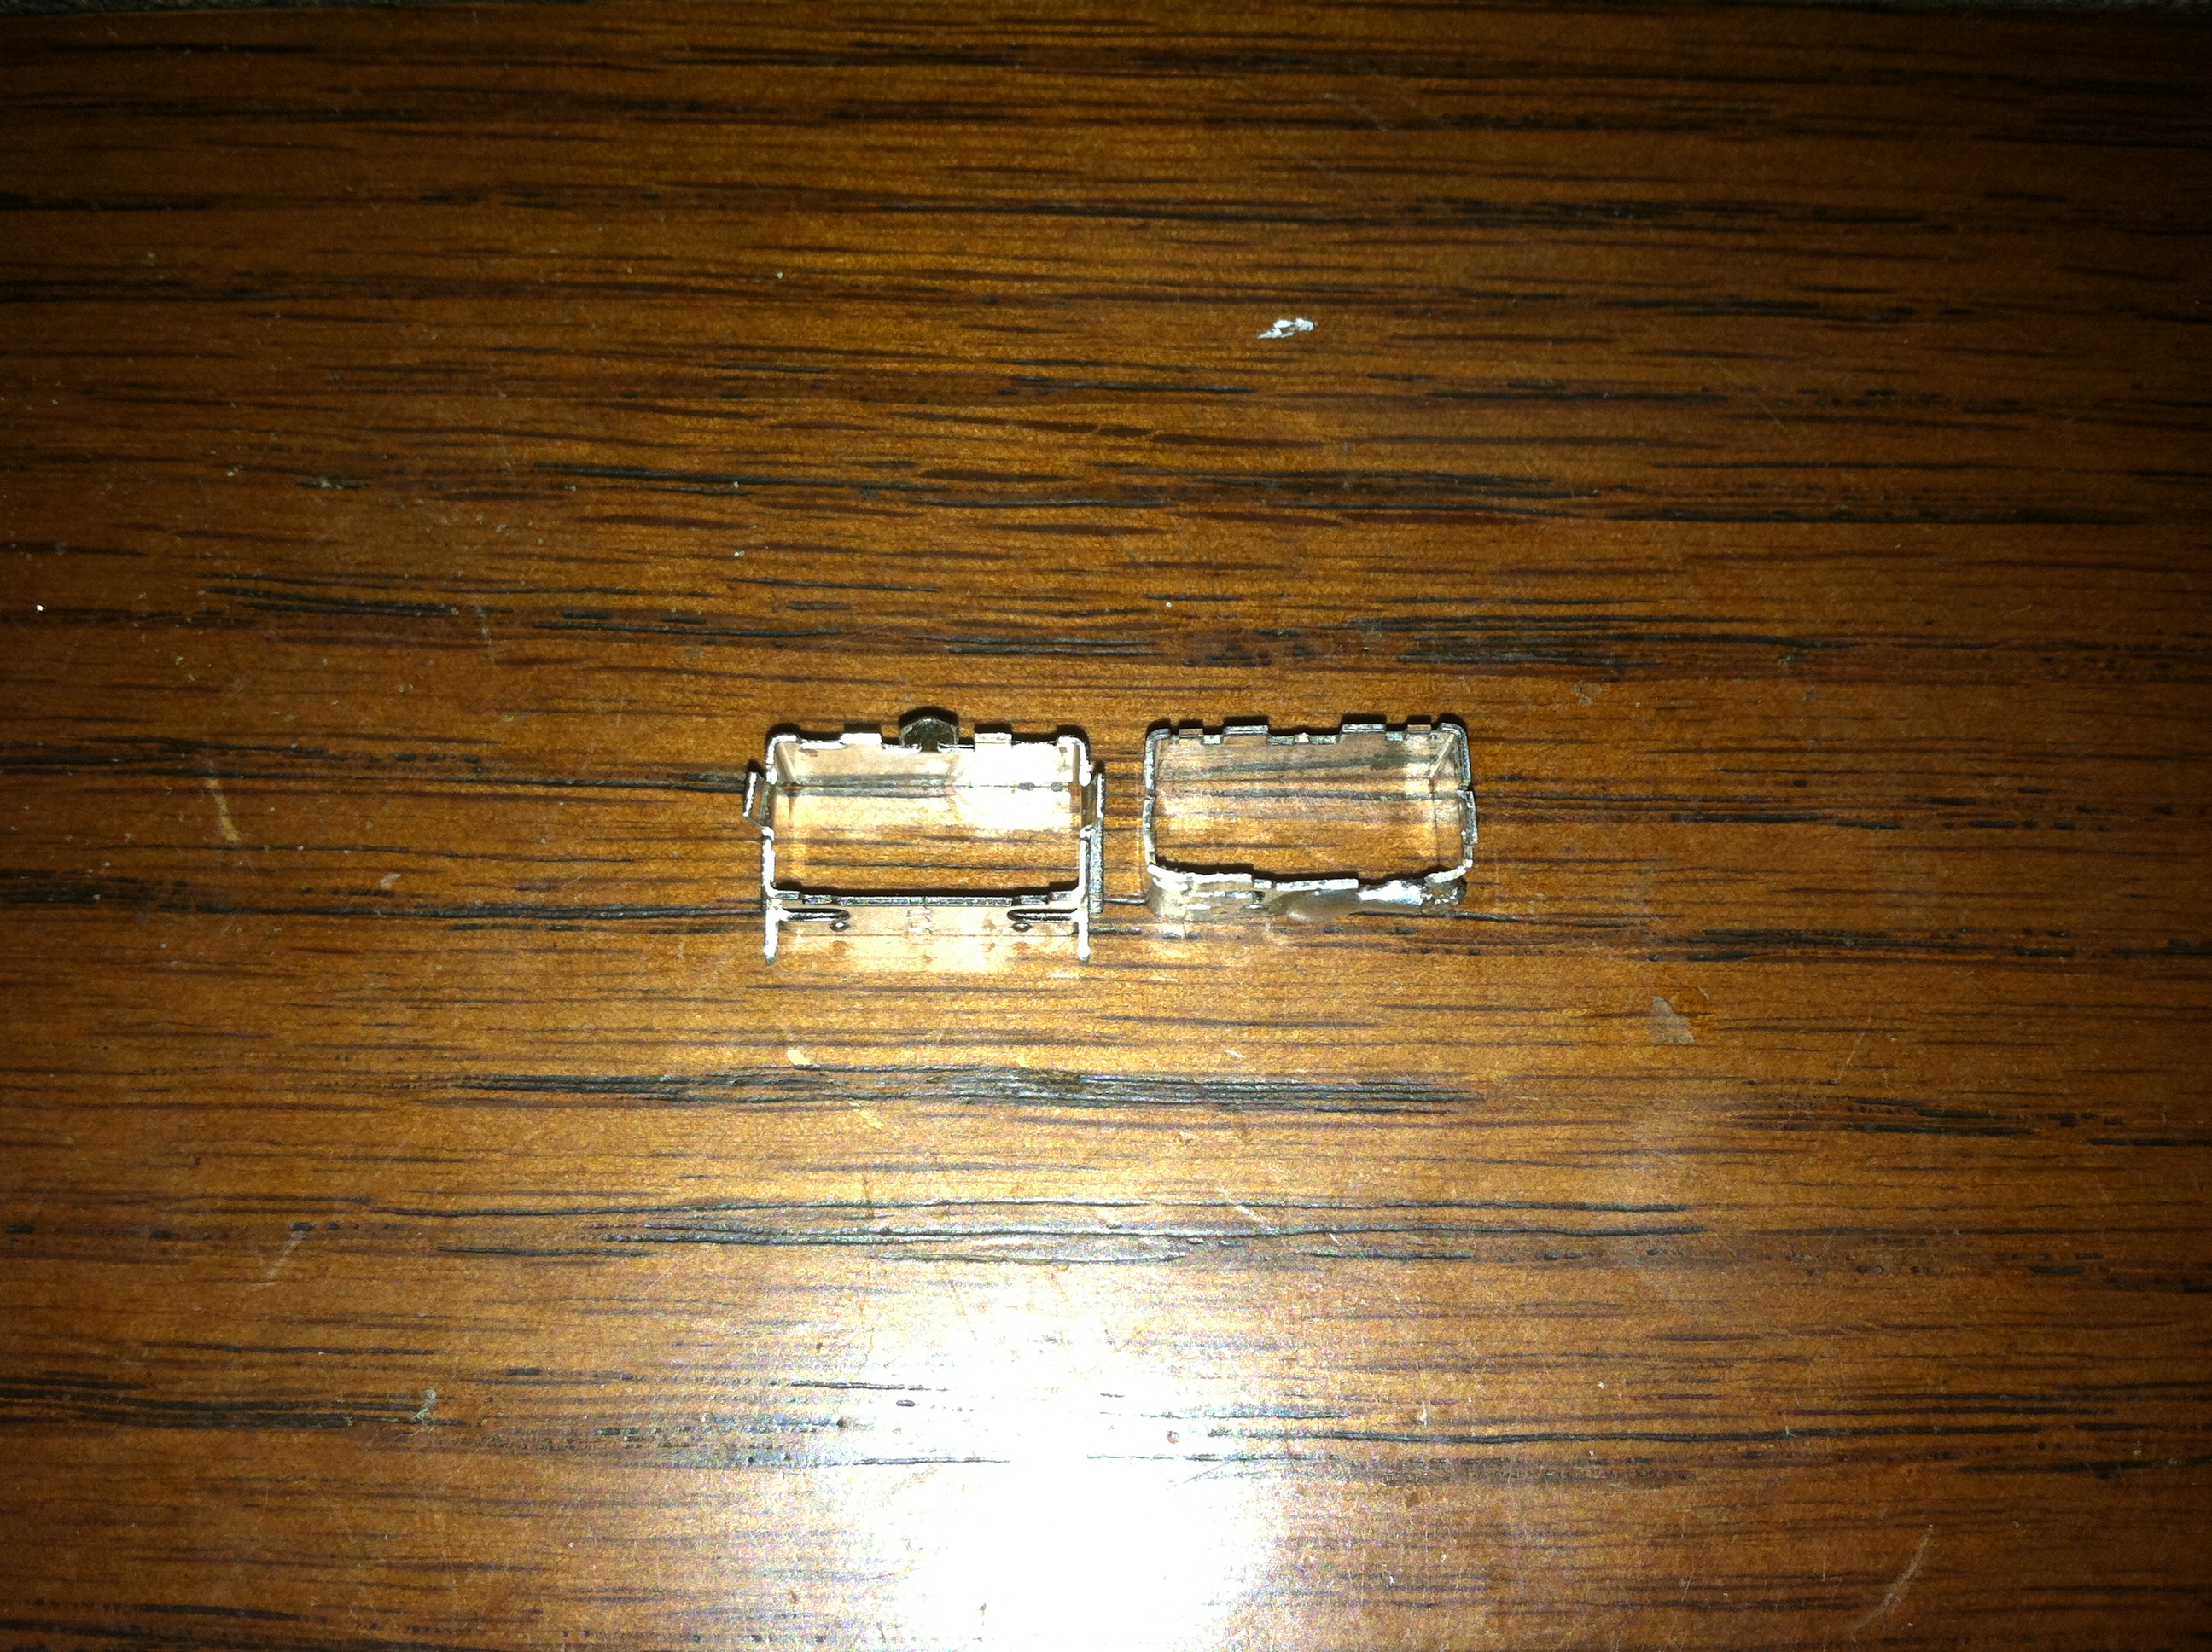
The housing required modification as without this the Magsafe assembly will fall apart. The magnets have grooves on the inside that mate with inverse grooves on the plastic bits. The magnets hold the plastic and the plastic holds the magnets in place, very clever construction Apple 😉 … Now if they woulddd just license the damn connector to other manufacturers.
Using the frame from the larger Magsafe I re-bent and then soldered (used as a weld) the flanges so that it was secure. It might be hard to tell from the above image with the smaller original Magsafe on the left and then now even smaller modified Magsafe housing on the right.
Mounting Location
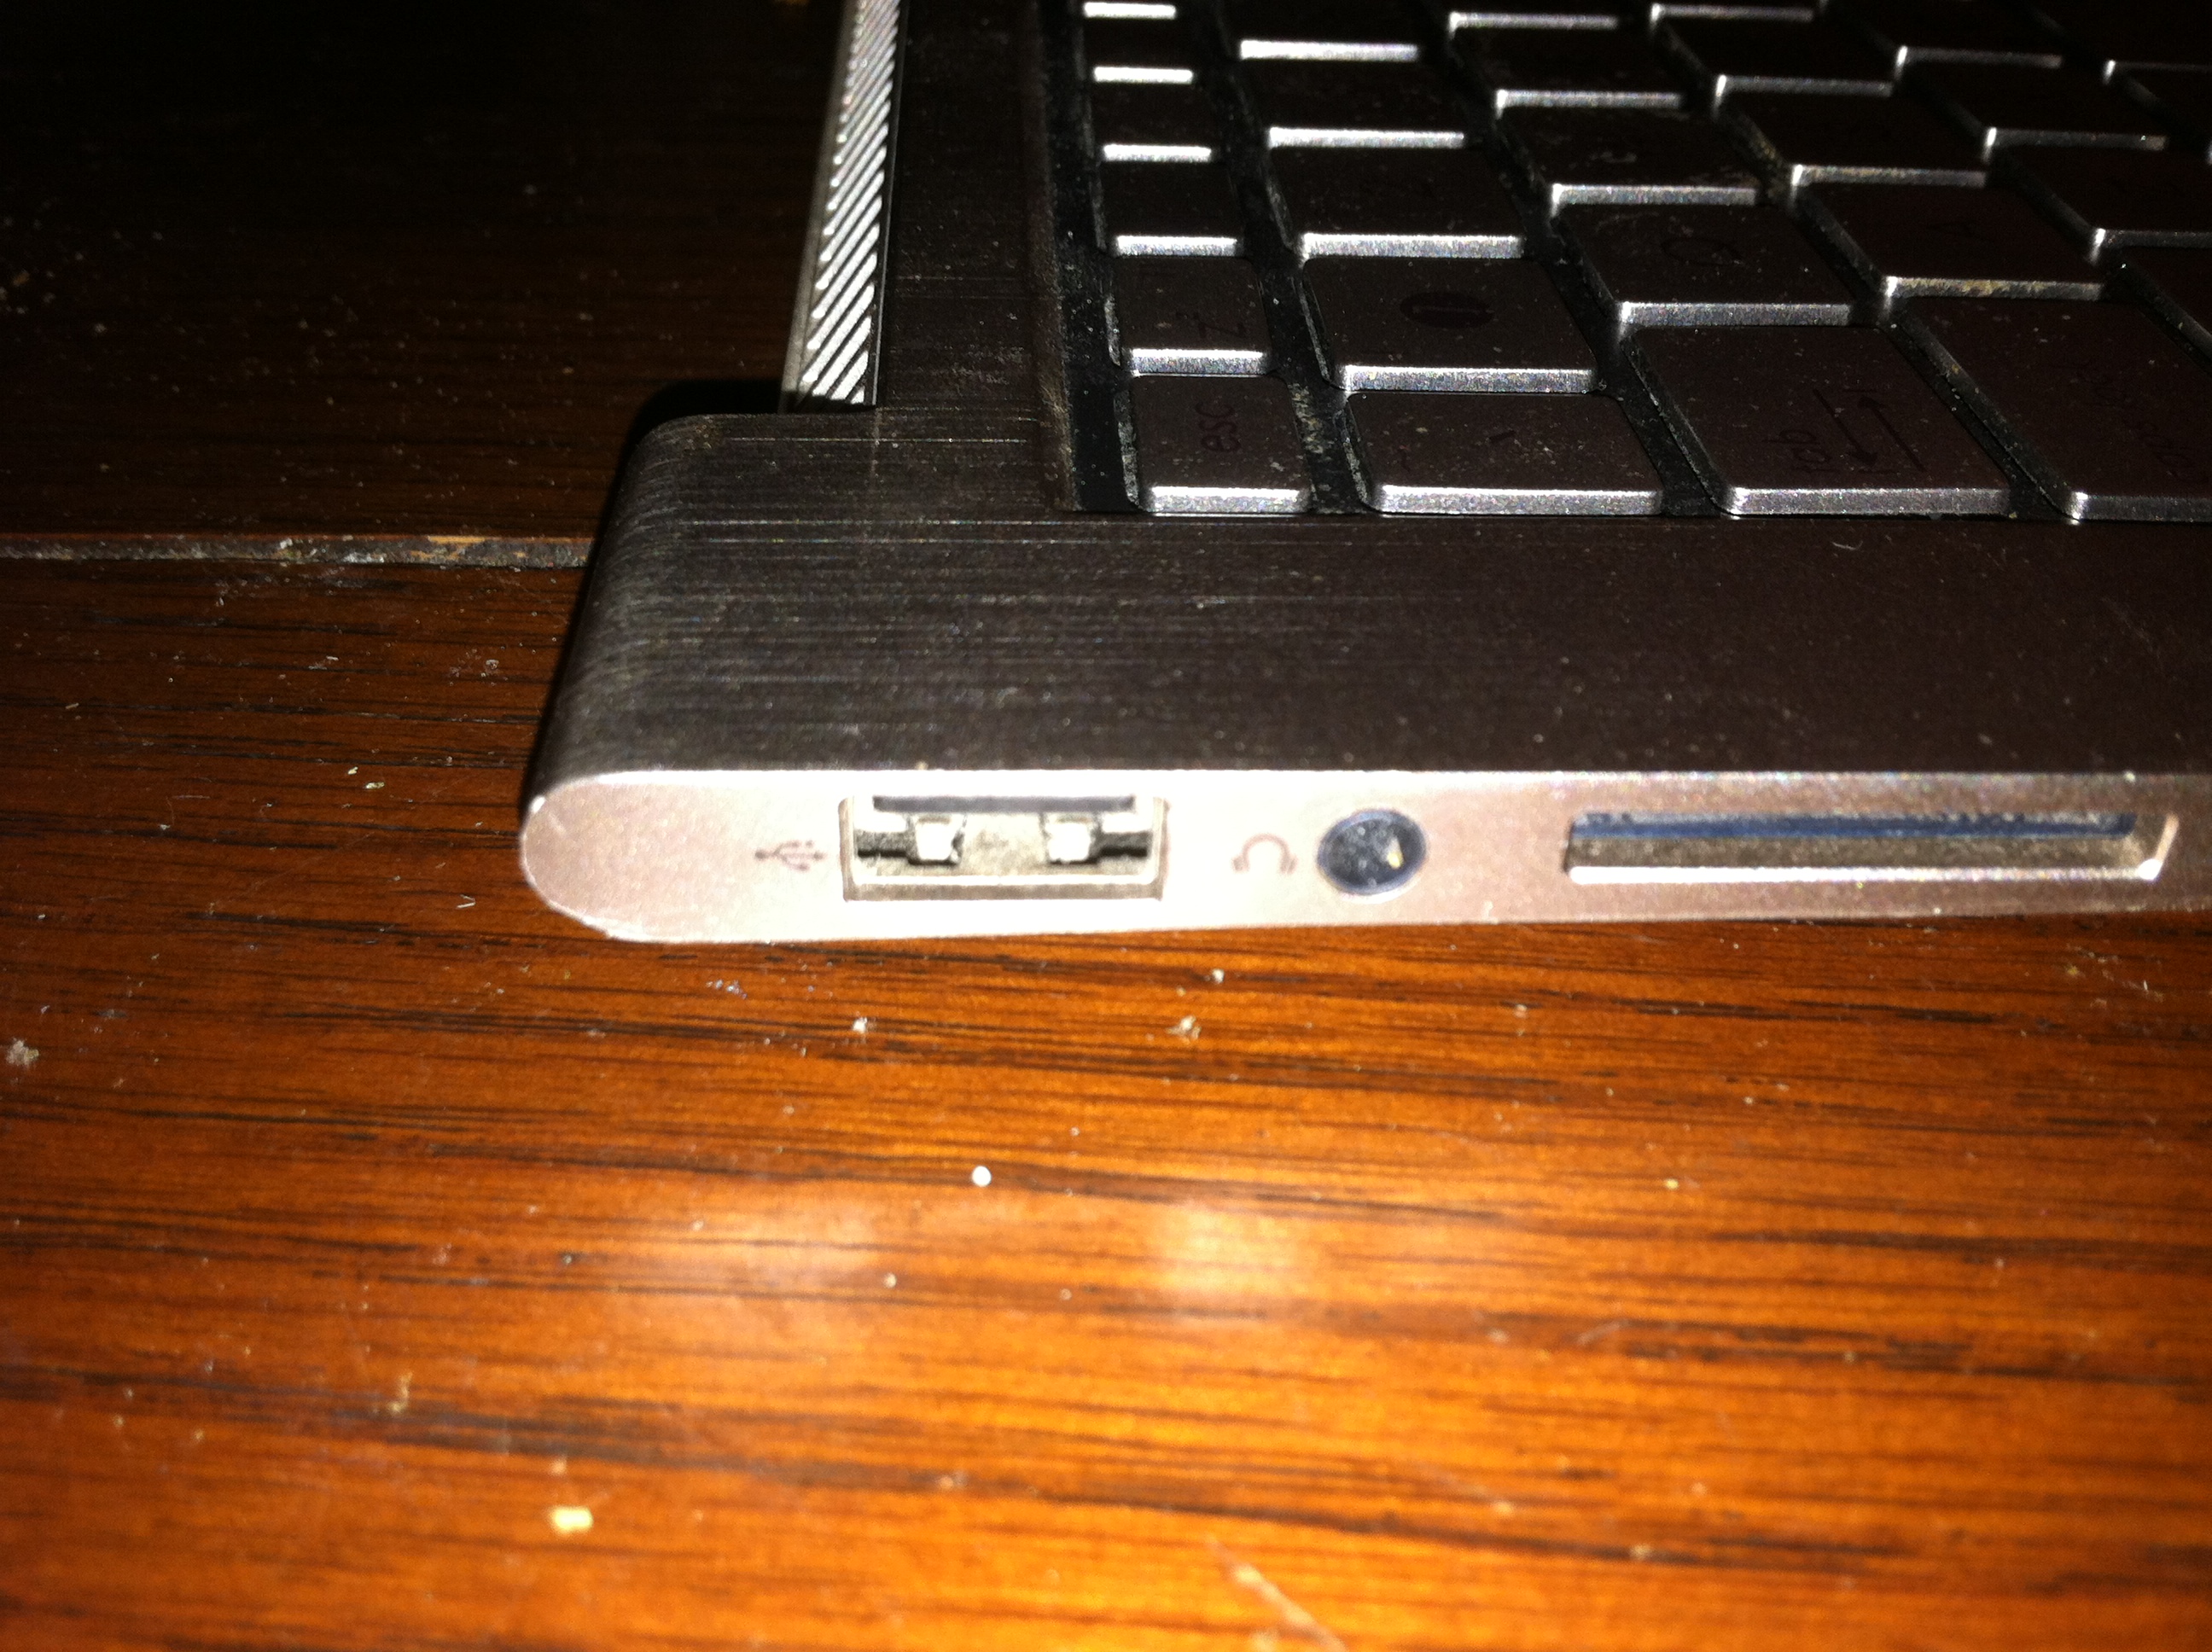

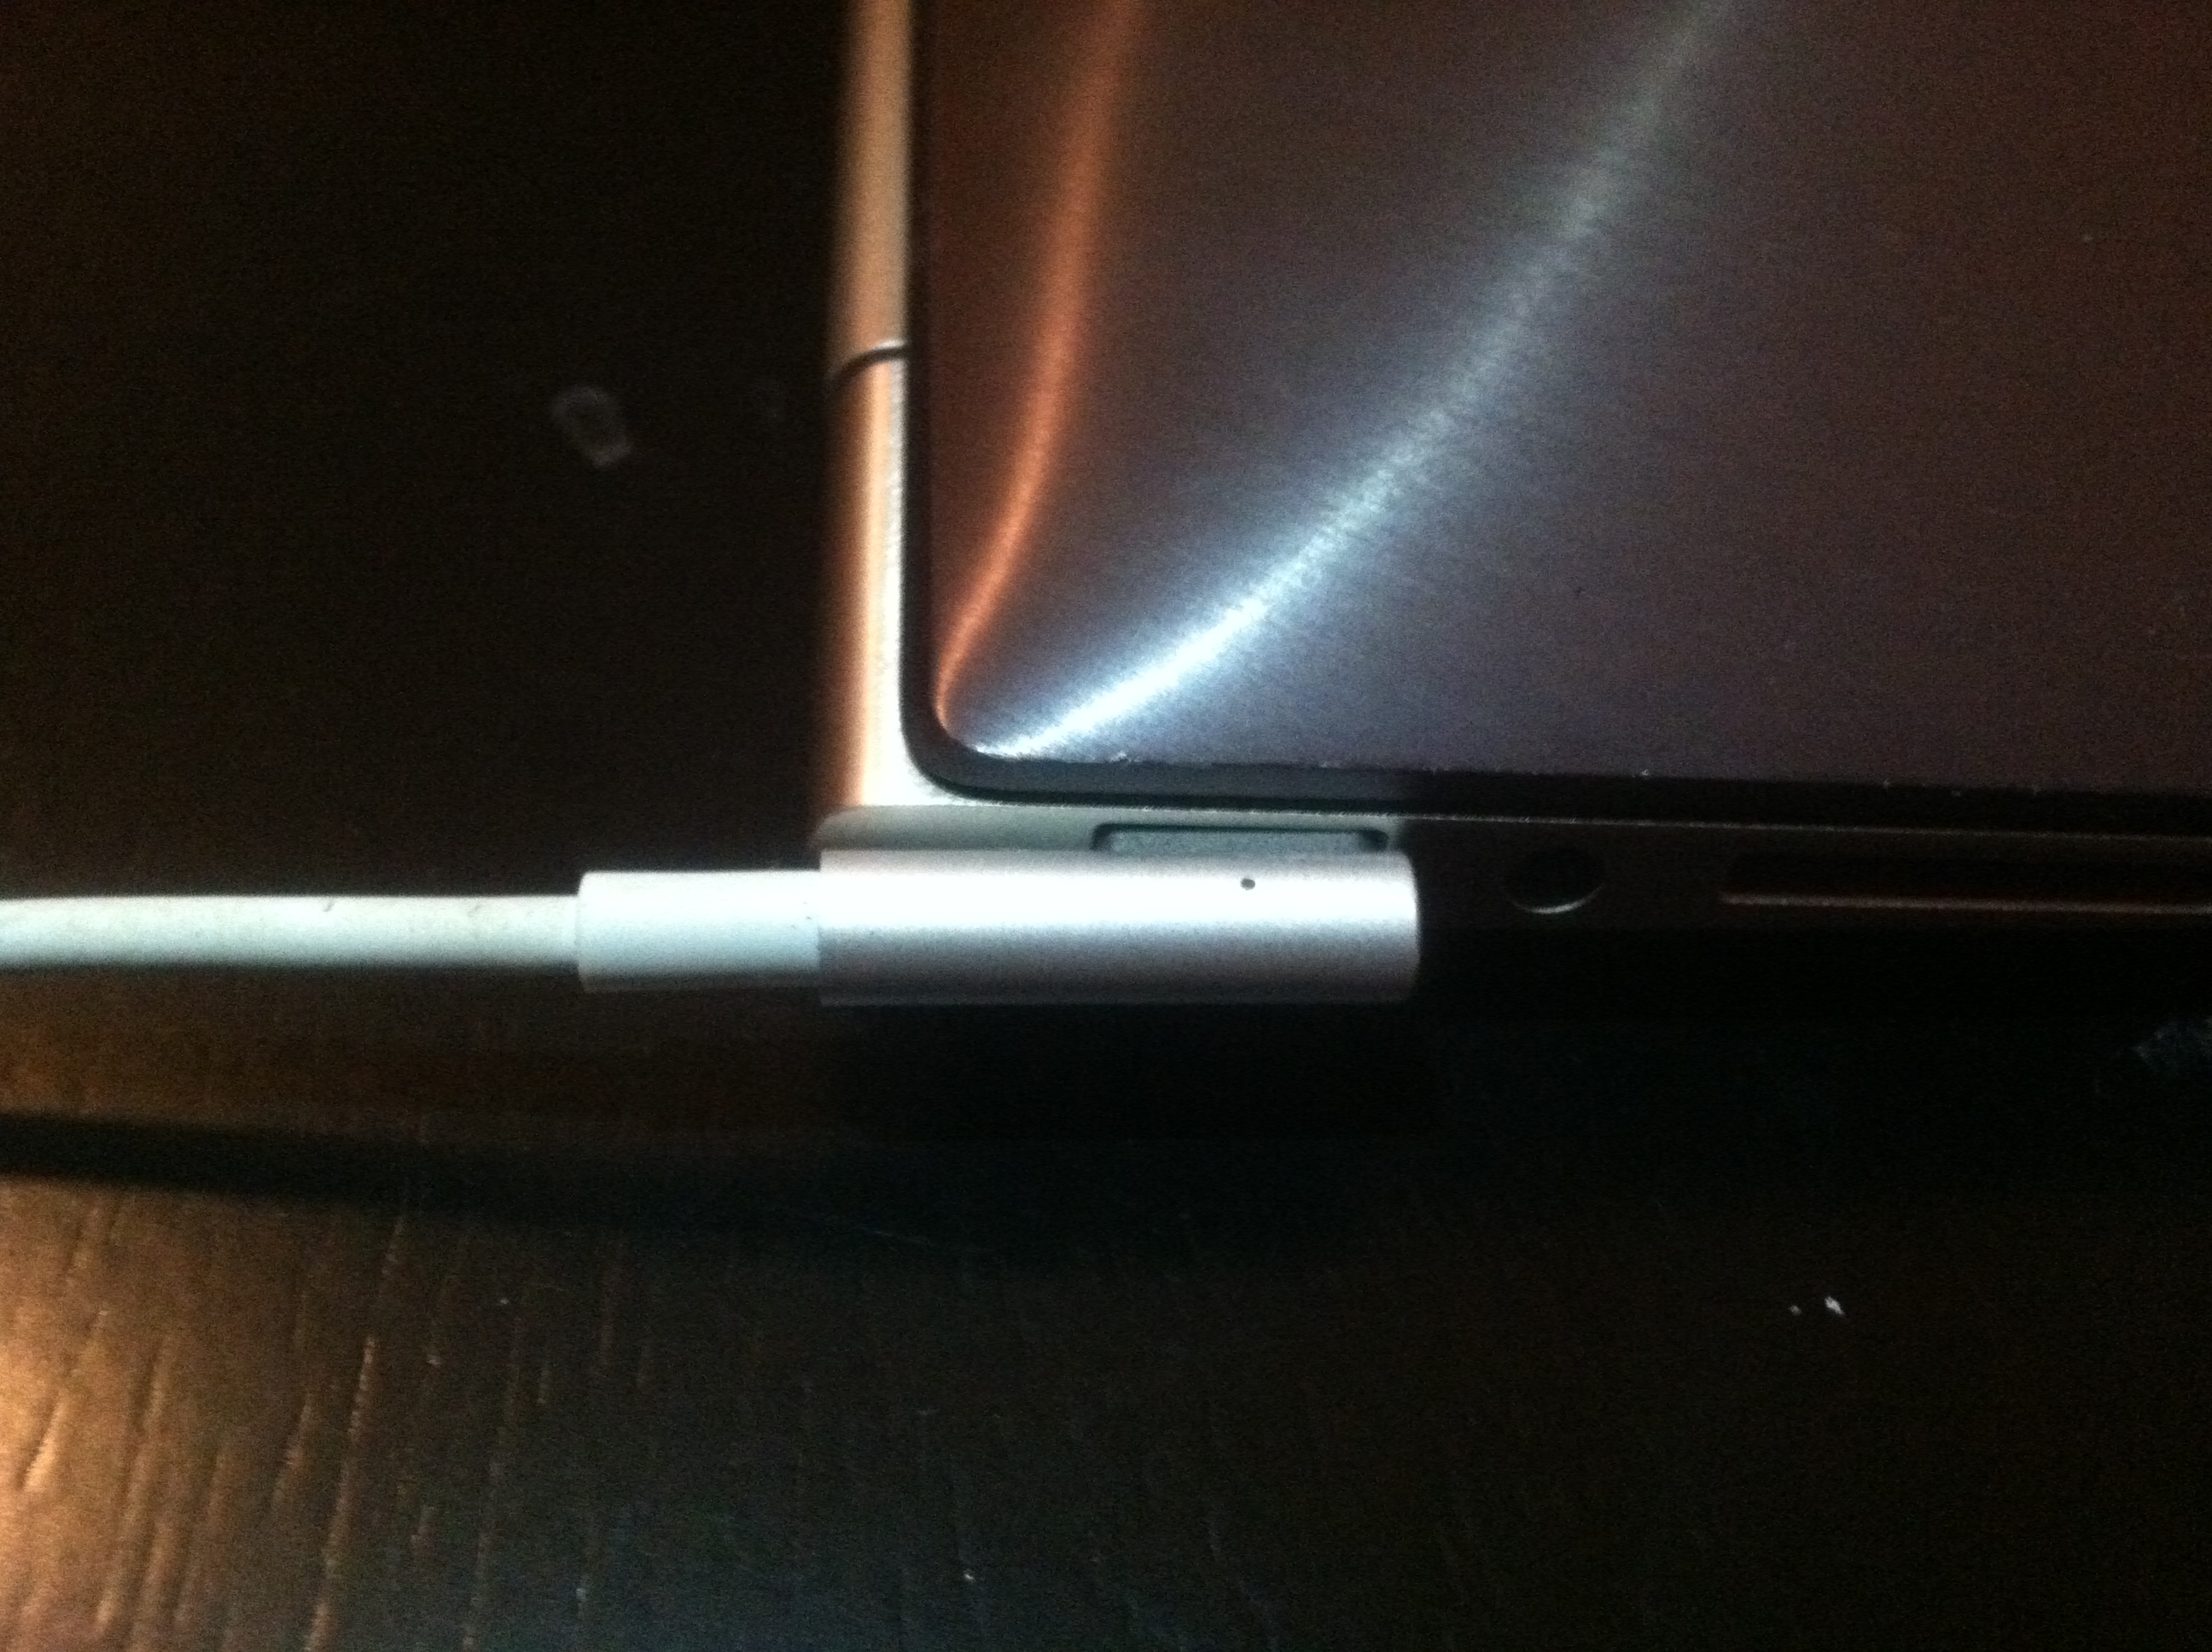
Magsafe plugs are basically the exact same size as a USB connector making modifications to the chassis of the laptop unnecessary. This will help the mod achieve a professional, clean, and nearly stock looking appearance. I’ve removed the LCD assembly here just to ensure no damage comes to the screen during the course of the mod.
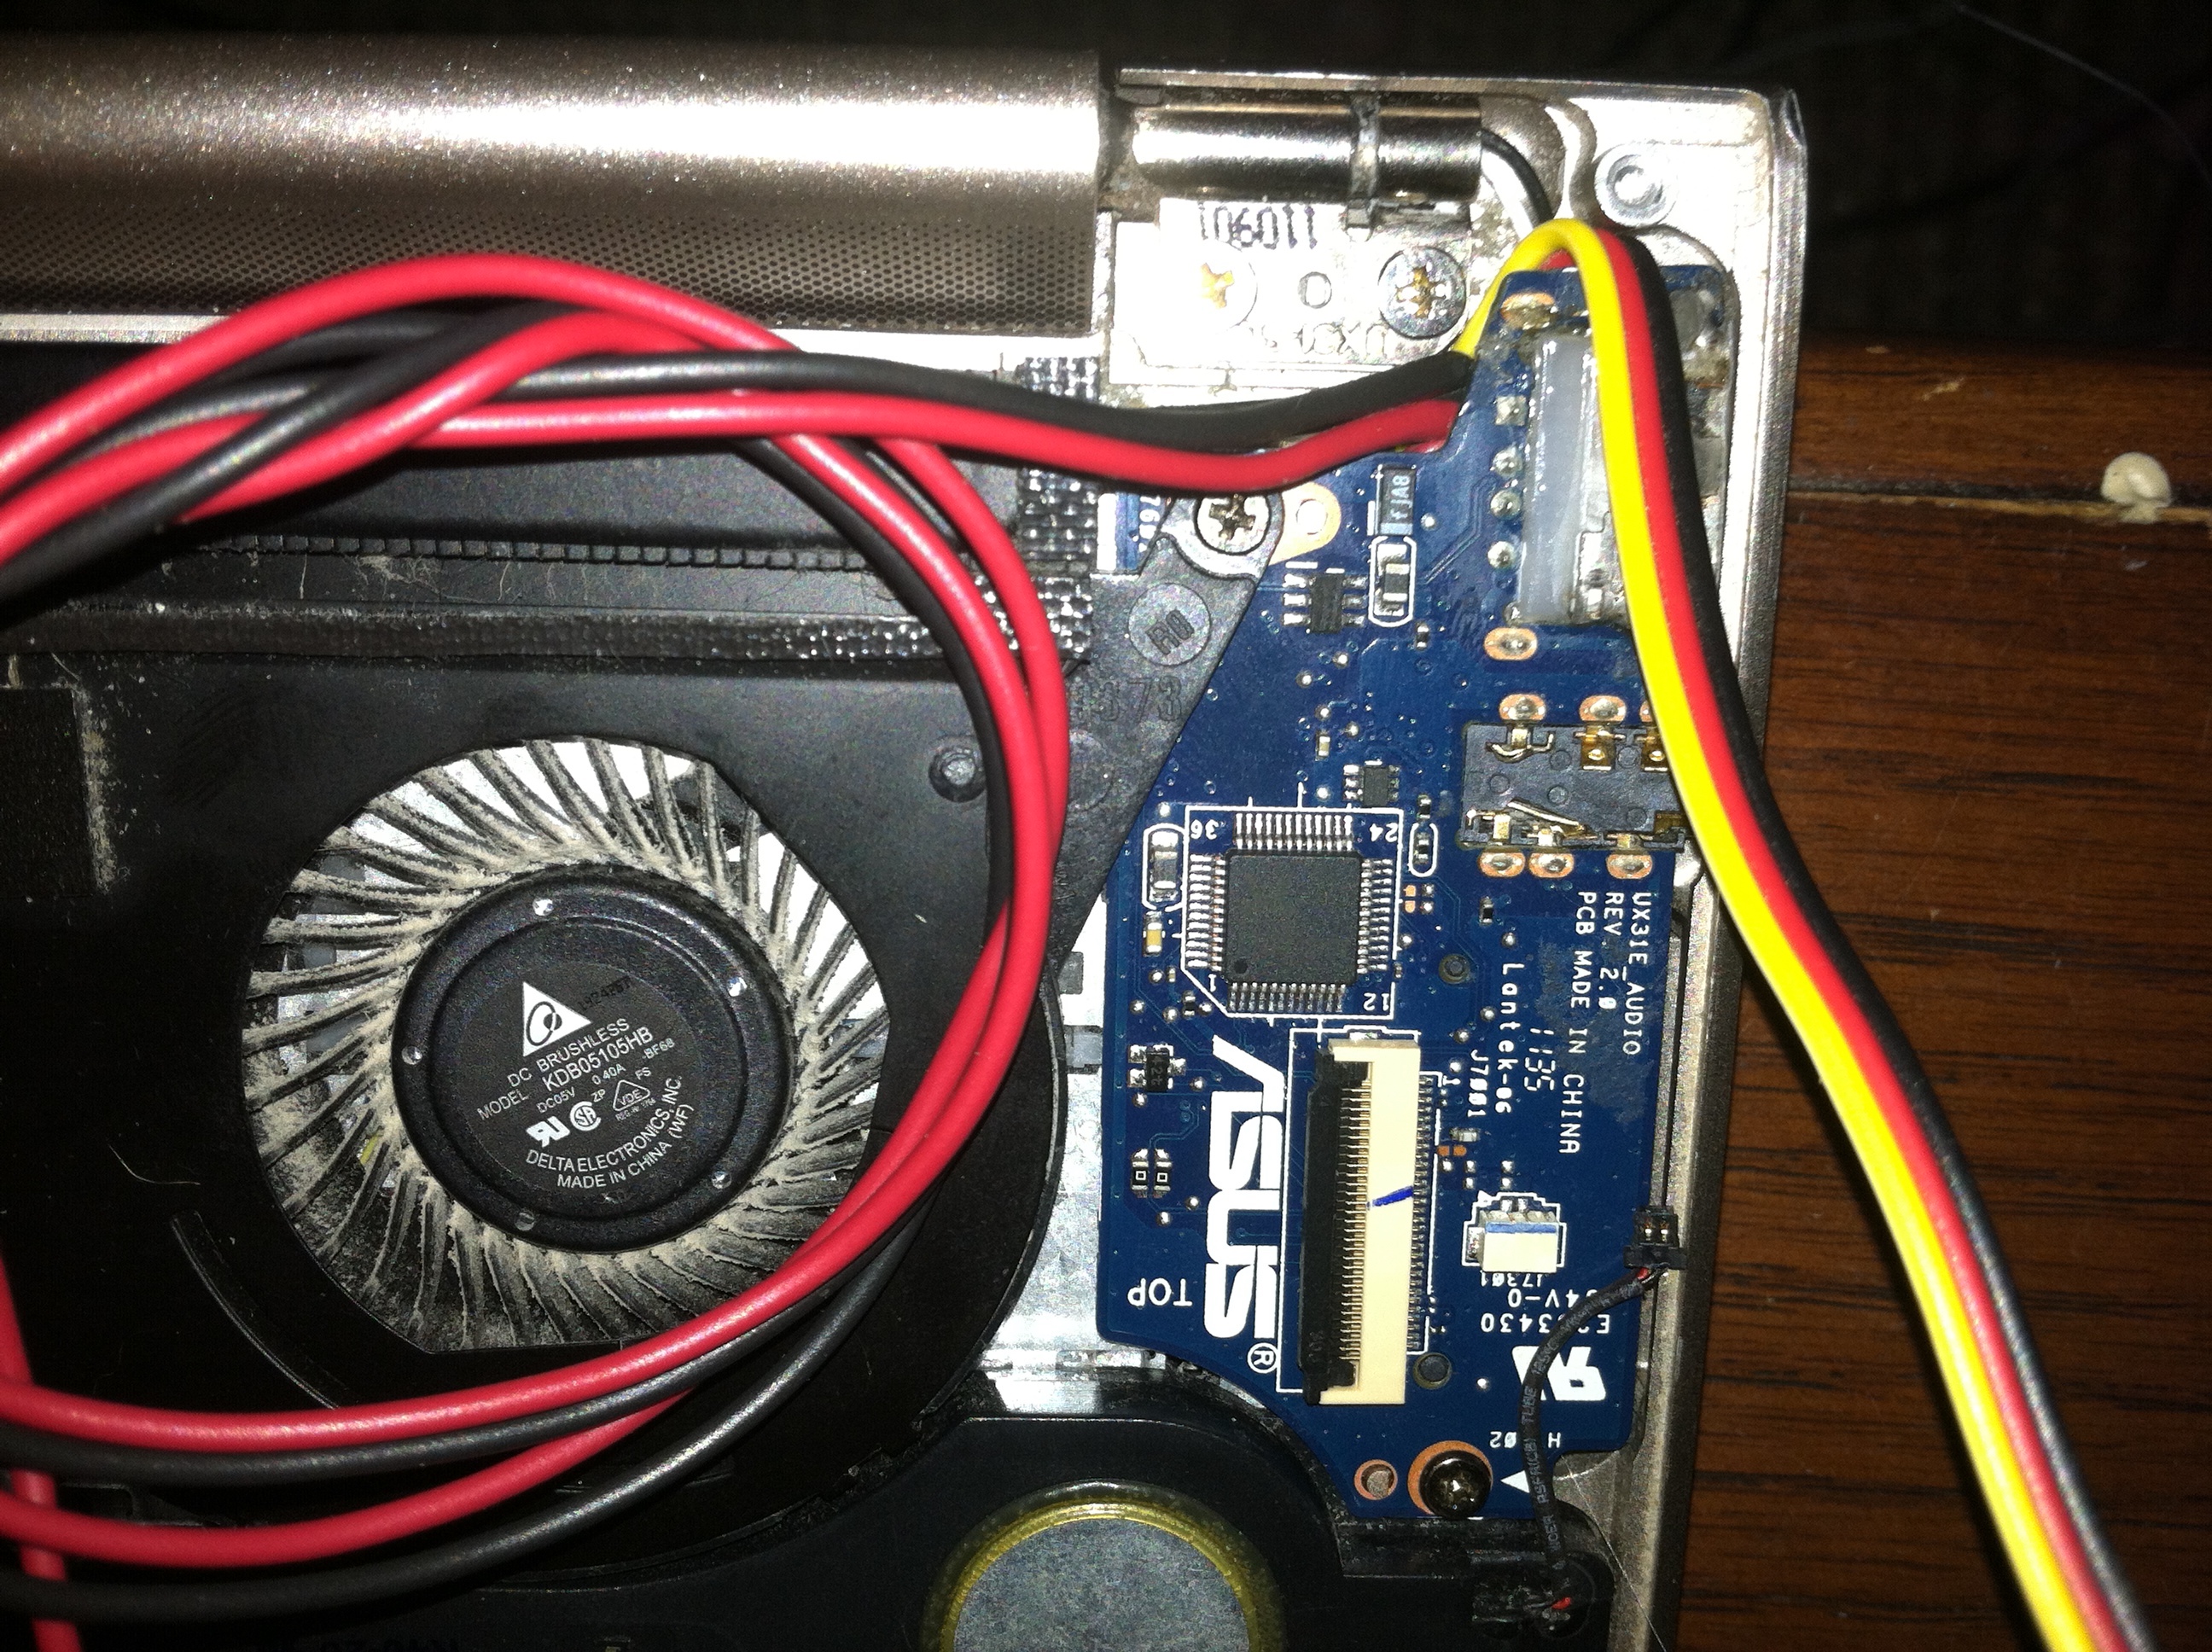
Mounting to the I/O Board
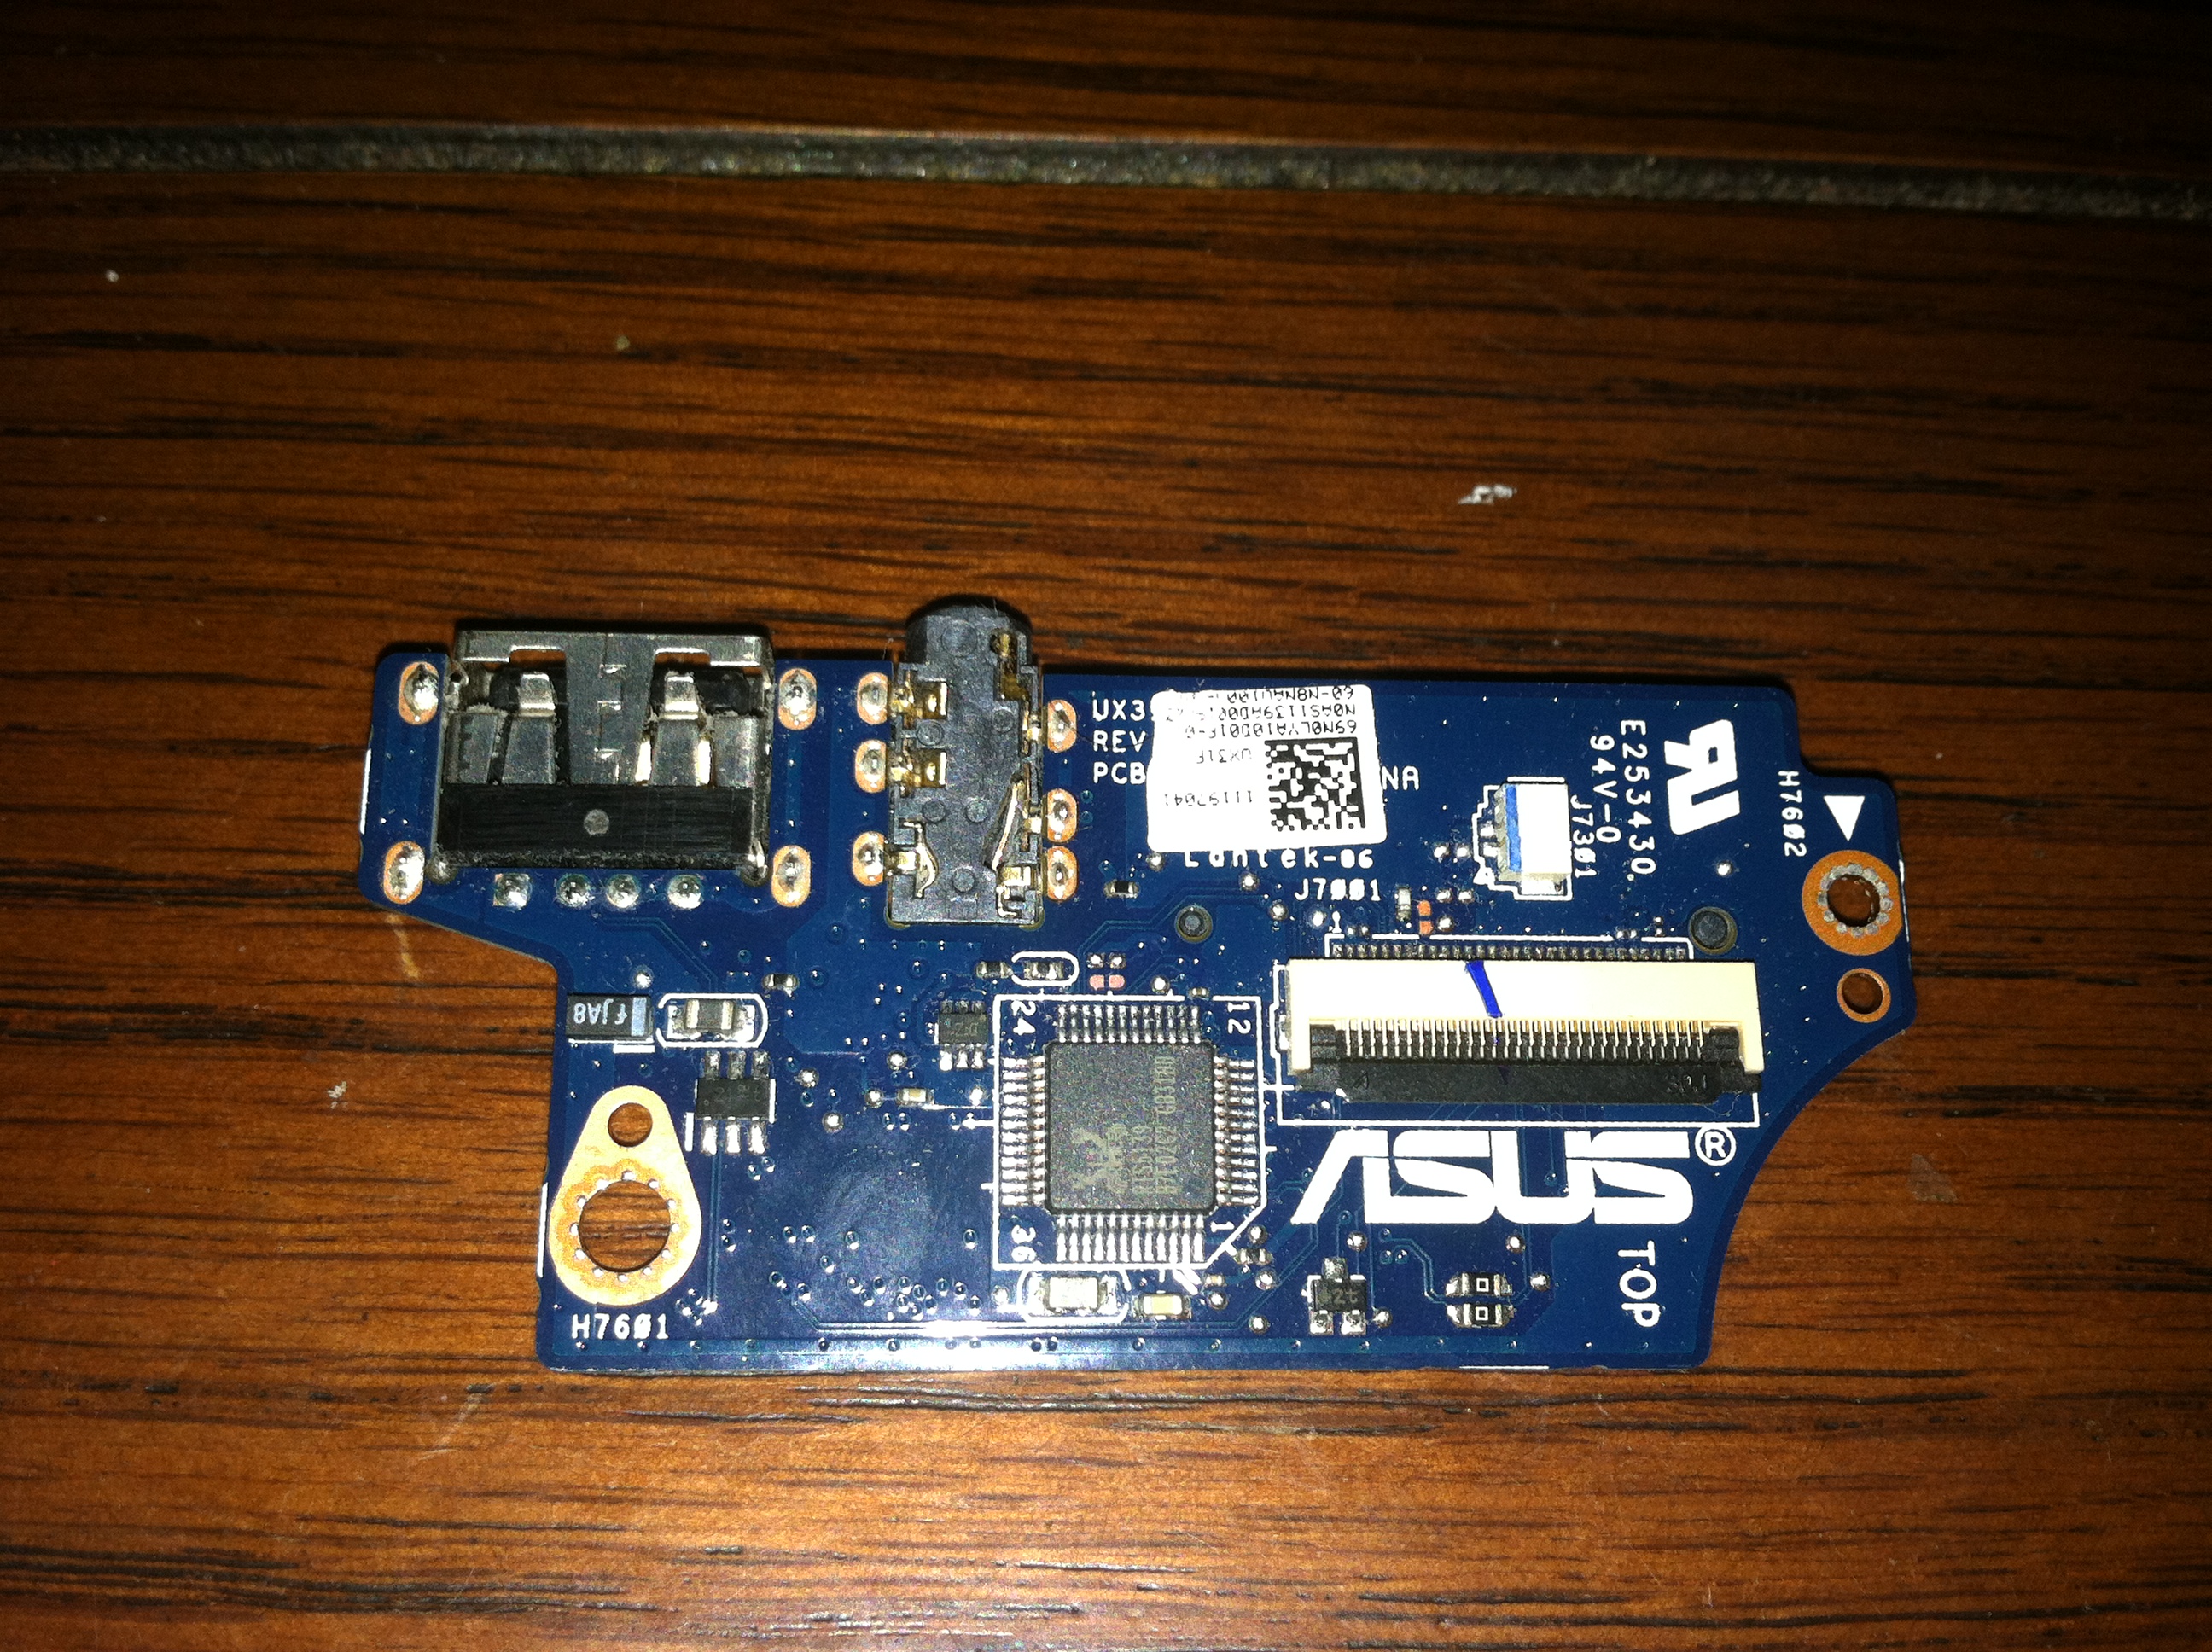

The UX31E has two USB ports, a USB 2.0 present on the above I/O board and a USB 3.0 port on the opposite side where the nasty power jack lives. I have only used the USB 2.0 port because anything plugged into the USB 3.0 port interferes with the barrel jack. So I removed the USB 2.0 port from the I/O board. Desoldering components like this can be a chore so I just diced it with a pair of side cutters and easily desoldered each pin individually.
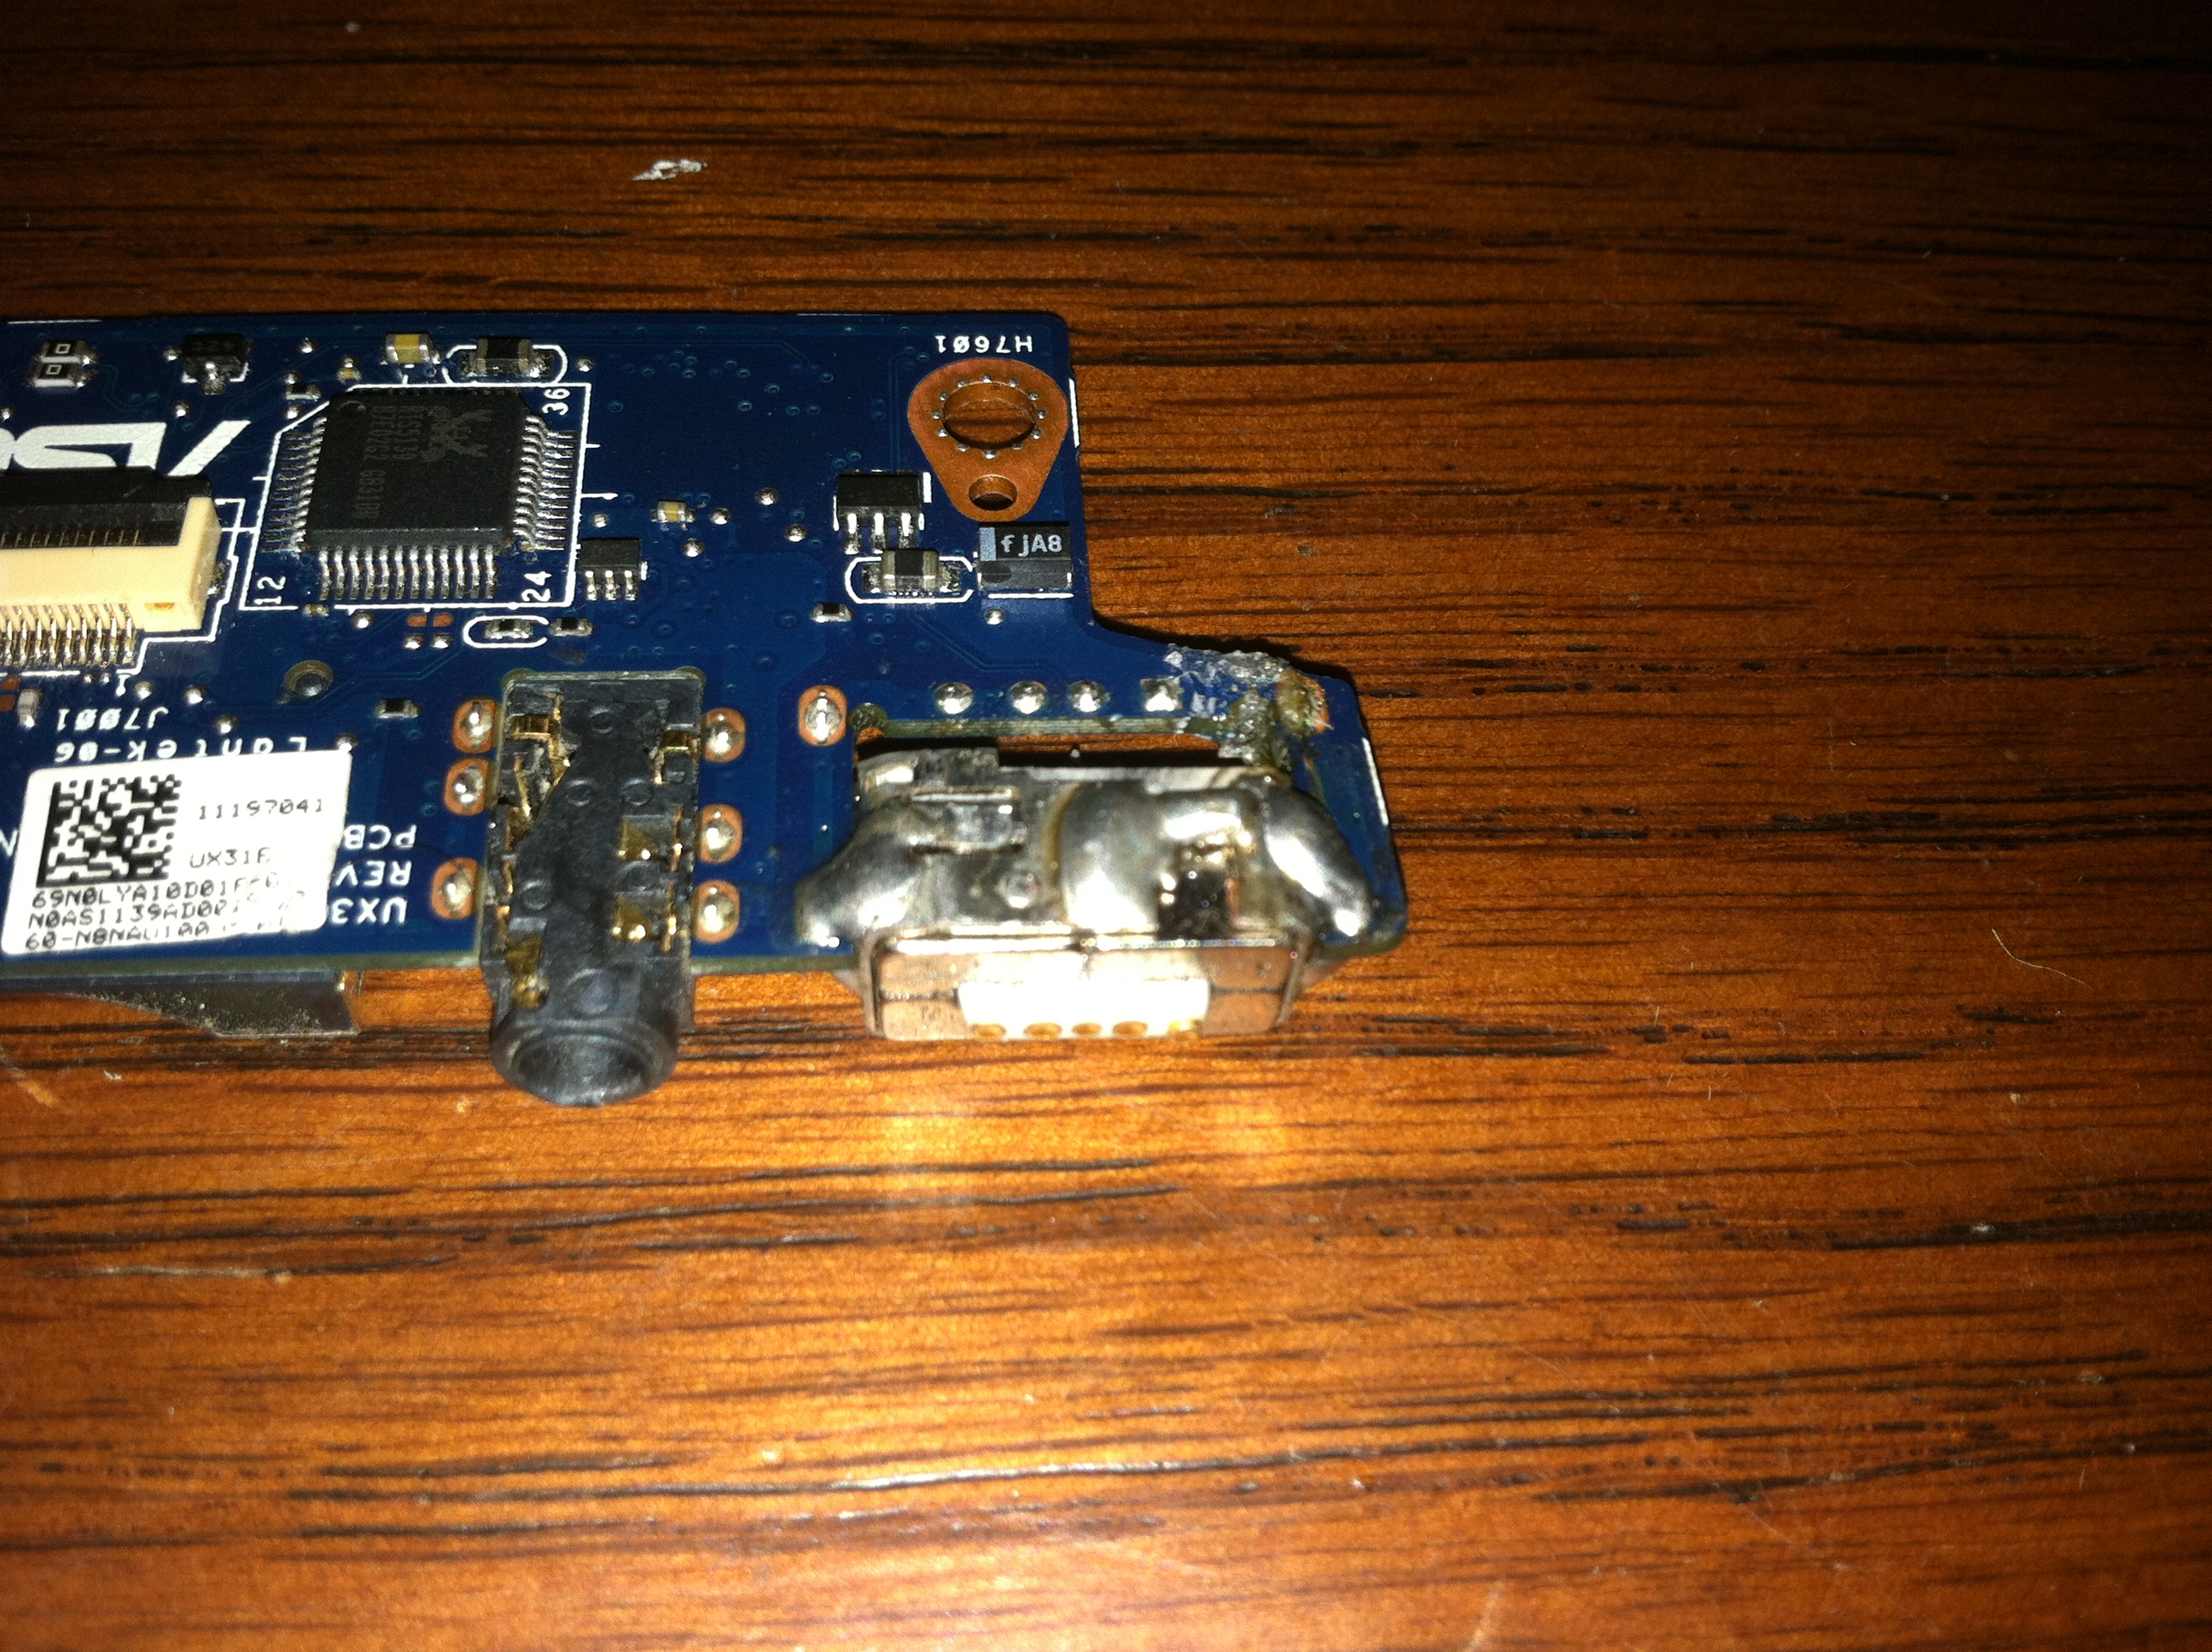
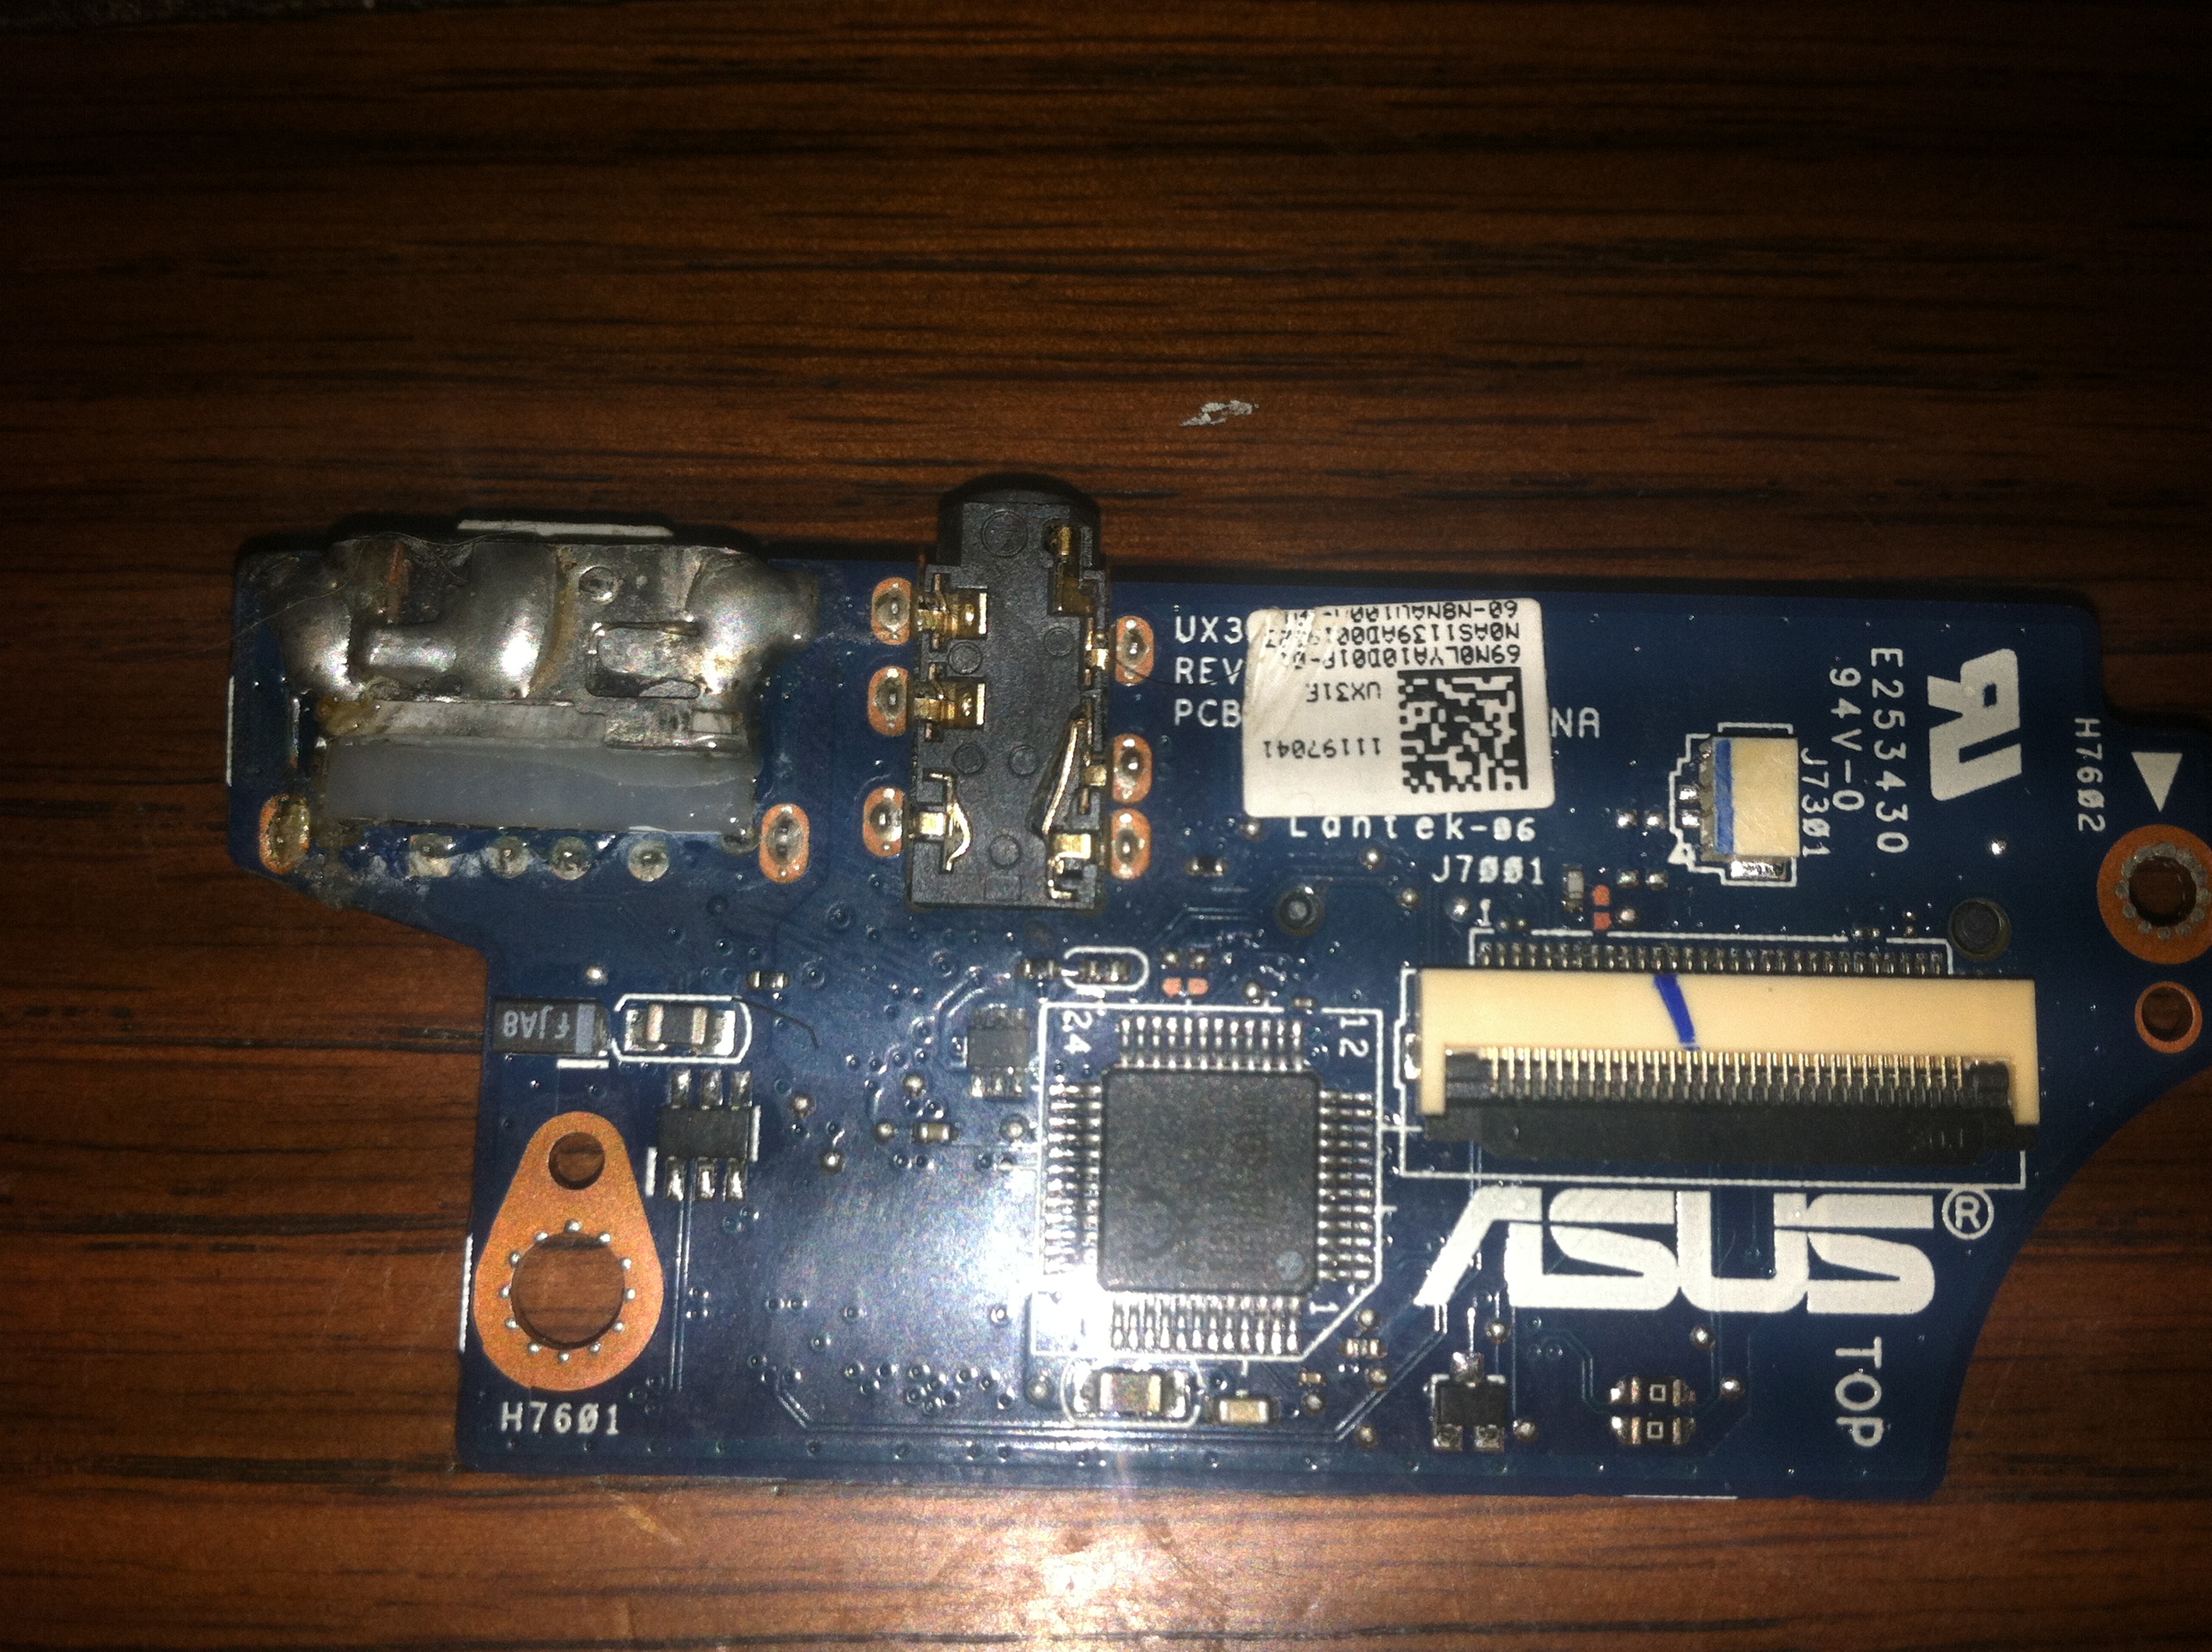
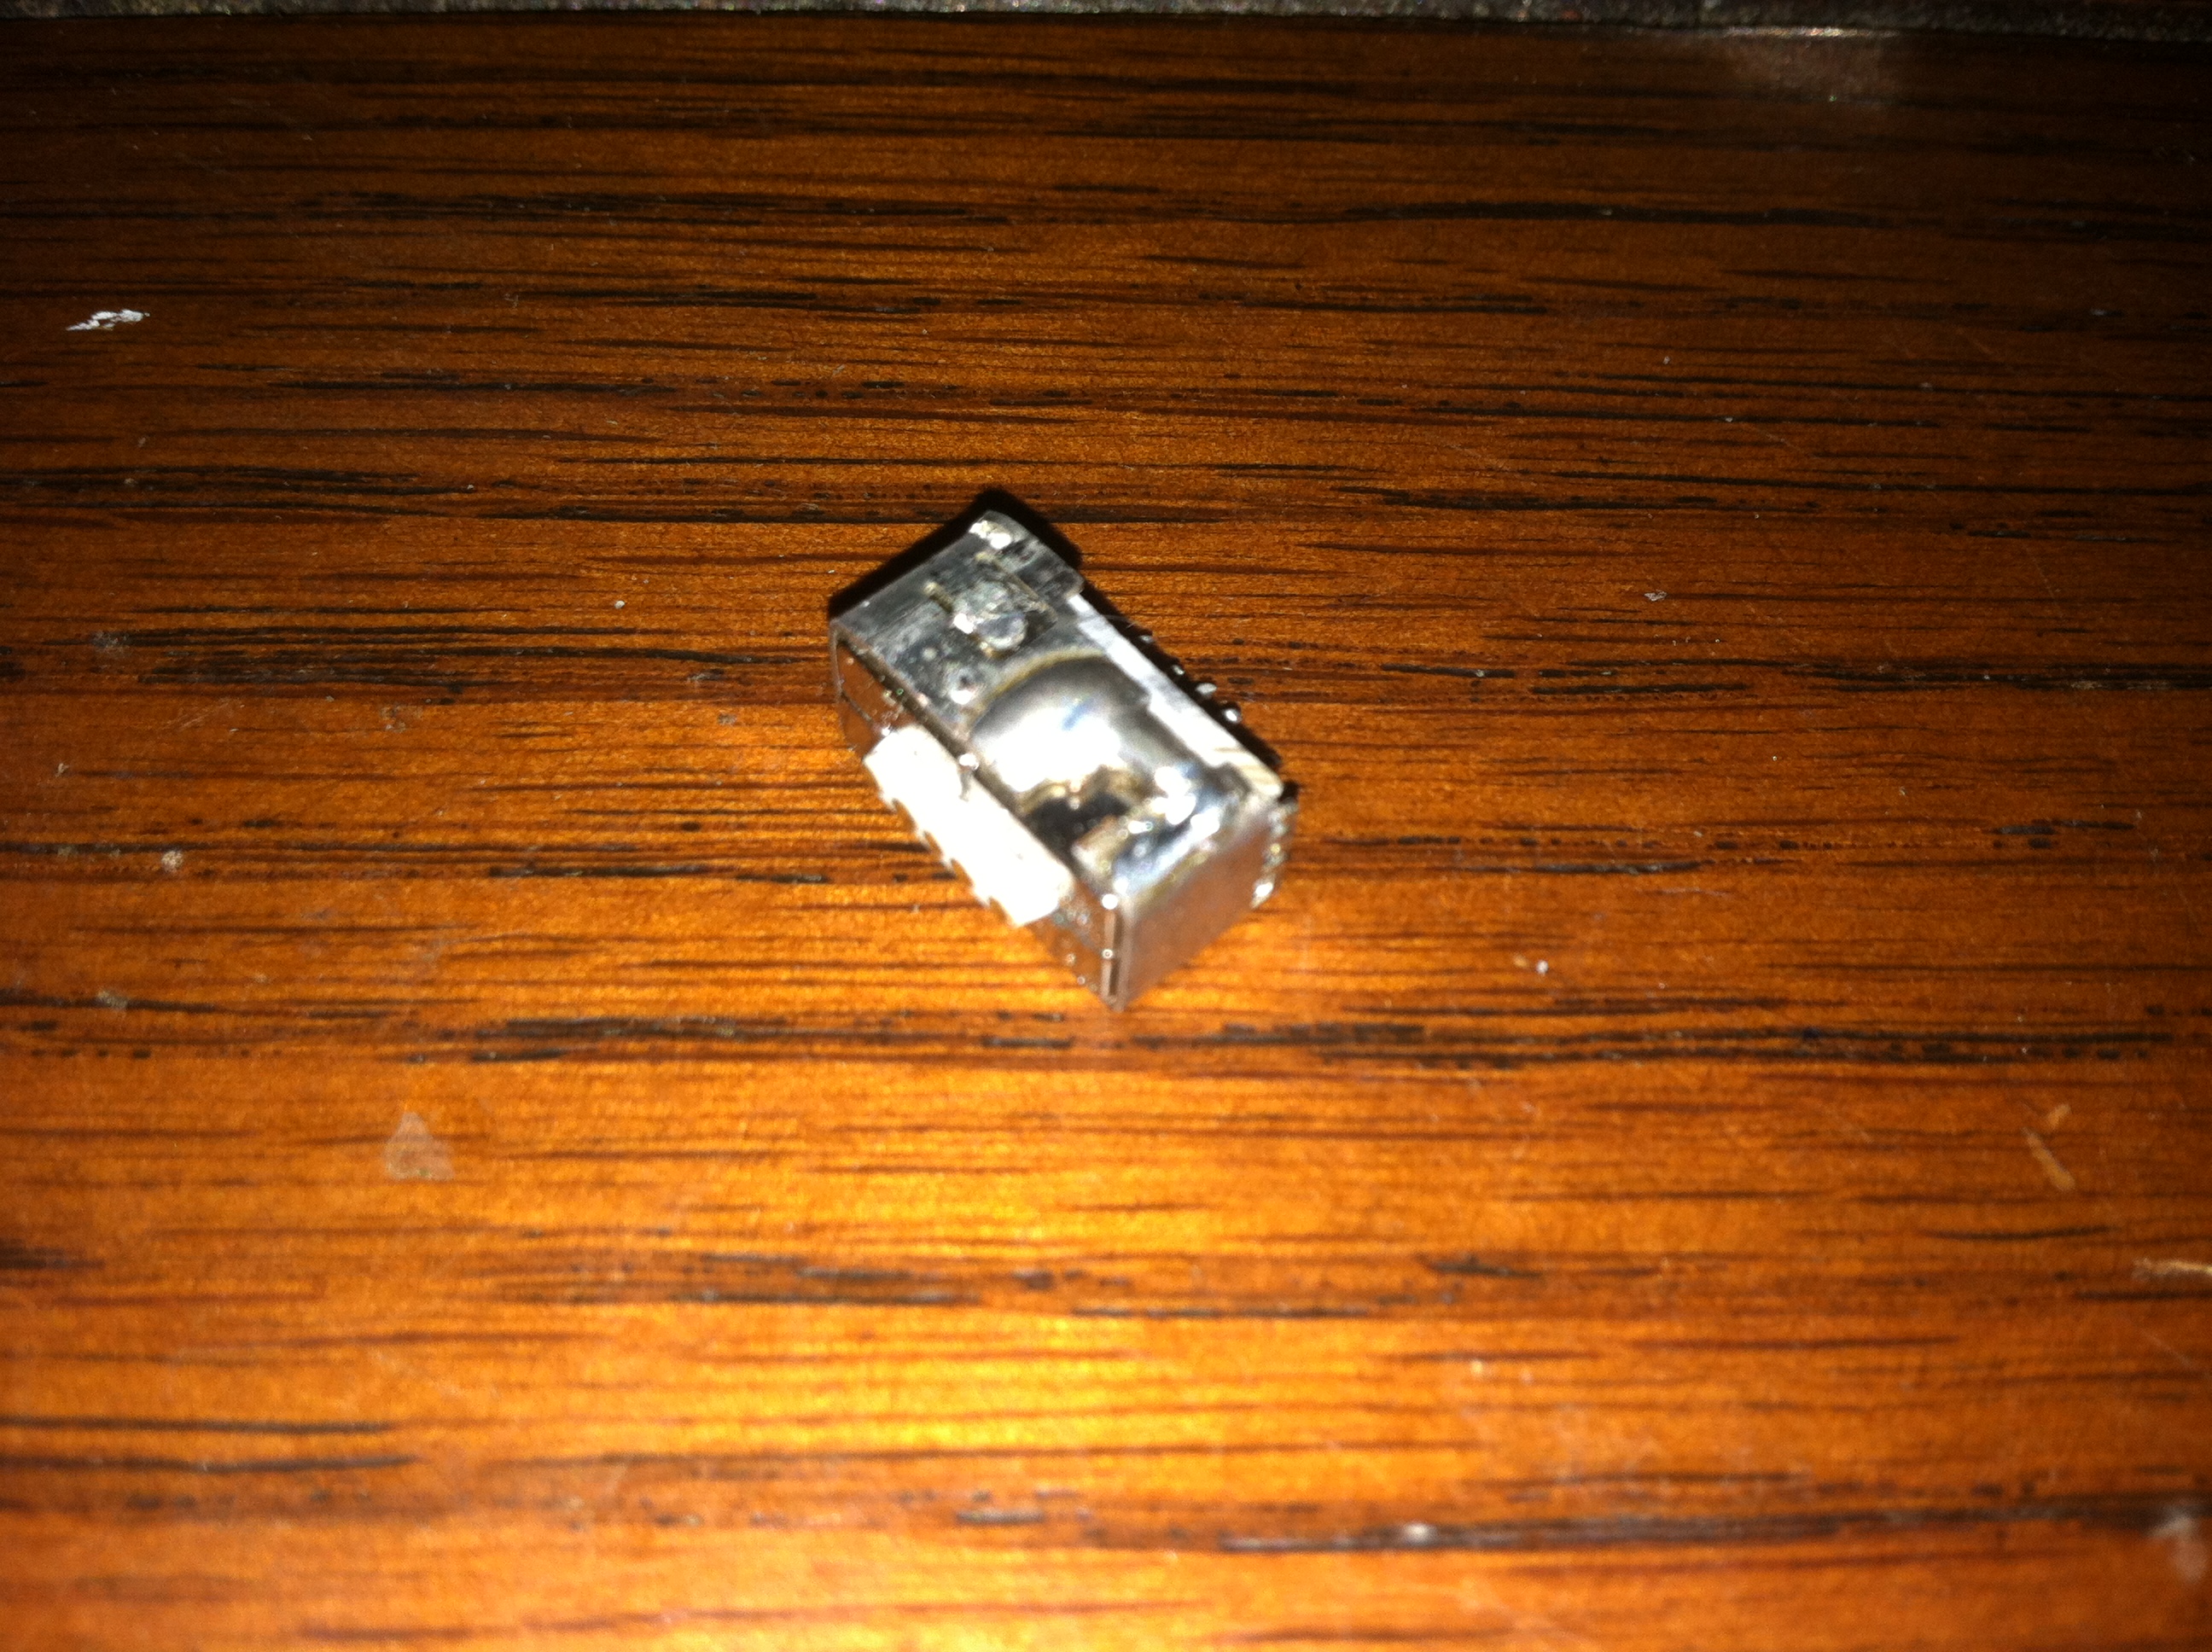
With the USB port removed the Magsafe connector was then soldered in place, from both sides, to the pads already present on the I/O board. I then added a small bit of plastic to brace the remaining gap and super glued it in place. The Magsafe port is now super strong with much less flex than the original USB port.
Wiring it all up
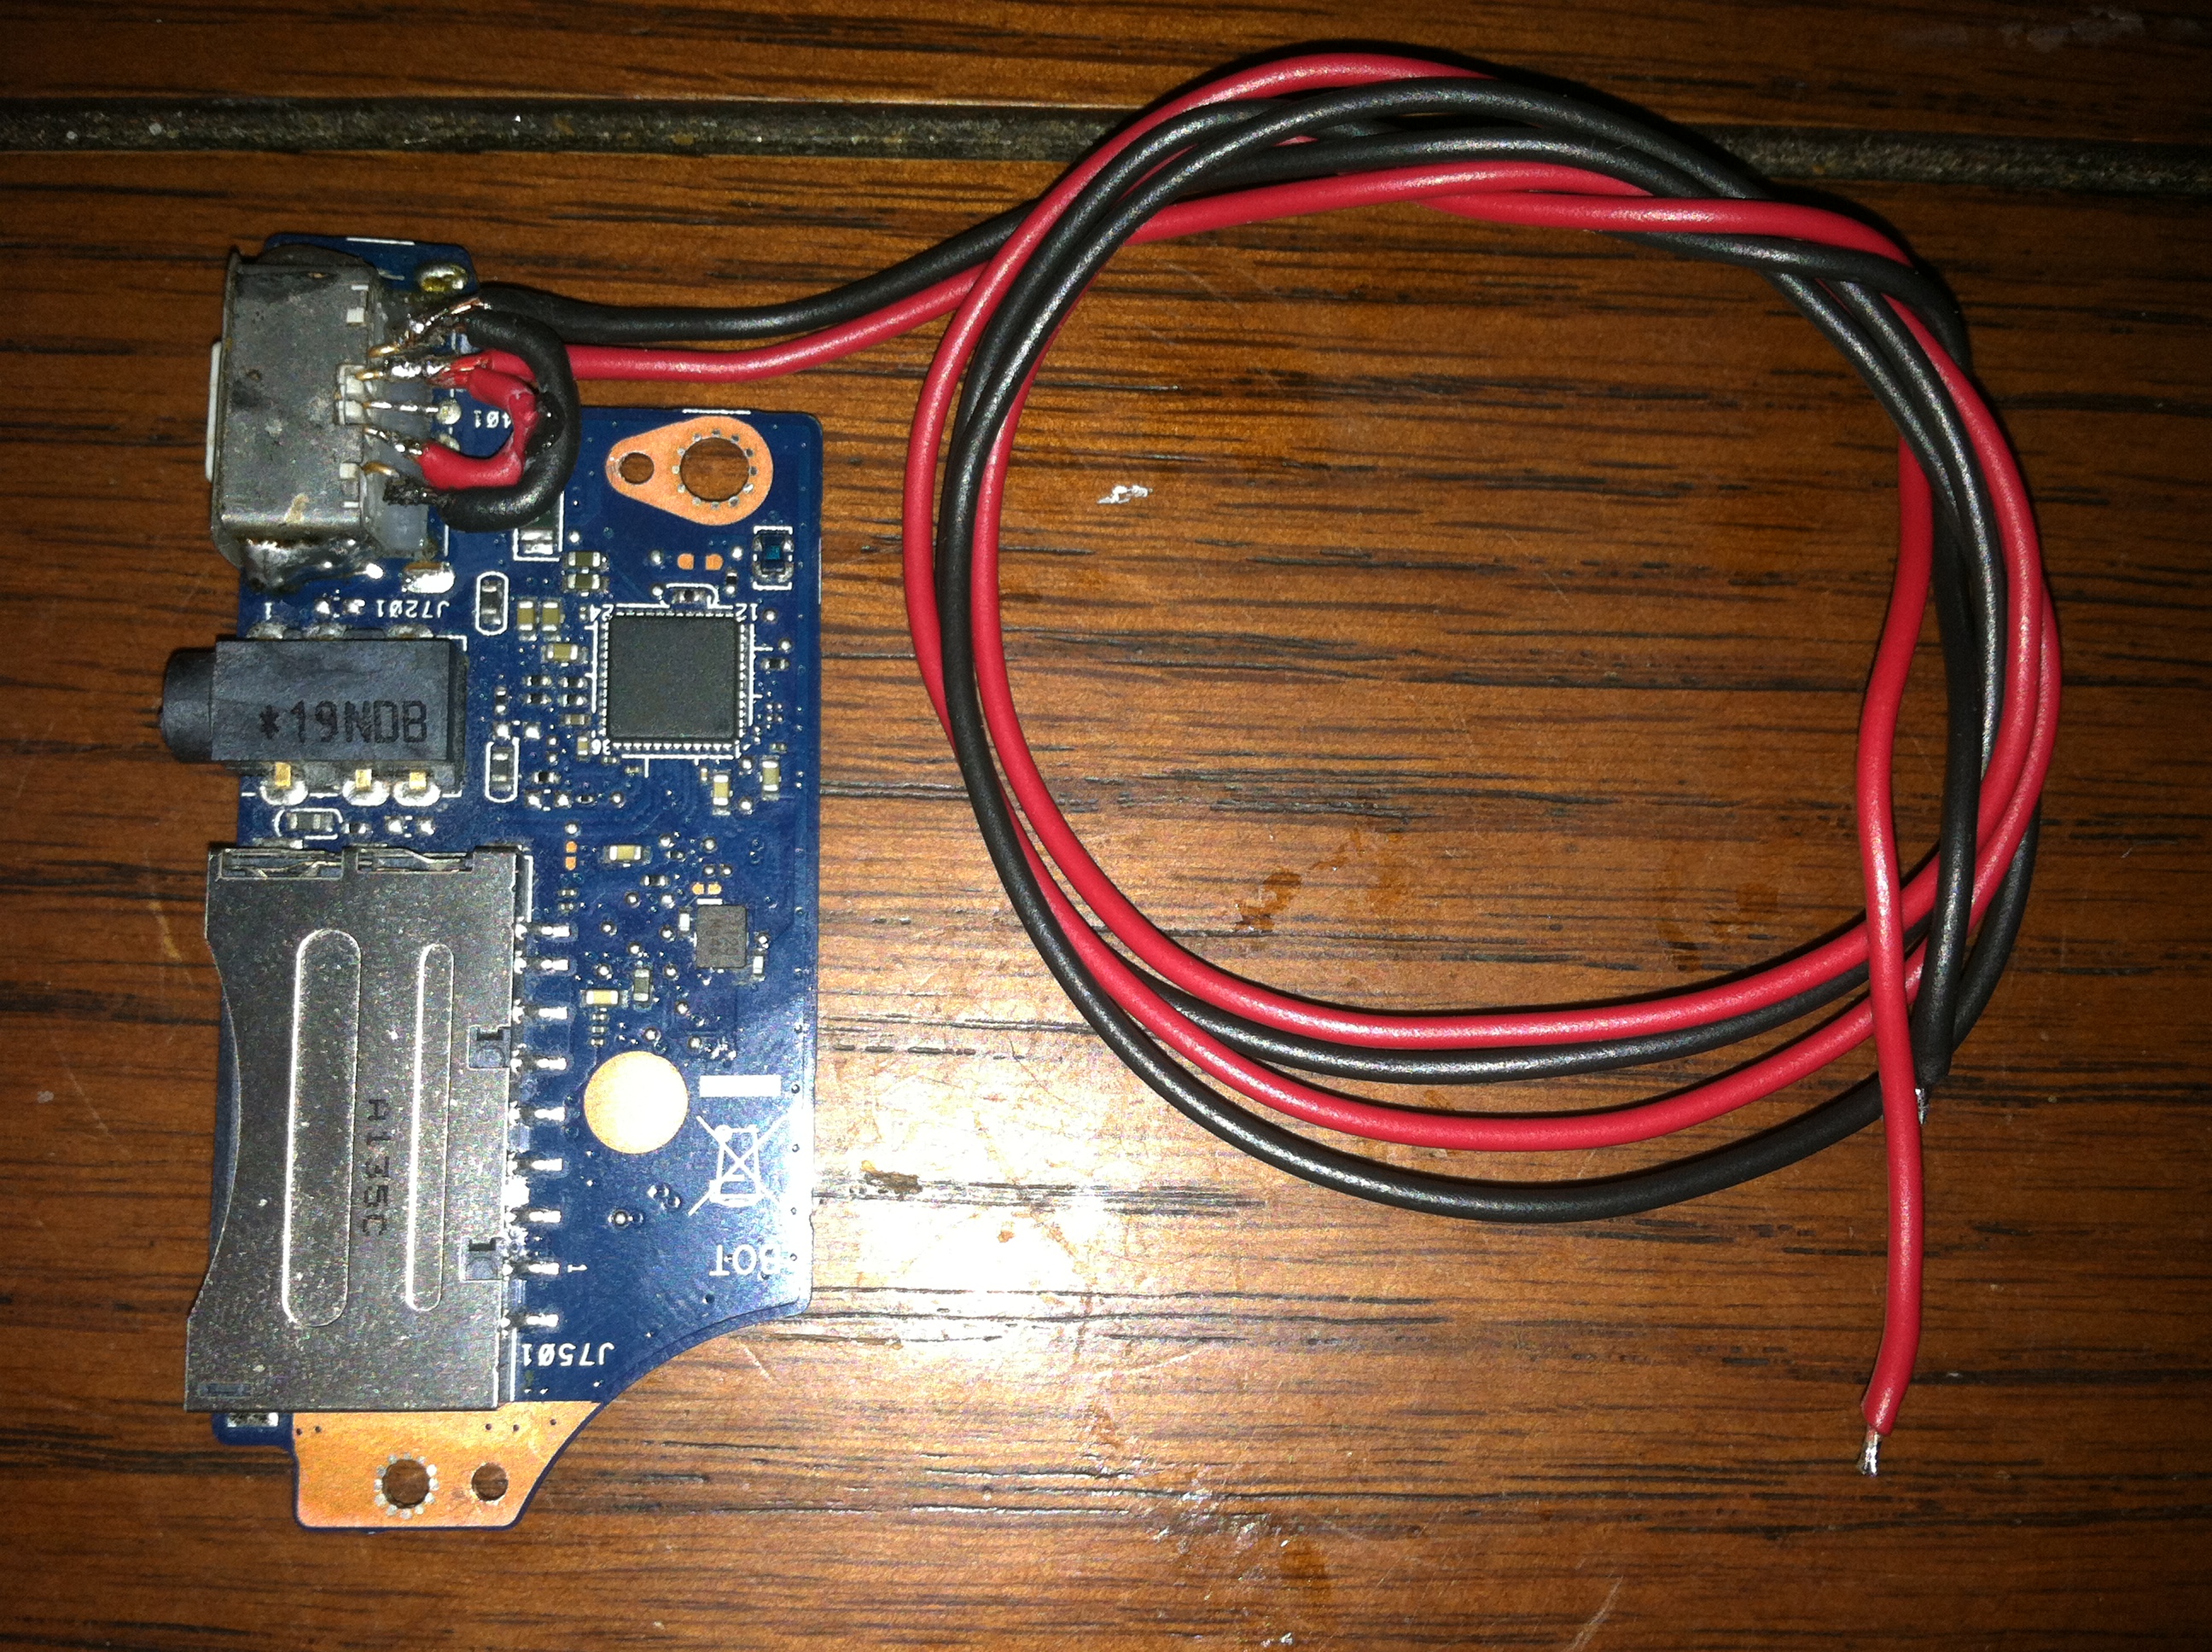
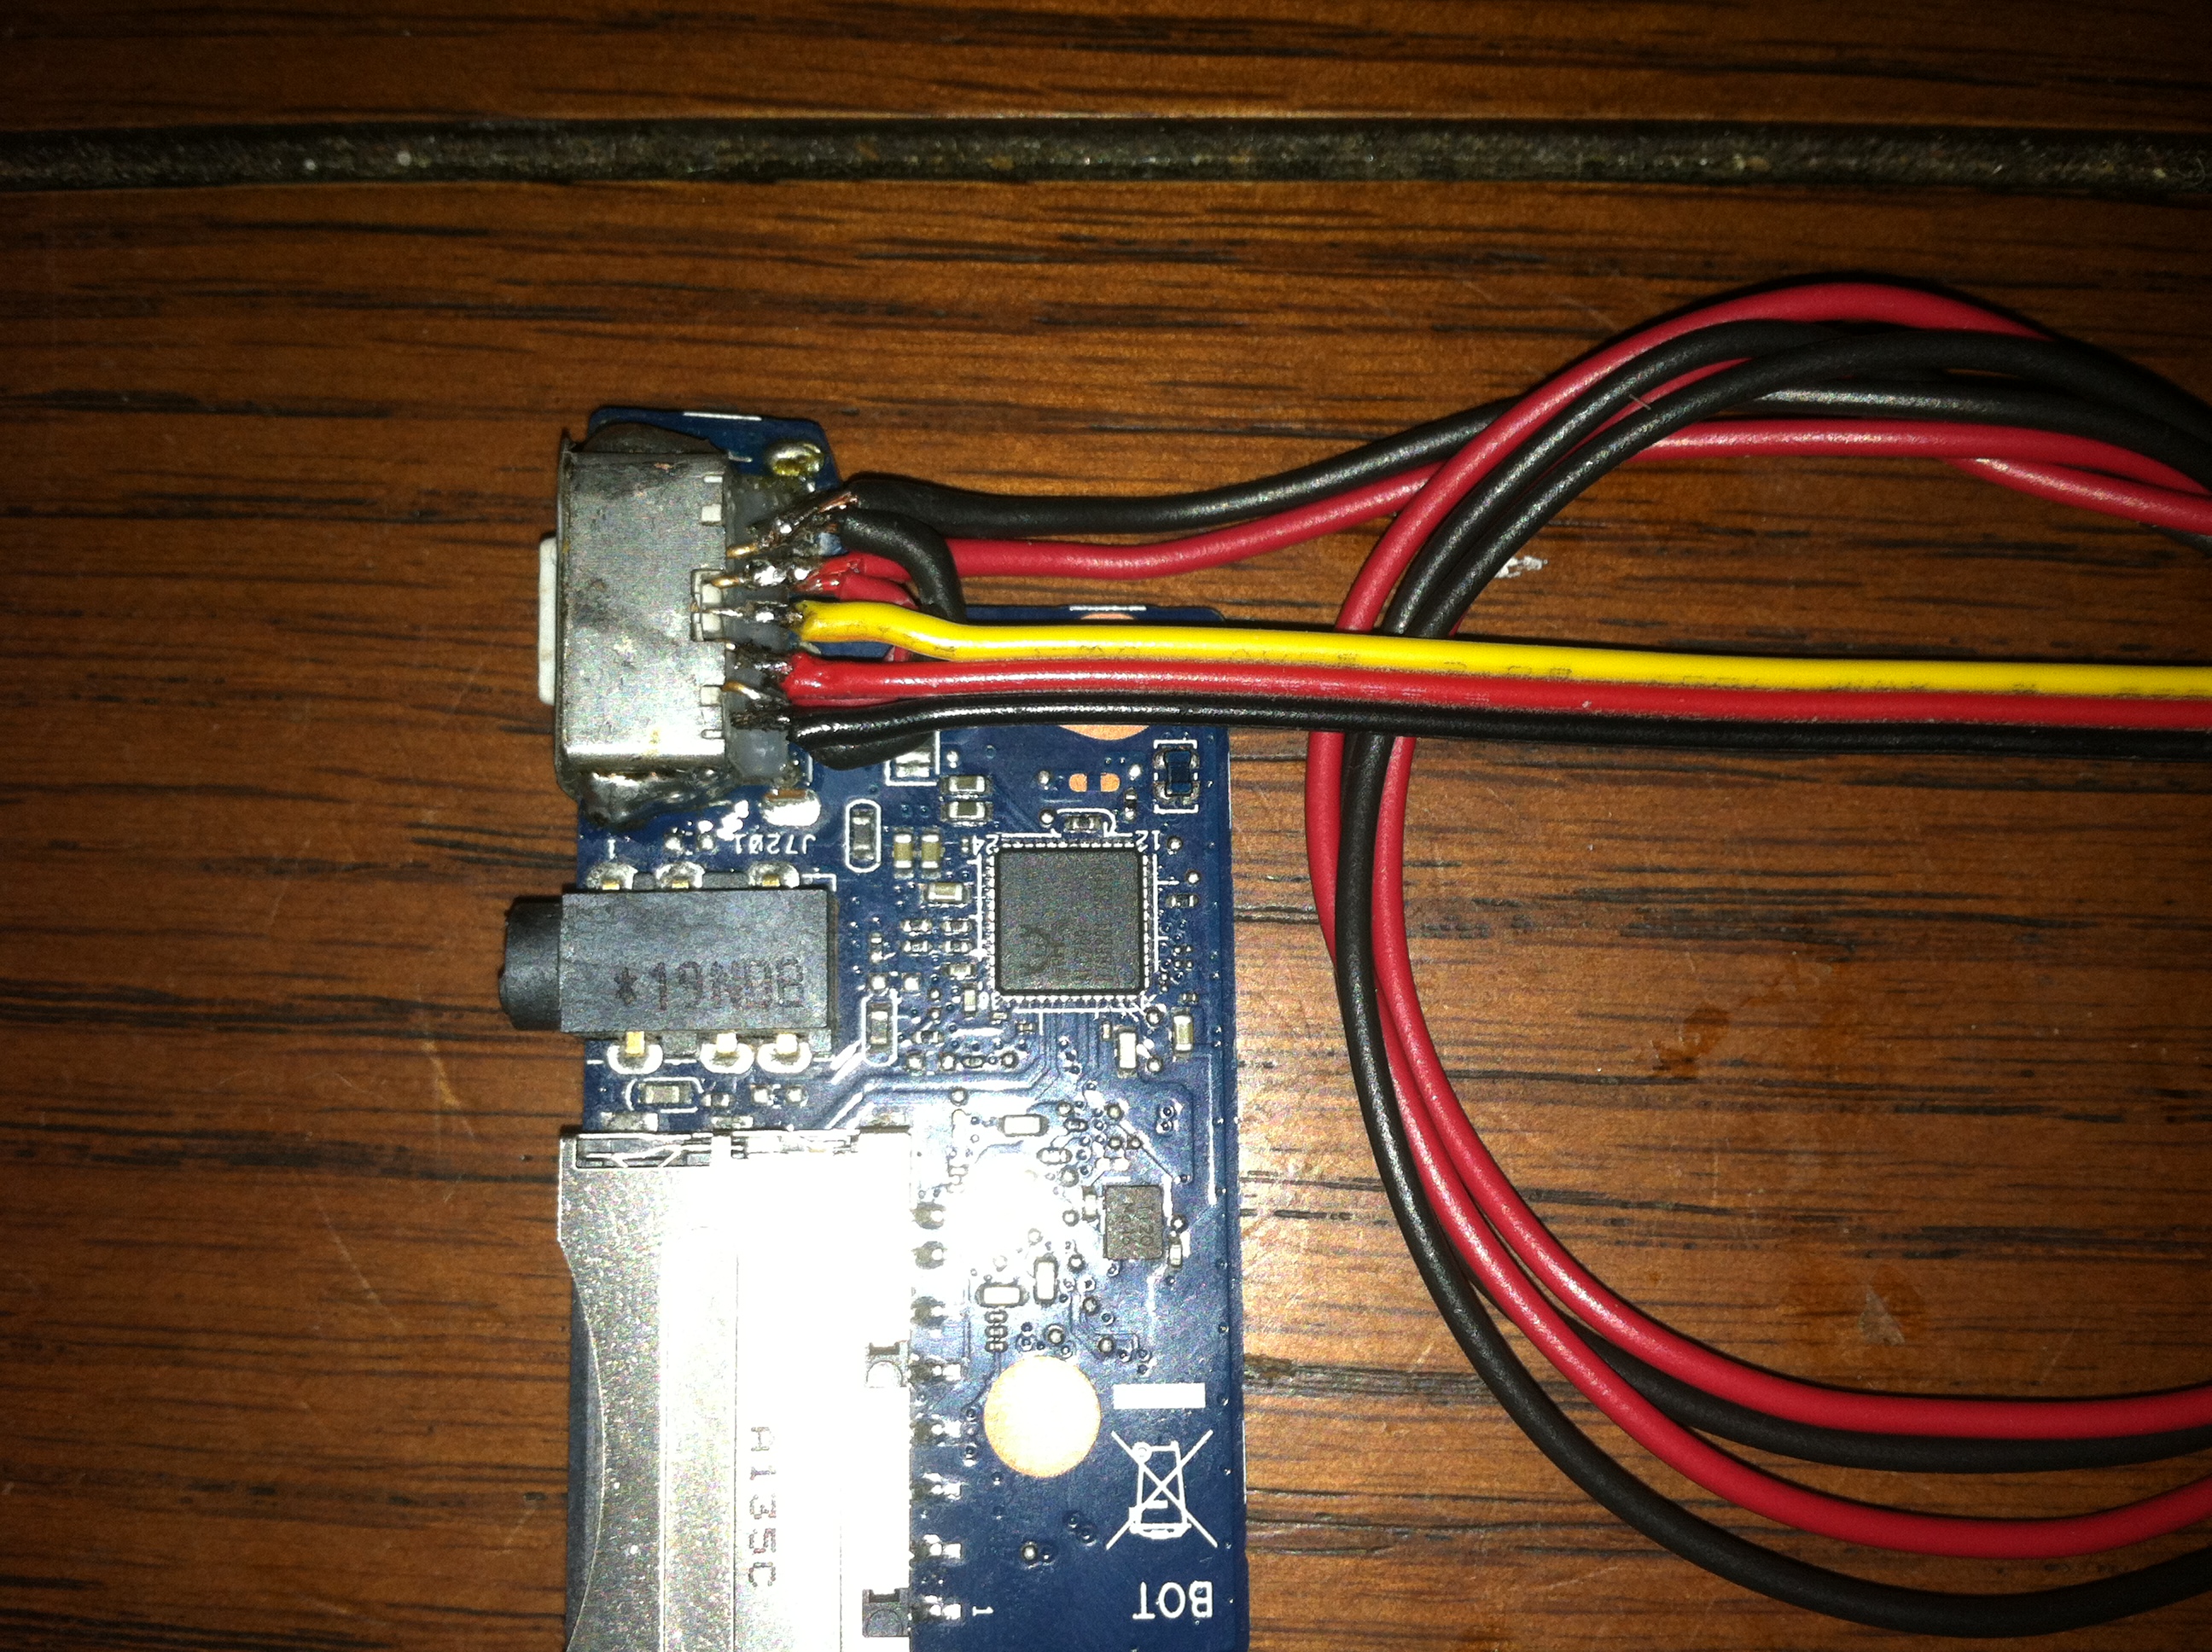
Using a medium gauge copper wire the power wires are soldered on to the Magsafe connector with bridging connections since there are two pairs of VCC and Ground pins. This is to ensure a solid connection as the connector wiggles during use and to prevent heating of the plastic by spreading power load. A second set of wires that also connects to the Power Sense/Control pin on the Magsafe connector is also soldered on and will provide a facility to control the LED inside of the Magsafe cable.

There isn’t room between the motherboard and bottom plate for the wires so they must be run underneath the board. Conveniently there is a channel through which the WiFi antennas are routed, there was plenty of room to add these two additional wires.
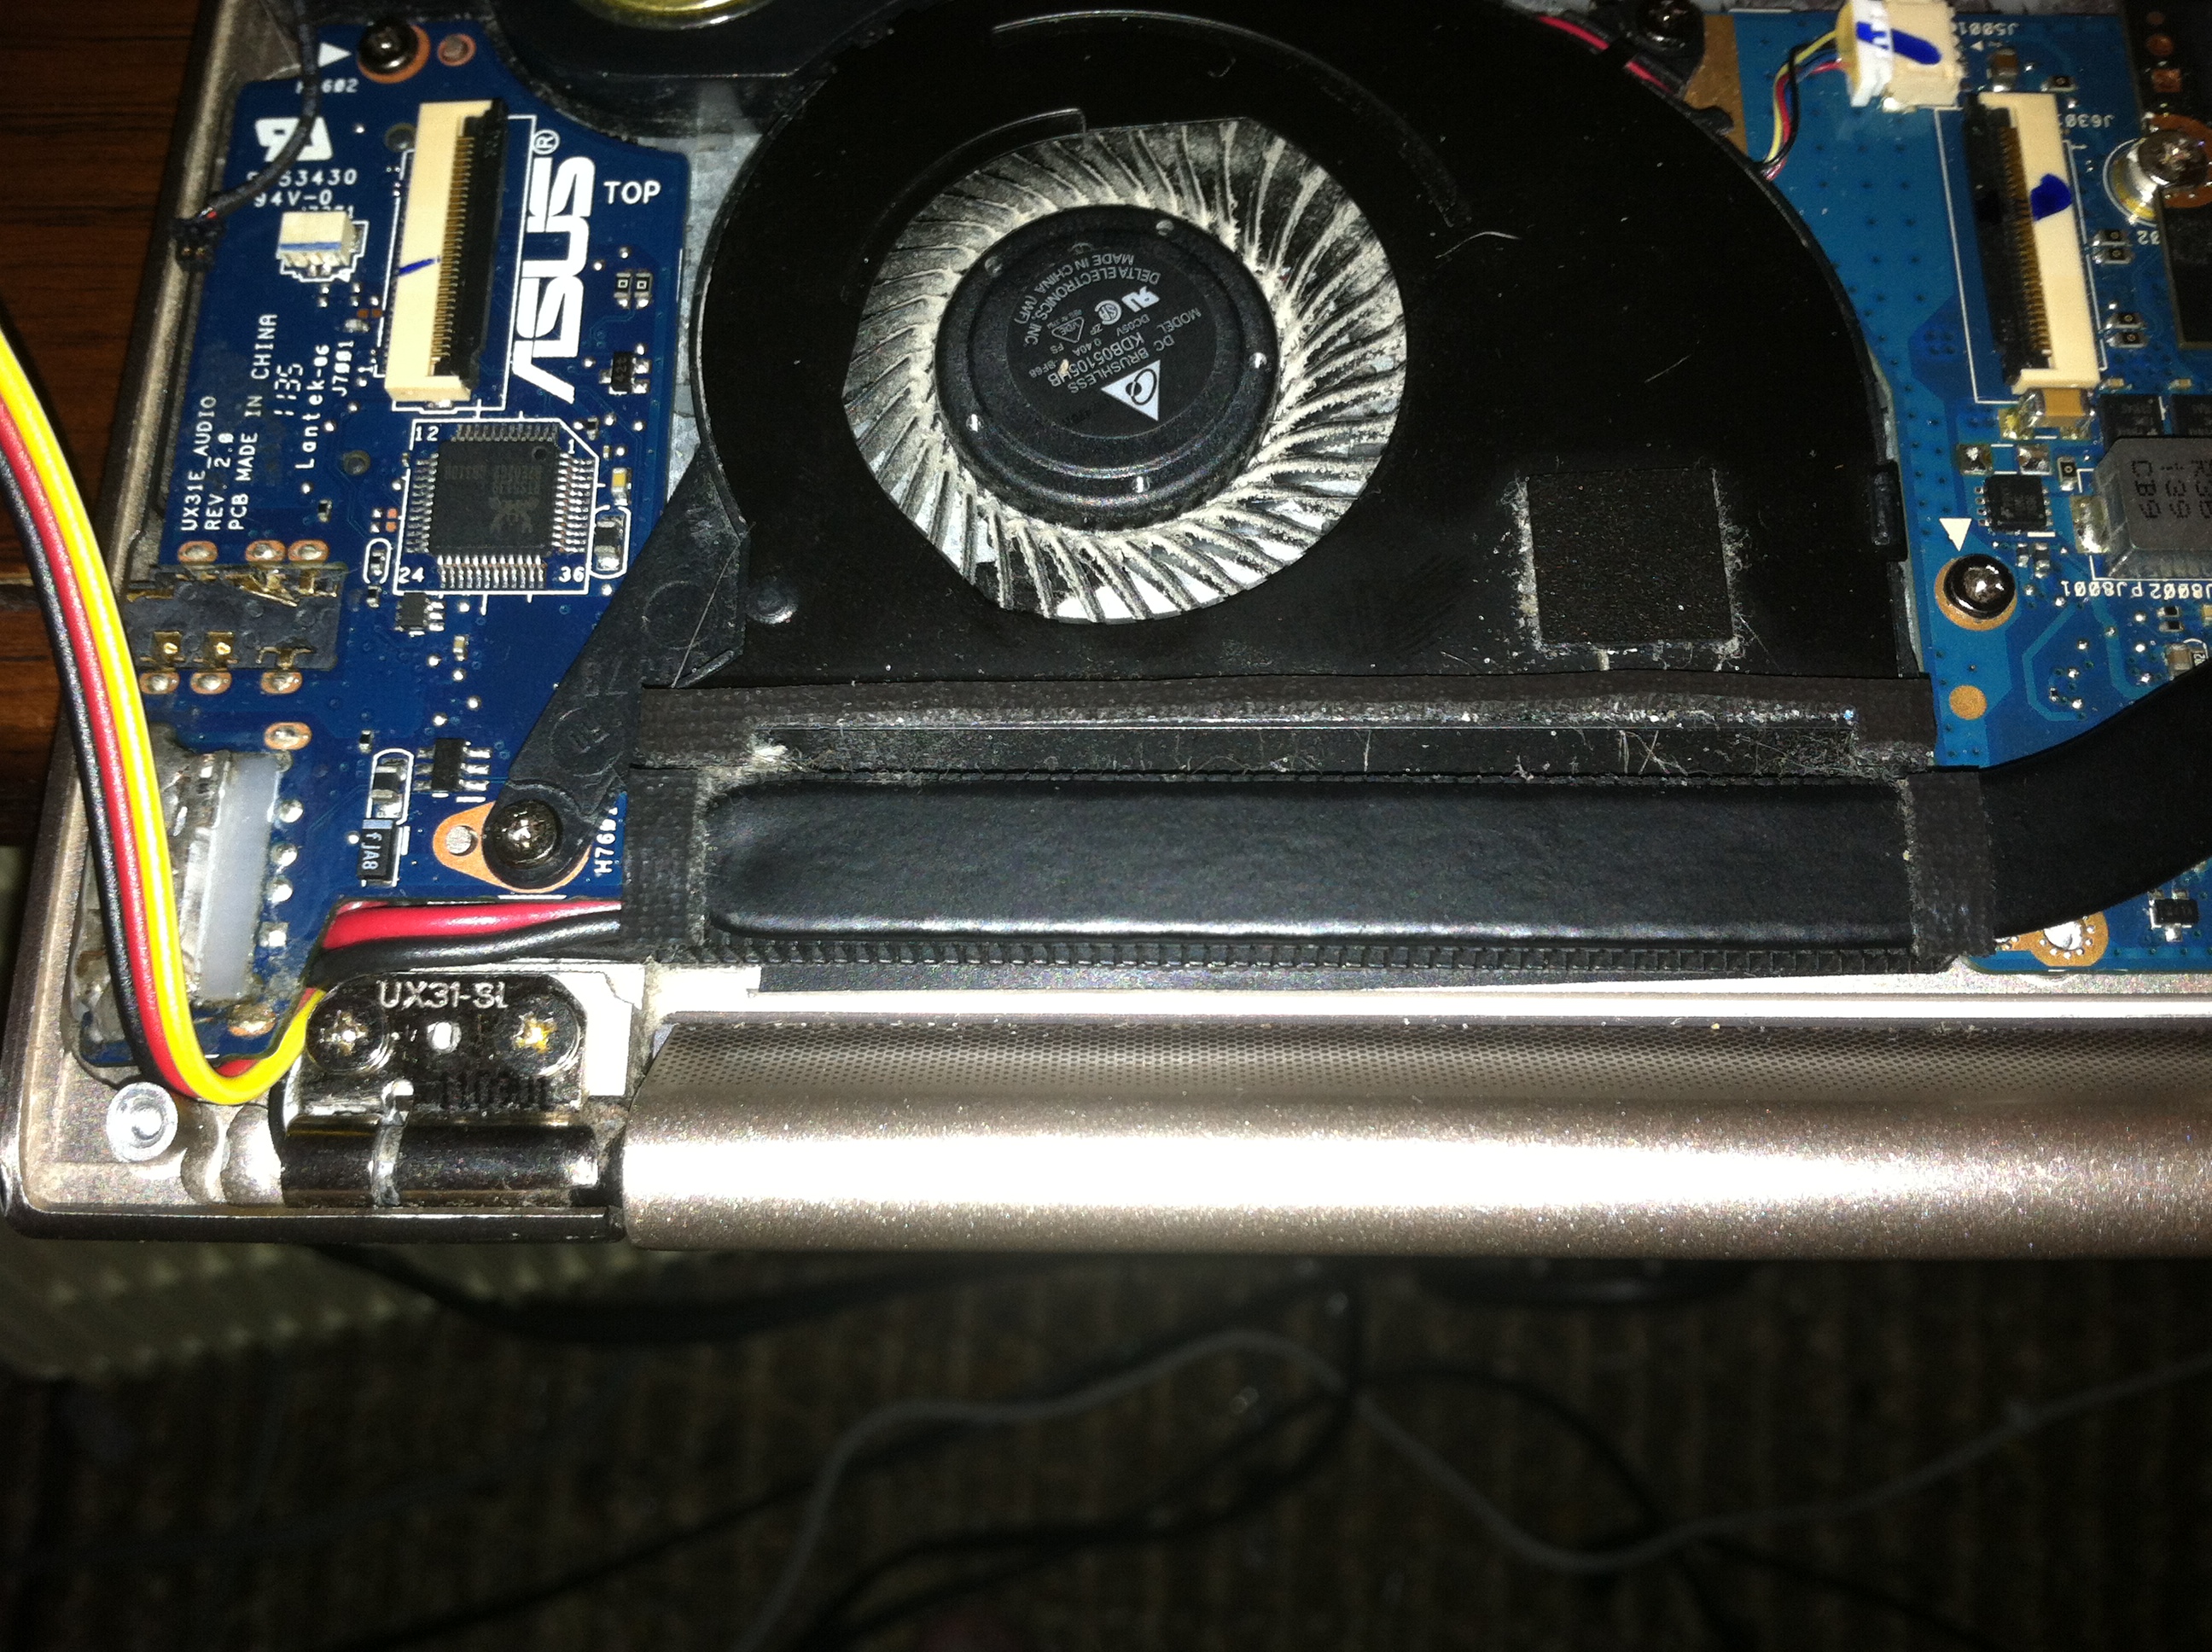
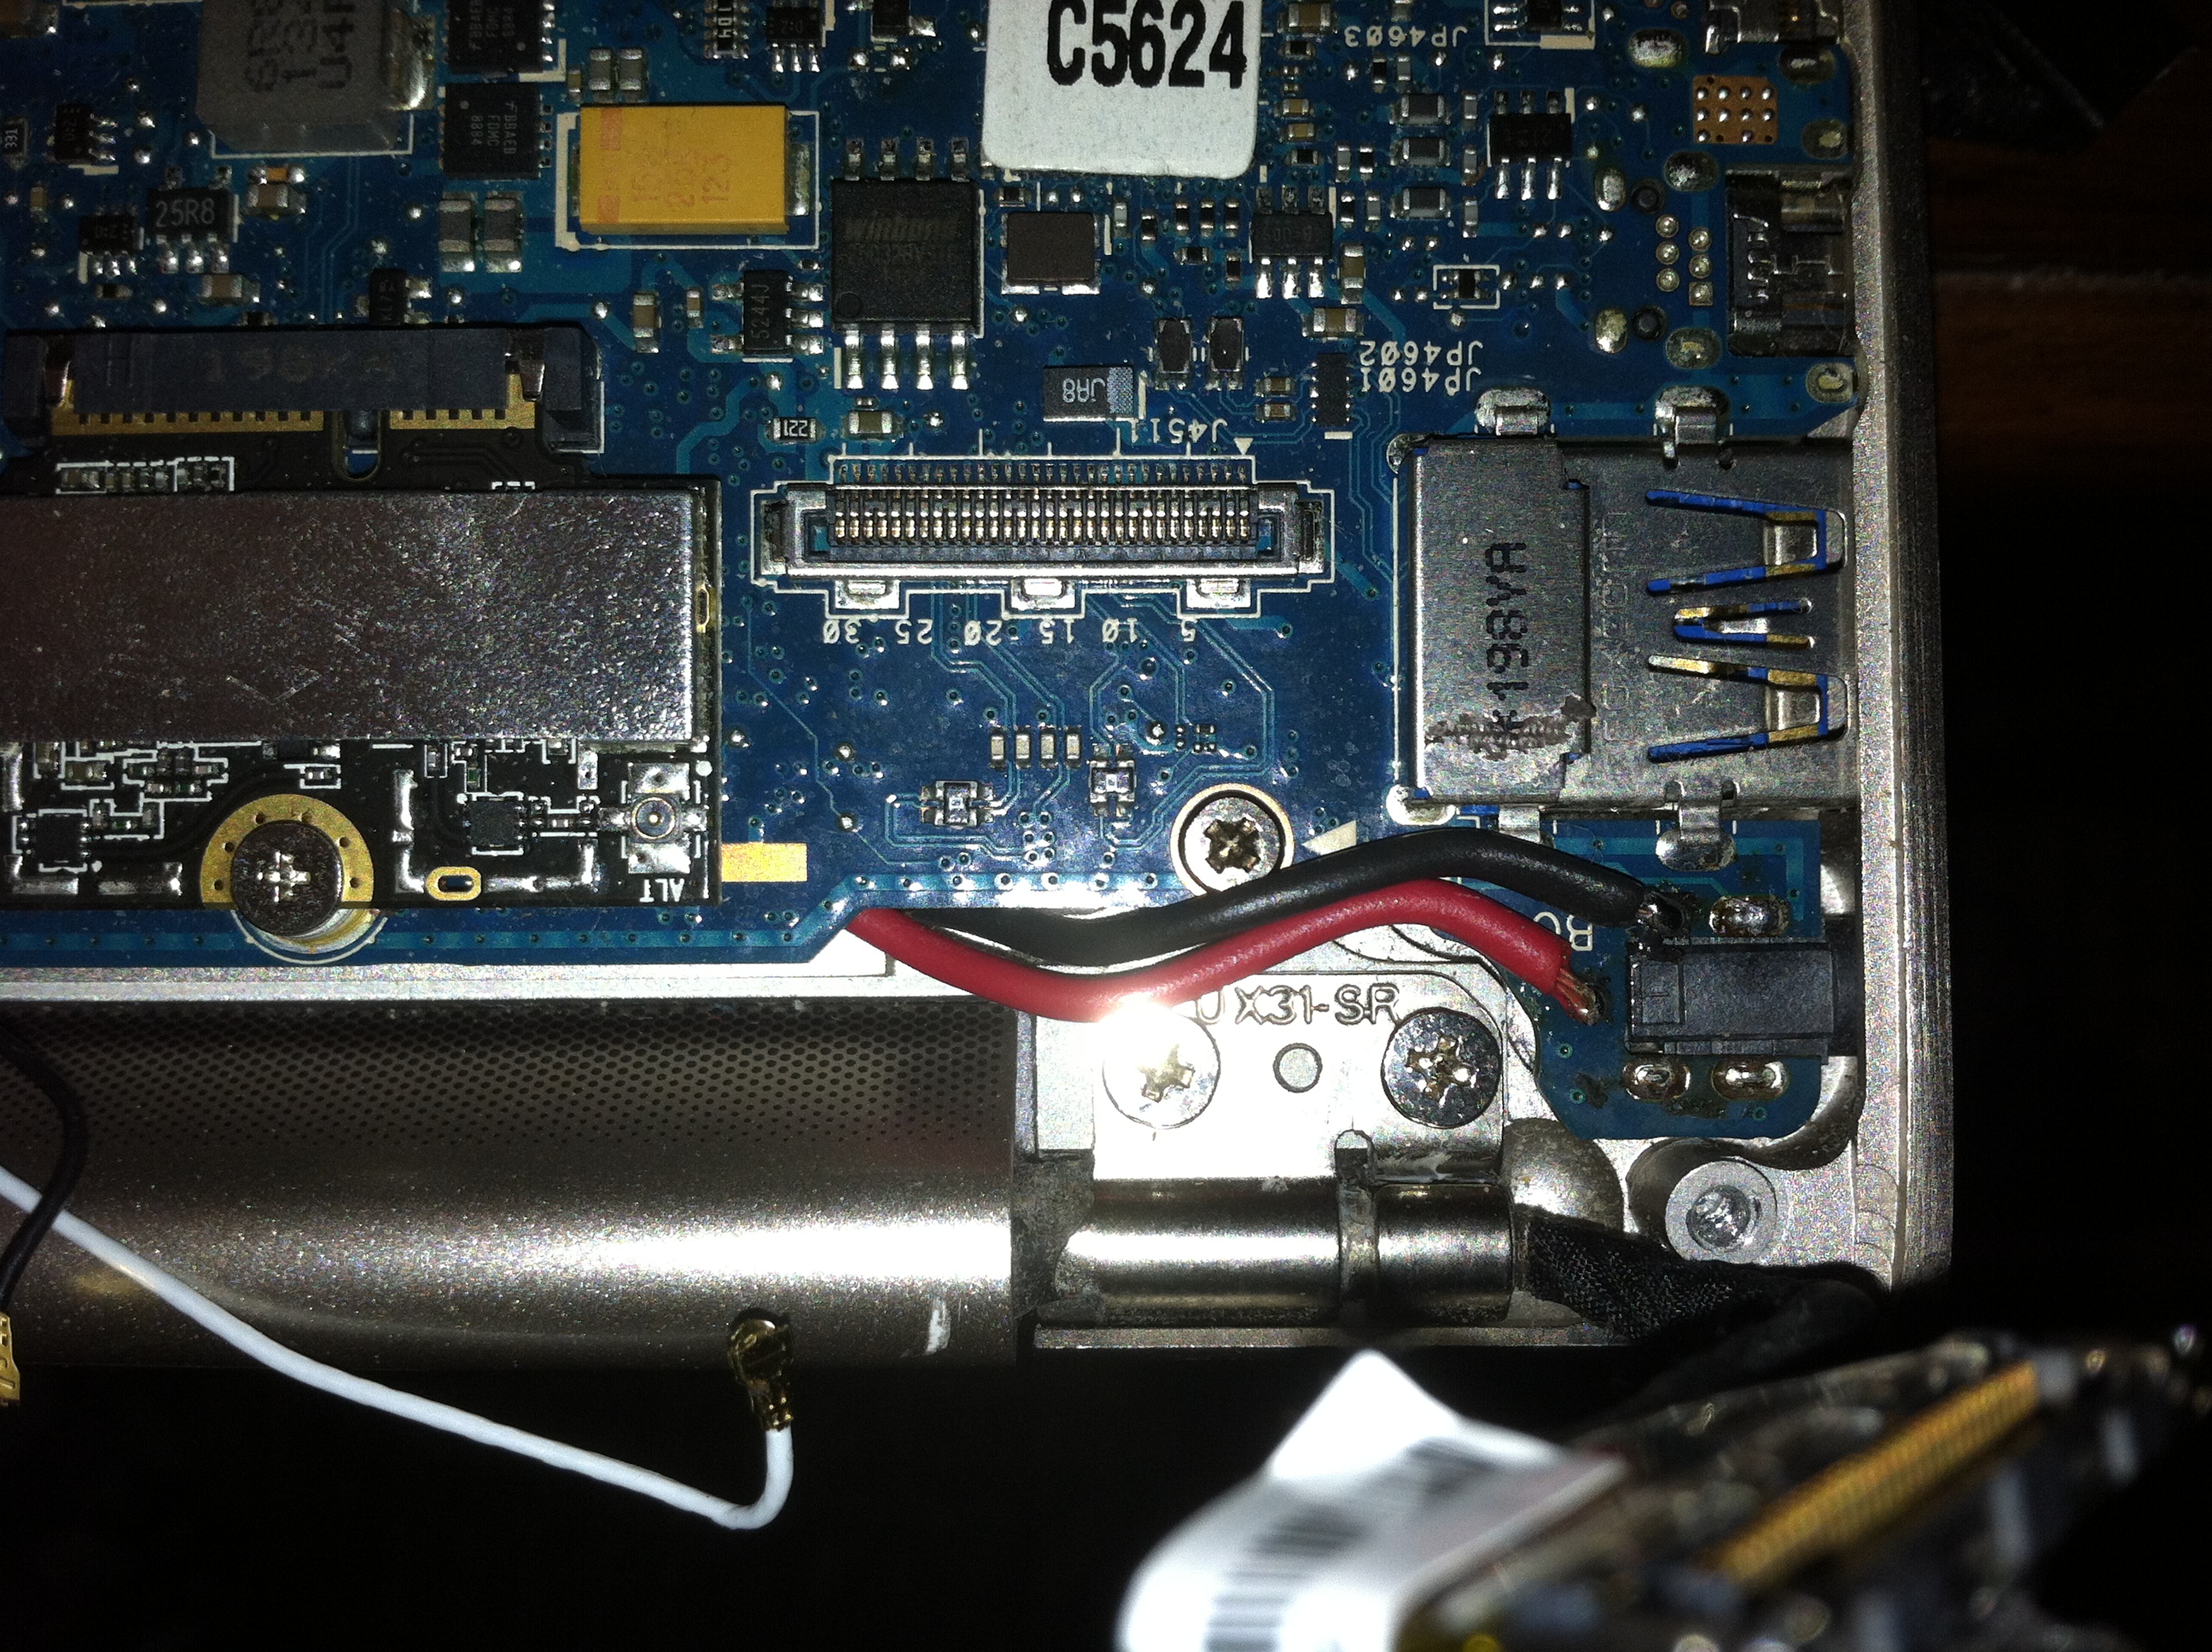
Here you can just barely see the wires as they run from the I/O board to underneath the Motherboard and in the second picture the wires pop back out and are connected to the power input pins on the original power input jack. This mod still allows the use of the original power input jack or the Magsafe connector. The wires can easily be desoldered from the motherboard should the mod itself need to be undone there are no permanent modifications to the Motherboard.

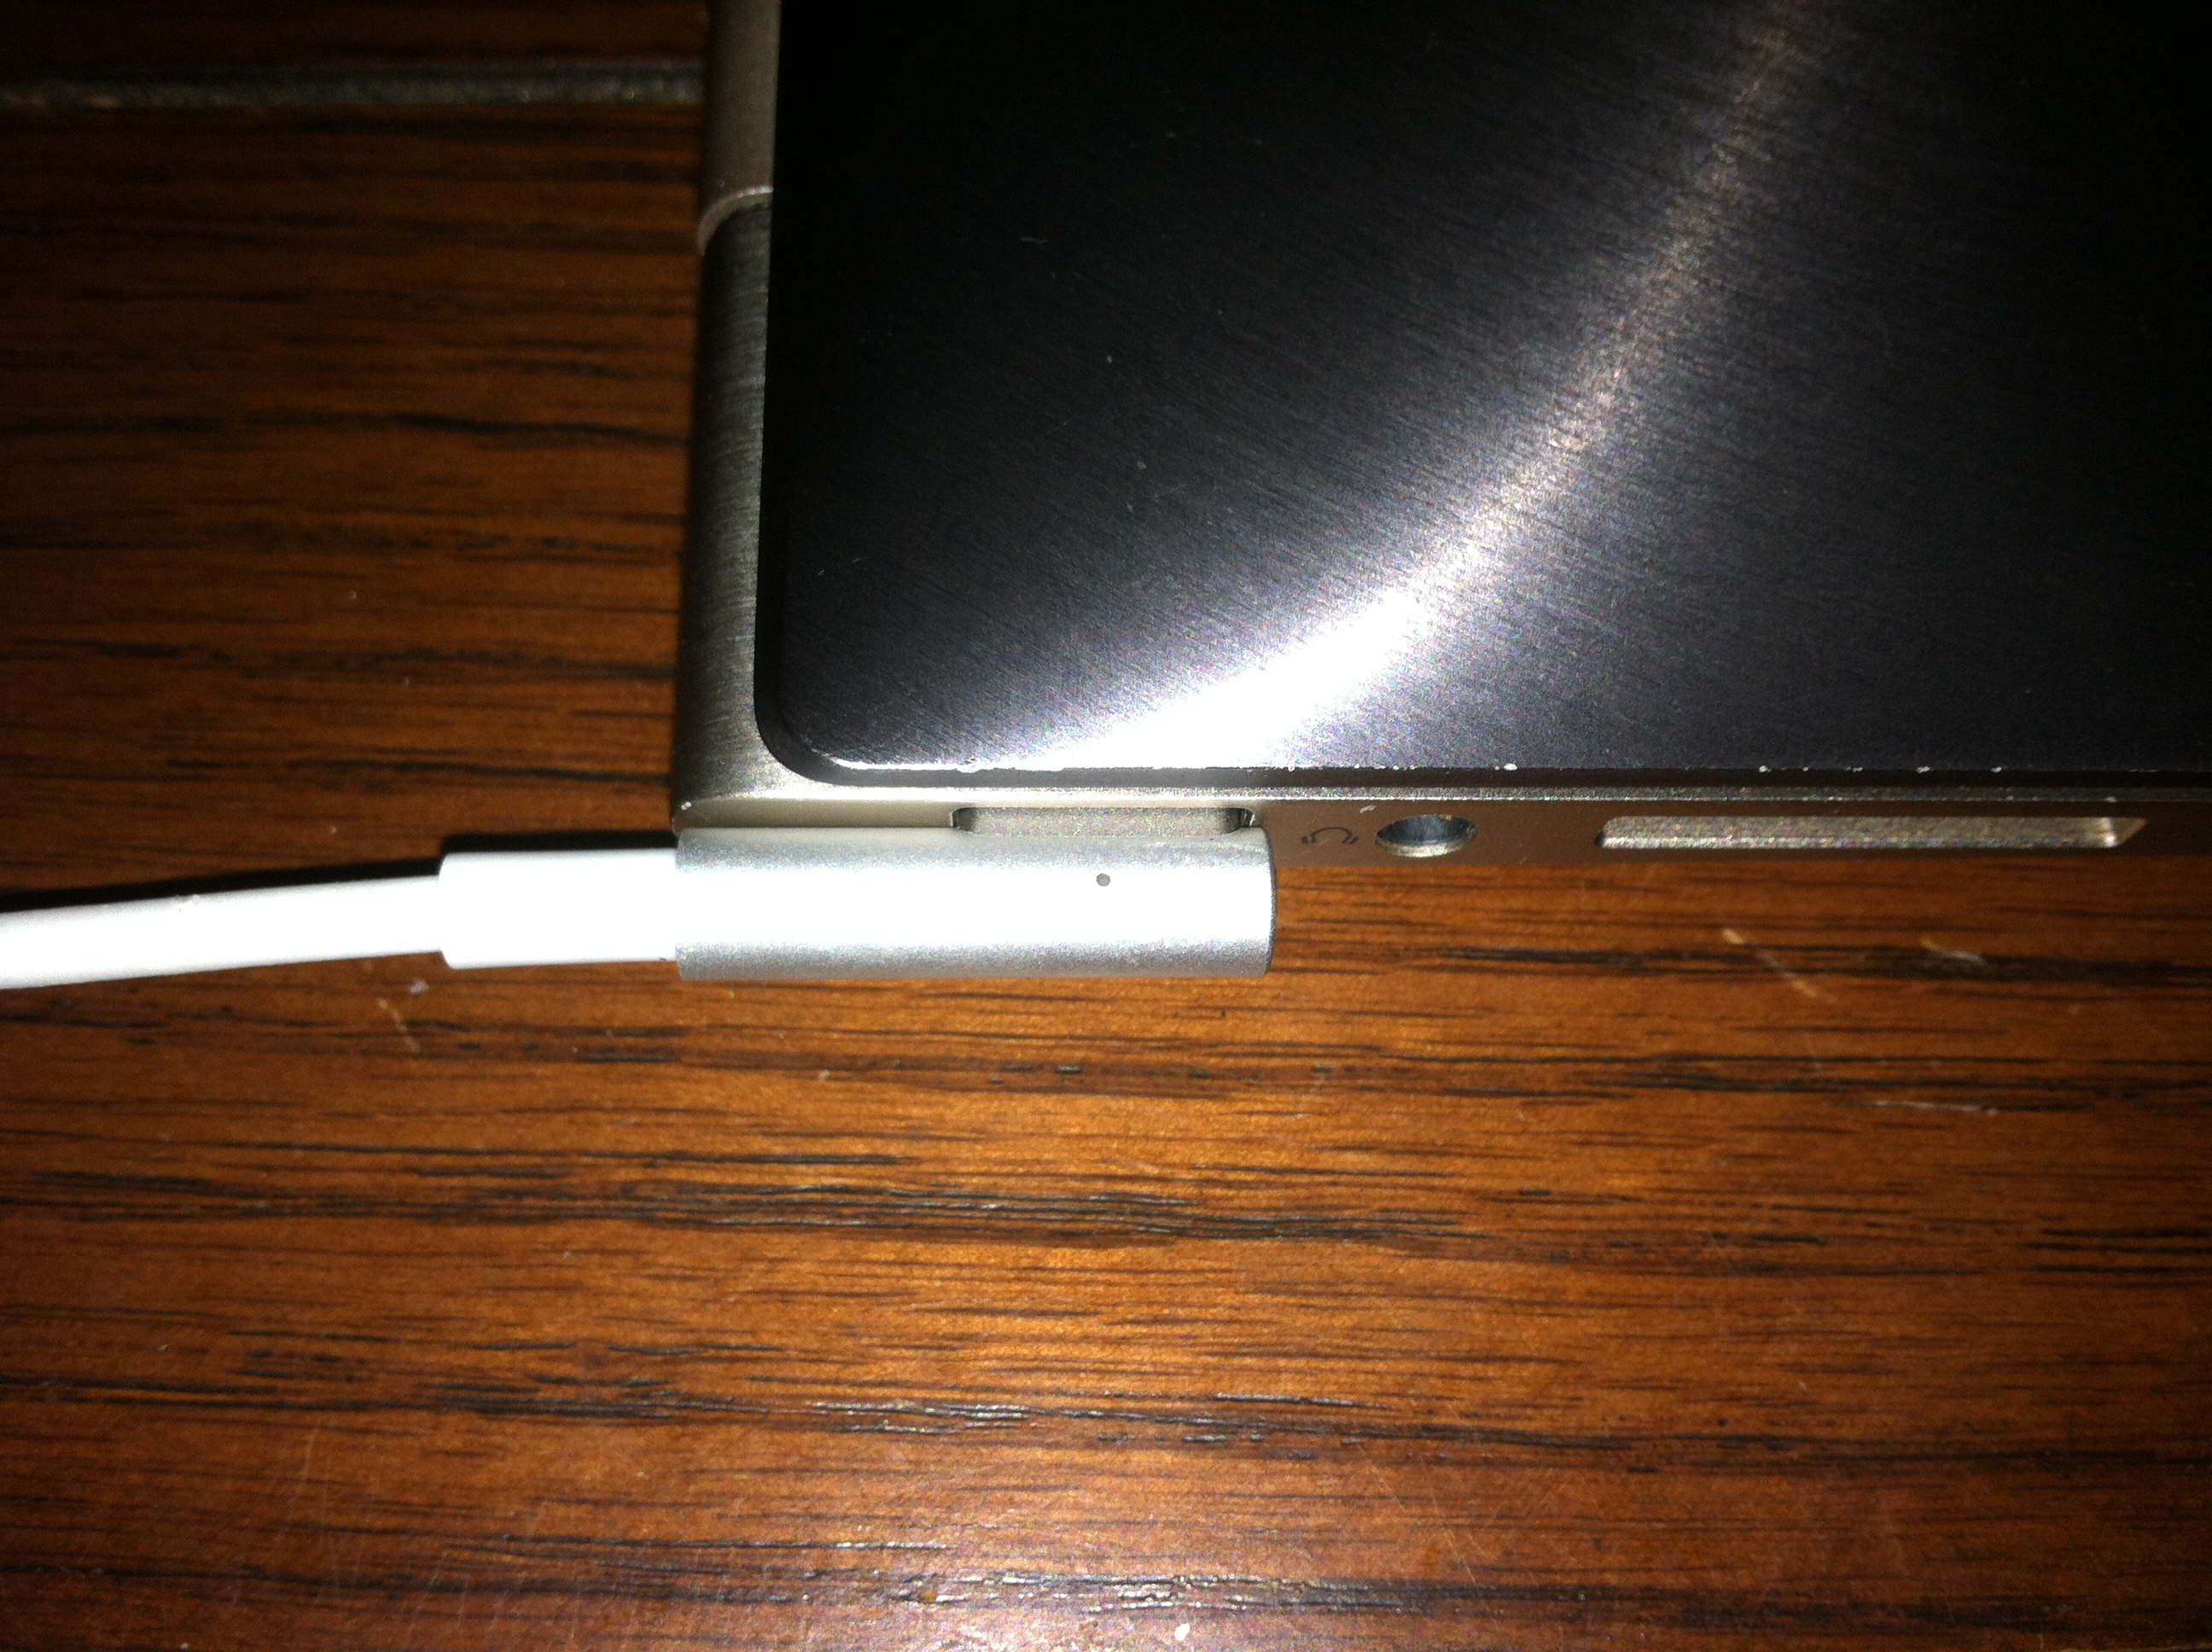
The end result is a new Magsafe connector on my Asus Zenbook and until I see otherwise might be the first non-Apple laptop to have a Magsafe charging port. Right now the LED on the Magsafe cable lights very dimly green, this happens when the adapter is providing power but the connection to the Power Sense/Control pin. There is no requirement that you speak to the Power Sense/Control pin as it operates completely independently of the power adapter itself.
Making that LED Sing!
I prototyped the Digispark I was going to use to control the LED and it worked great but seeing as official Apple Magsafe adatpers won’t actually work to charge my laptop due to the reasons noted in the Full Disclosure section below I decided to stop here. This is less about giving up and more about ongoing research into how to get the Apple adapters to output the full voltage and if that requires further mods it makes it easier having not integrated a microcontroller setup I will have to remove later on.
Full Disclosure
Why did the project fail?
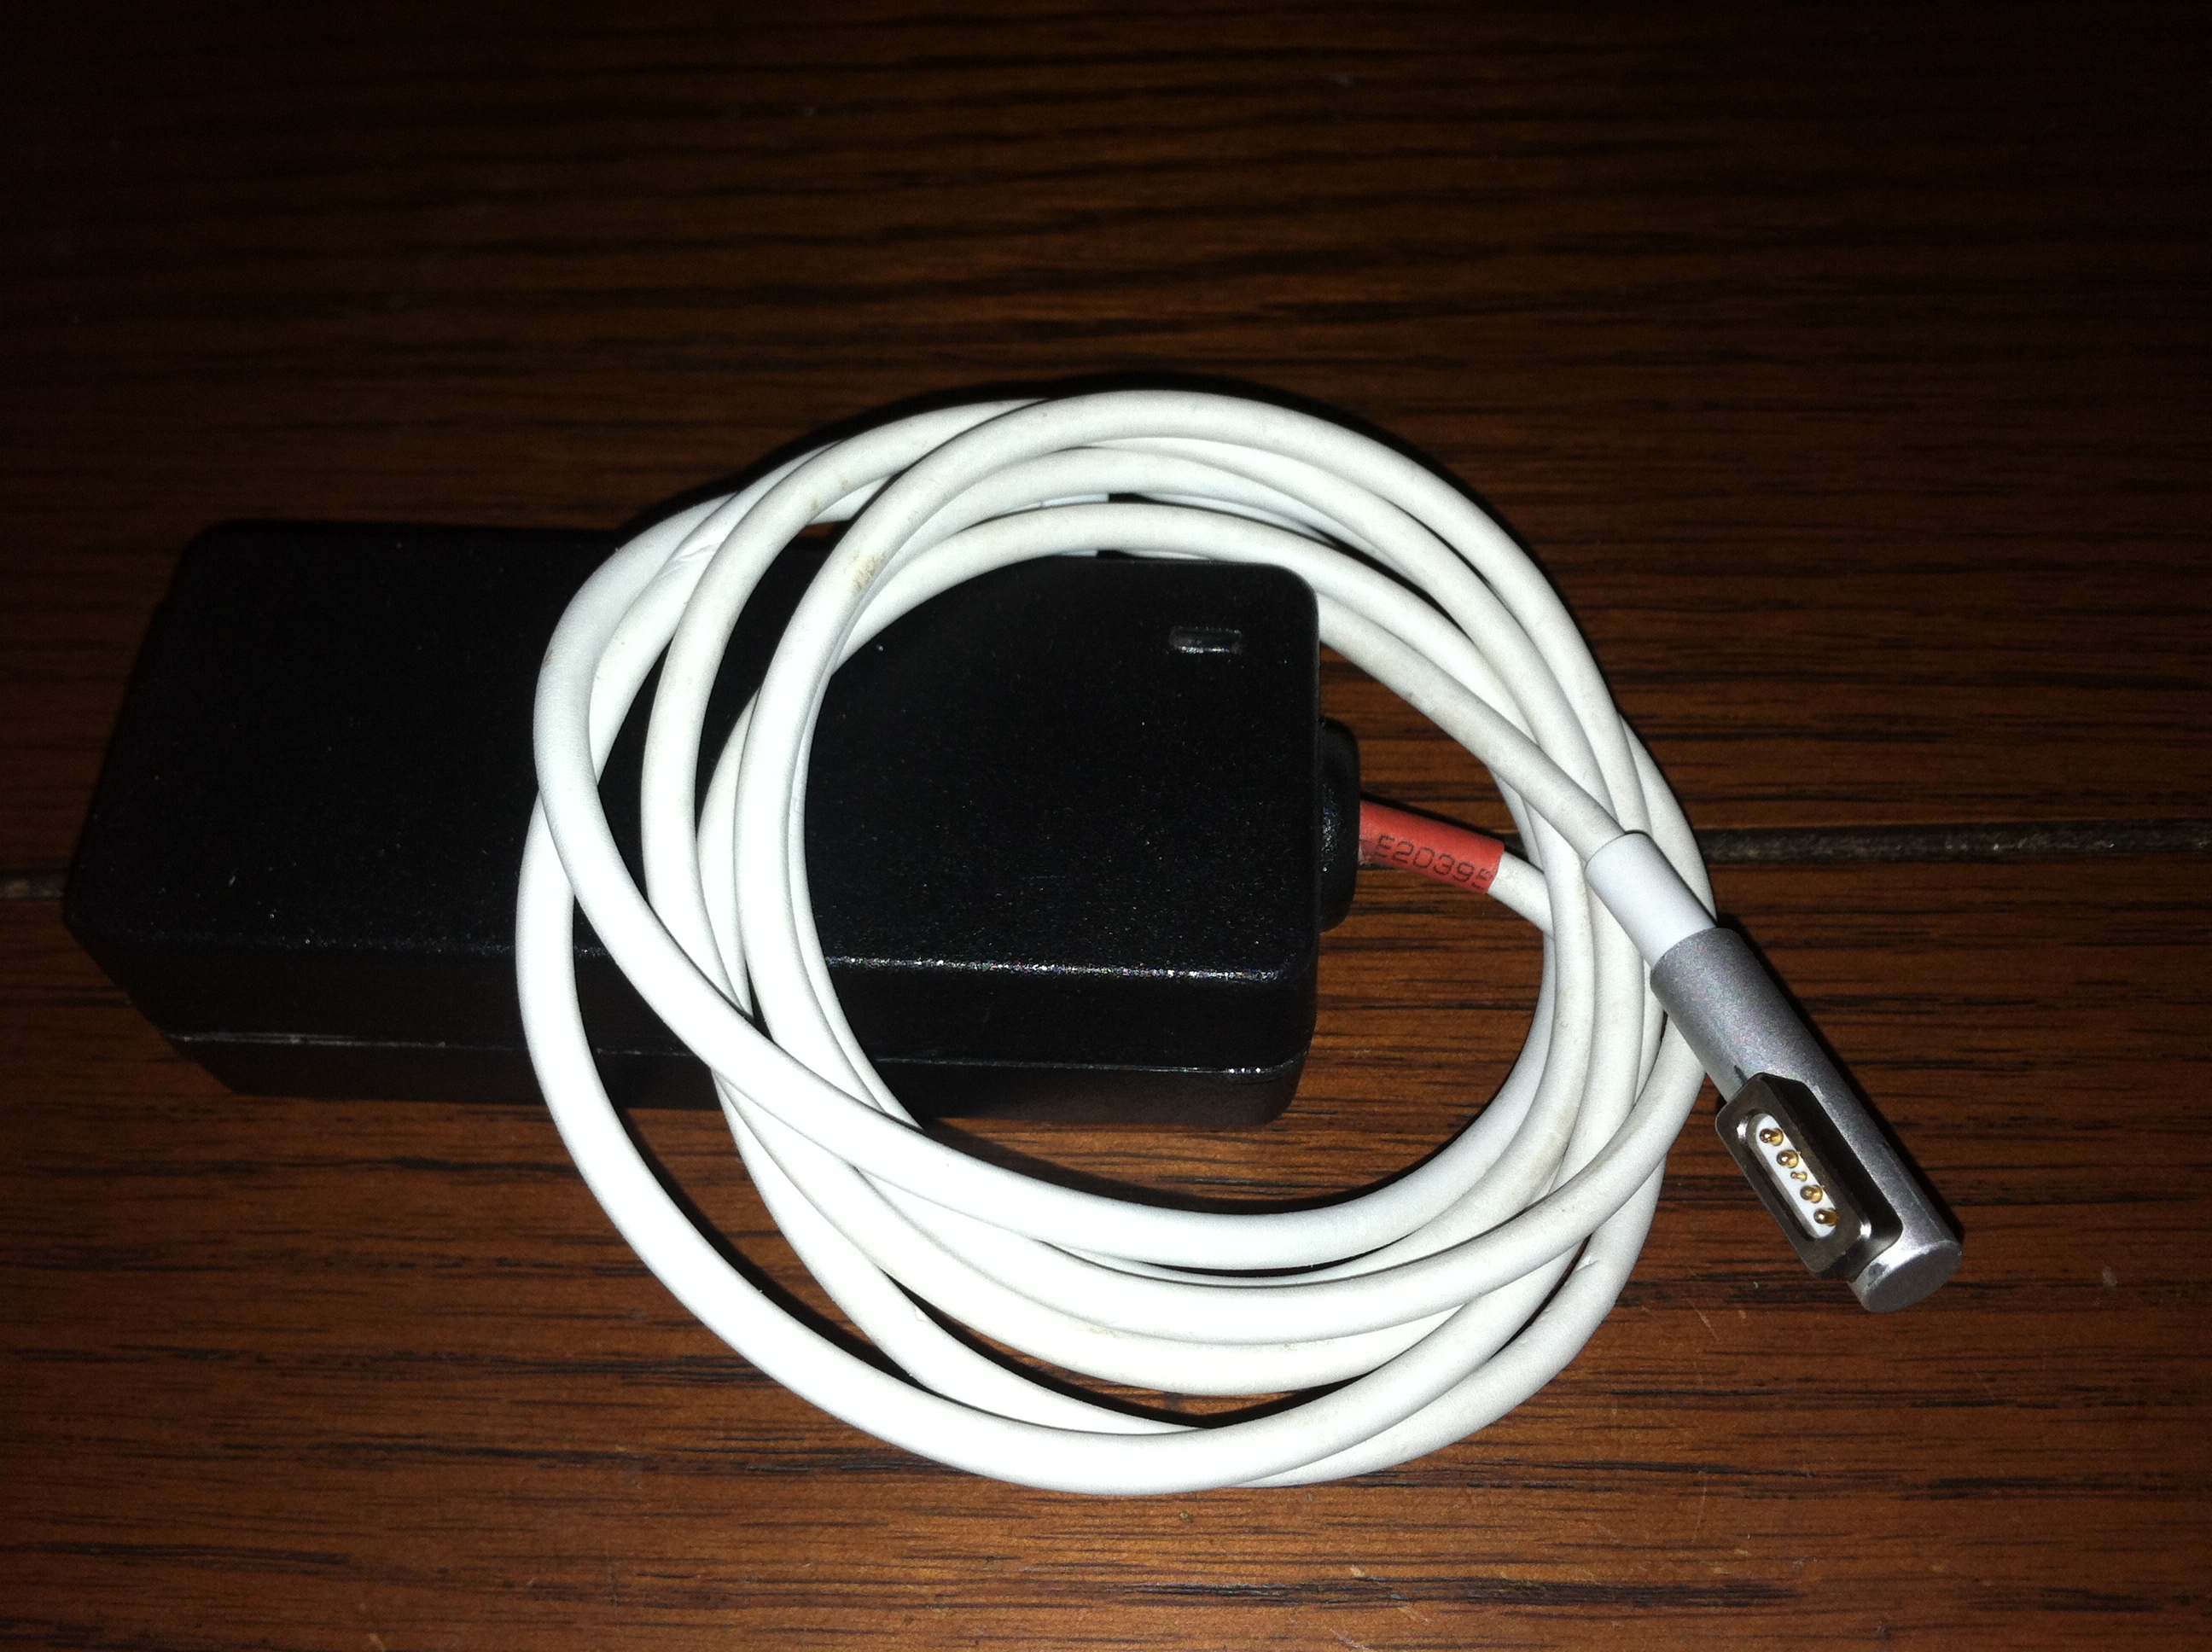
Apple power adapters have a sort of handshake style startup sequence by first providing a small amount of power and current where the power management controller pulls a resistance between either in a certain order or very specific value. I literally tried for days using various potentiometers and loads to try and trick an Apple adapter into providing the full 18.5 volts and thus charge my laptop. In the end I was forced to simply attach a Magsafe cable to a spare power adapter of compatible voltage for my laptop. Anyone who is around Apple hardware enough ends up with at least a few broken Magsafe adapters, if you get one where the cord broke at the adapter and the cable is nice and long. Yes, thats what she said.
It is worth noting that the charge control pin (center pin of Magsafe) has absolutely no connection to the adapter itself. The tip has a small IC that reports what wattage it supports and other info at which point the Macbook’s power management controller starts pulling a load and resistance across the power pins (every pin but the center pin). The center pin then gets pulsed to indicate 1 of 4 states for the LED that include: off, green, orange, yellow (green/orange).
Why is this still a success?
In the end I got what I wanted, the main time the fiddly cord originally for the laptop was an issue was while using the computer on the go or on the couch where your lap or the sides of the couch hit the cord. So instead of breaking the barrel jack from this type of abuse I now have a sleek cord that angles toward the back (or front) and really cleans up the look of an otherwise stunning laptop.